In this article, you will become familiar with the official and unofficial Arch repositories, why not use Yay (or other AUR helpers) to compile and install unofficial packages, and how to manually compile and install packages from the AUR (unofficial) repository.
Tutorial Details
| Description | Manual Installation of AUR Packages |
| Difficulty Level | Moderate |
| Root or Sudo Privileges | Yes |
| OS Compatibility | Arch, Manjaro, EndeavourOS, etc. |
| Prerequisites | – |
| Internet Required | Yes |
What are the Official and Unofficial Arch repositories?
Arch Linux is well-known for being a highly customizable, lightweight, and rolling release distribution. However, if we point the flashlight towards it, the first thing most users consider that makes it unique is its default Pacman package manager.
Which has a simple and efficient syntax for package installation, removal, and updates. Its repository offers an extensive selection of packages that you may wish to have right away. Unfortunately, some might be lacking since there are a lot of packages.
However, this disappointment quickly fades away when you discover the Arch User Repository (AUR), a community-driven platform enabling individuals and groups to contribute and make unavailable packages from the official repository accessible outside the official Arch repository.
And these packages can be manually installed by downloading the PKGBUILD file, compiling it, and installing it on your system. However, you can also use AUR helpers (like Yay) to automate this task of installing, updating, and removing AUR packages.
Why Avoid Using Yay (or Other Helpers) for Managing AUR Packages?
The issue lies with the Arch User Repository (AUR) being managed by unauthorized users and groups, leading to potential bugs or security concerns in certain packages despite the diligence of some maintainers.

And most packages are regularly updated, but some might have been discontinued. Using AUR helpers to install these abandoned packages could lead to unintentional problems. These leftovers may introduce instability or compatibility issues with other system packages.
To resolve this, you can download the PKGBUILD file for your desired unofficial packages from AUR and inspect the code to ensure its safety. If you have experience with shell scripting, you can go further and modify the code as per your requirements.
So, in this article, you will learn how to manually compile and install packages from the AUR (unofficial) repository.
How to Manually Compile and Install the AUR Packages on Arch-Based Systems
Installing AUR packages without helpers can be a bit challenging, especially for less experienced Linux users. However, if you follow along with this guide, you will be able to manually install any AUR packages.
In the following examples, you will learn how to manually compile and install the Google Chrome browser on your Arch system:
1. Execute the following command to install Git (used for repository cloning) and base-devel (which includes essential development tools required for building and compiling) on your System.
$ sudo pacman -S --needed git base-develOutput:

2. Visit the Arch User Repository (AUR) official website (https://aur.archlinux.org) and type the package name you want to install in the search box.
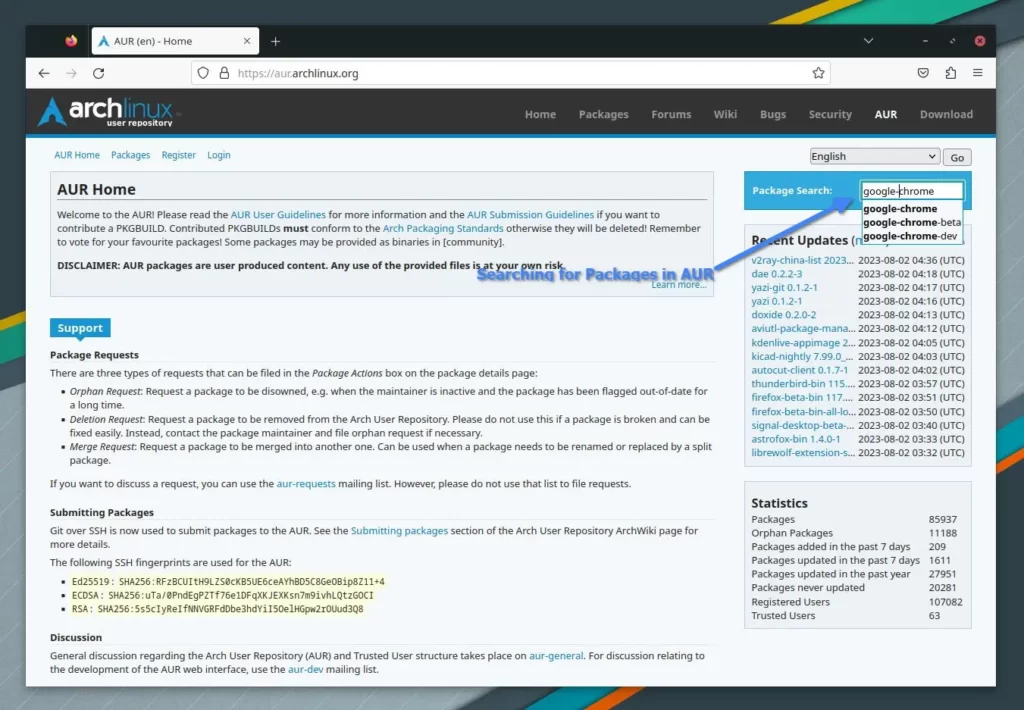
3. As mentioned at the beginning of this article, AUR is a community-driven repository, which means you might come across multiple packages for the same program, as shown.
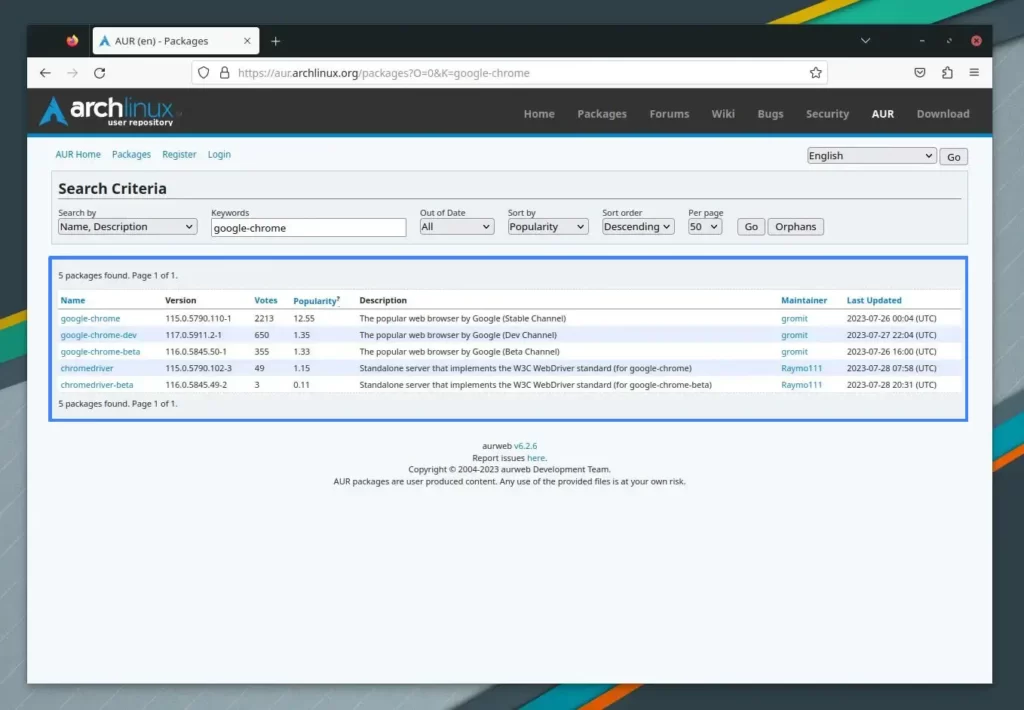
In this case, I am confident that the first package named “google-chrome” is the correct one to install.
However, if you encounter multiple packages while searching for your desired program, you can determine the correct choice by evaluating the “Votes” or “Popularity” columns.
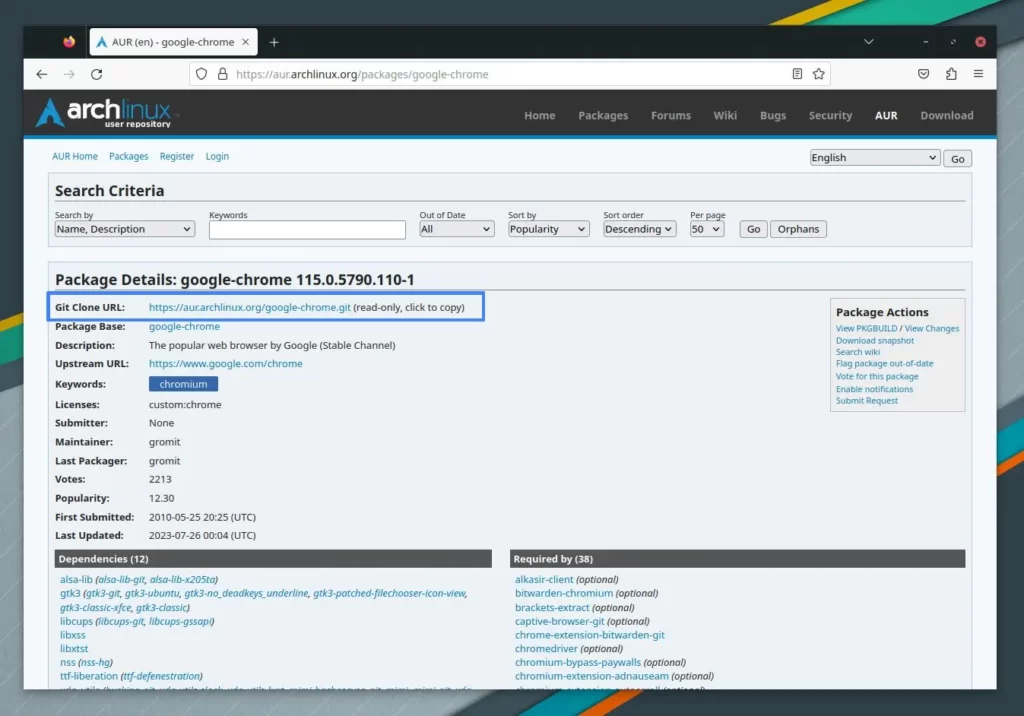
4. Once you locate the correct package and click on it, you will be redirected to the package information page.
Here, you will find various information related to the packages, like the Git Clone URL, Package Base, Maintainer, Last Packager, Last Updated, and much more.
From now, you have to copy the “Git Clone URL” of the package, as highlighted below.
5. Now, open a terminal and execute the “git clone” command followed by the copied package’s git repository, as shown.
$ git clone https://aur.archlinux.org/google-chrome.gitOutput:

6. After cloning the package repository, navigate to the cloned directory using “cd” and list the directory content using the ls command, as shown.
$ cd google-chrome/
$ ls
Output:

7. Multiple elements can be found within the cloned repository, but the most crucial one for us is the “PKGBUILD“. It is a script that defines how the package should be built and installed.
Open the “PKGBUILD” file using your choice of text editor to review its contents.
$ vim PKGBUILDOutput:
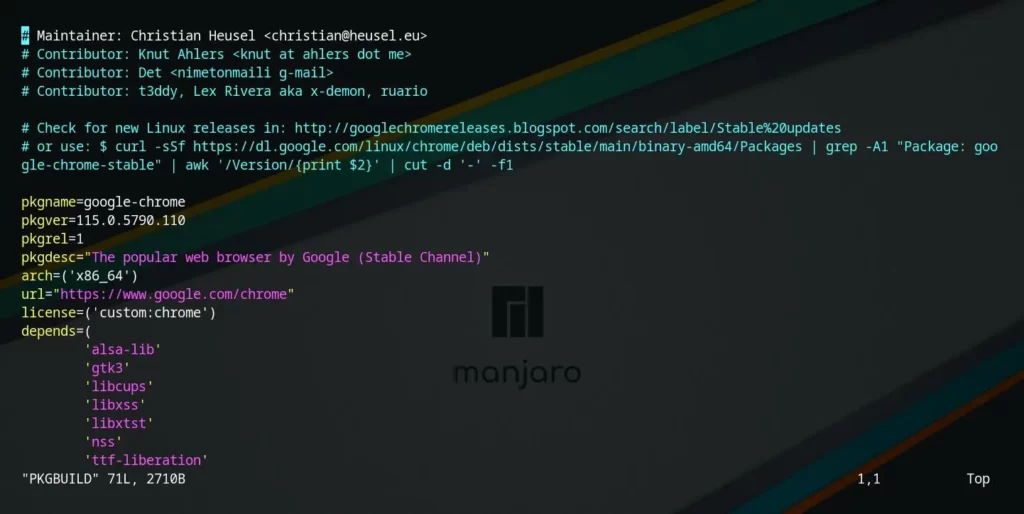
If you have experience in shell scripting, feel free to enhance the script according to your needs. For regular users, this script primarily installs necessary dependencies and uses the Google Chrome Deb package for installation.
8. Execute the following command to start the process of building and installing the package:
-s” flag will handle the installation of missing dependencies automatically, and the “-i” flag will install the package after it’s built.$ makepkg -siOutput:

Now, it will fetch and install the necessary package for “Google Chrome“, allowing you to enjoy a coffee break in the meantime.
9. Upon completion of all tasks, you will receive identical output without any errors.
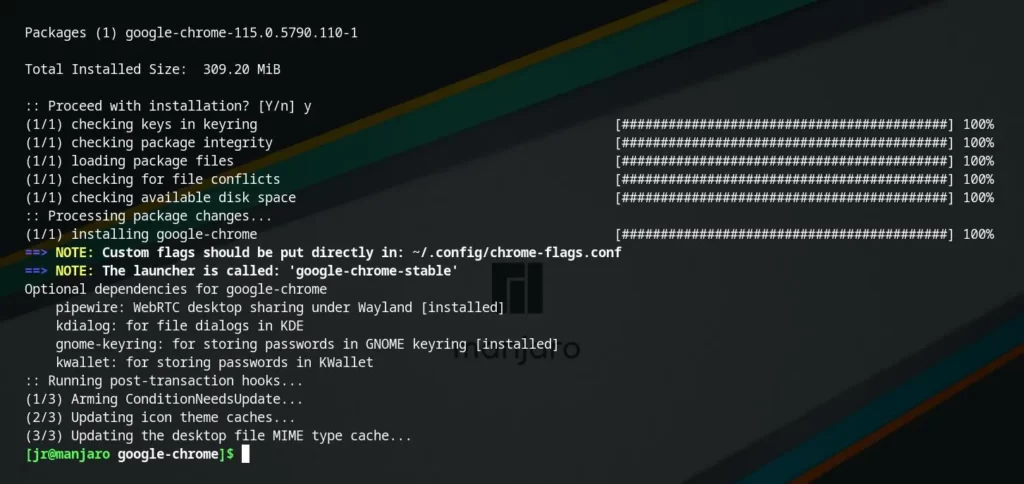
10. Now, either you can launch the program from the terminal by specifying its name (in this case, “google-chrome-stable“) or you can search for it, as shown.
$ google-chrome-stableOr

11. Once you follow any of the aforementioned methods, your program will be launched.

That’s all it takes to manually build and install a package from AUR.
To update the manually installed packages, you have to be notified of the latest version (by following the project on GitHub) and follow the complete building and installation process.
How to Remove Manually Installed Packages from Arch-Based Systems
The easiest way to remove a manually installed package from Arch is by specifying the package name in the “pacman -R” command, as shown.
$ sudo pacman -R google-chromeOutput:

Final Word
I hope you find this article useful. If you have any questions or queries related to this topic, please let me know.
Till then, peace!


