
In this comprehensive article, you will learn what Snap is in Linux, discovering its remarkable features, intriguing history, and the controversies that surround it.
Additionally, you will also learn how to install Snap on your preferred Linux distribution, followed by practical examples that showcase its command usage.
Tutorial Details
| Description | Canonical Snaps |
| Difficulty Level | Moderate |
| Root or Sudo Privileges | Yes |
| OS Compatibility | Ubuntu, Manjaro, Fedora, etc. |
| Prerequisites | – |
| Internet Required | Yes |
What are Snaps in Linux?
Snap is a package management system and software development technology developed by our beloved Canonical, the company behind Juju, Landscape, and Ubuntu Linux.
It allows developers to package applications along with their dependencies, libraries, and other necessary resources required to run the software into a containerized package called a snap.
With Snap installed, the end-user can effortlessly run any Snap without encountering any dependencies or library issues and happily enjoy using their applications.
Overall, the end goal of Snap is to provide a self-contained and secure way to distribute software that can run across different Linux distributions.
Advantages of Using Snaps
The Snap offers numerous advantages that amuse users struggling with dependencies or library issues while installing their applications.
The following are some key advantages that Snap offers:
- Cross-platform: The Snap software required to run the Snaps is available for Ubuntu, Red Hat, Fedora, Arch, etc.—almost all popular Linux distributions.
- Cross-distribution support: A single Snap can run on any Linux distribution without any modification.
- Sandboxing: The Snaps are containerized (or sandboxed) within a tightly controlled environment with restricted access to the system resources. These isolations ensure security and prevent Snap from interfering with other applications or the system.
- Automatic Updates: Snaps provide seamless background updates, ensuring users always have access to the latest version and security patches, independent from distribution updates.
- Rollback: Snaps offer users the ability to easily rollback to a previous version of an application if a new release causes any issues.
- Multiple Channels: Snap offers multiple channels for software deployment, such as stable, candidate, beta, and edge, allowing users to choose the one they most prefer.
- Robustness: Snaps are read-only and mounted in a way that prevents them from tampering with the system.
History of Snaps
Canonical (the daddy of Ubuntu) introduced the Snap package management system in 2016 to revolutionize Linux software distribution.
Addressing issues like dependency management, version conflict, and security, ultimately enhancing the user experience and simplifying package development for developers.
Controversy
While Snap has brought a lot of advantages to the Linux ecosystem, it has also faced some controversy, like:
- Centralization Concern’s: The Snap centralization in Canonical’s Snap Store has sparked concerns over potential control issues, with worries about application blocking or removal by Canonical in the Linux community.
- Package Format: The Snaps format, which differs from traditional package formats like DEB and RPM, has sparked debates among users and developers over whether its fragmentation adds unnecessary complexity and duplication to packaging efforts.
- Security and Confinement: Snap’s core confinement feature faces criticism for its strict restrictions on certain applications, leading to limited functionality and raising concerns over the security risks posed by classic confinement for some apps.
- License Compatibility: Snaps enable software distribution with varied licenses, potentially resulting in non-fully open-source snaps or snaps that may contain proprietary elements.
- Community Adoption: Linux distributions have not embraced Snap by default, and community adoption has been mixed. Some distributions still prefer to use the existing packaging formats (e.g., DEB and RPM) and package managers (e.g., APT and DNF) or their alternative, Flatpak.
Despite the controversy, Snap continues to be actively developed and widely used on systems like Ubuntu and other distributions that include support for Snaps.
Canonical also made efforts to address the above listed concerns about Snap and improve Snap’s overall integration with different Linux distributions.
Now, if you want to give it a try, let’s see how you can install Snap on your preferred Linux distribution.
How to Install Snapd on Linux
Before you start using Snaps, you must install the Snapd (service) that runs in the background and handles the installation and updates of Snaps.
Let’s see how you can install Snapd on different Linux distributions, starting with:
Installing Snapd on a Debian or Ubuntu System
Most modern Linux distributions (especially Ubuntu) have Snapd pre-installed, but if it’s not present, you can execute the following command to install it using the APT package manager.
$ sudo apt update
$ sudo apt install snapd
Installing Snapd on a Red Hat or Fedora System
On these systems, you can use their default DNF package manager to install Snapd:
$ sudo dnf install snapdInstalling Snapd on an Arch or Manjaro System
Snapd is now available in the official Arch repository, leading to easier installation using the Pacman package manager.
$ sudo pacman -S snapdInstalling Snapd on an openSUSE-based System
The Snapd package is not officially included in the openSUSE Leap 15.5 repository. You’ll need to enable the Snap repository and then install the Snapd package.
Open your terminal and run the following two commands to add the Snap repository and then update your package lists:
$ sudo zypper addrepo --refresh https://download.opensuse.org/repositories/system:/snappy/openSUSE_Leap_15.5 snappy
$ sudo zypper refresh
Once the repository is enabled, you can install the Snapd package using Zypper.
$ sudo zypper install snapdStarting and Enabling the Snapd Service
After the installation, start the Snapd service and enable it to start on boot by executing the following command:
$ sudo systemctl enable --now snapd.socketOutput:

Then ensure the Snapd service is running by executing the following command:
$ sudo systemctl status snapd.socketOutput:
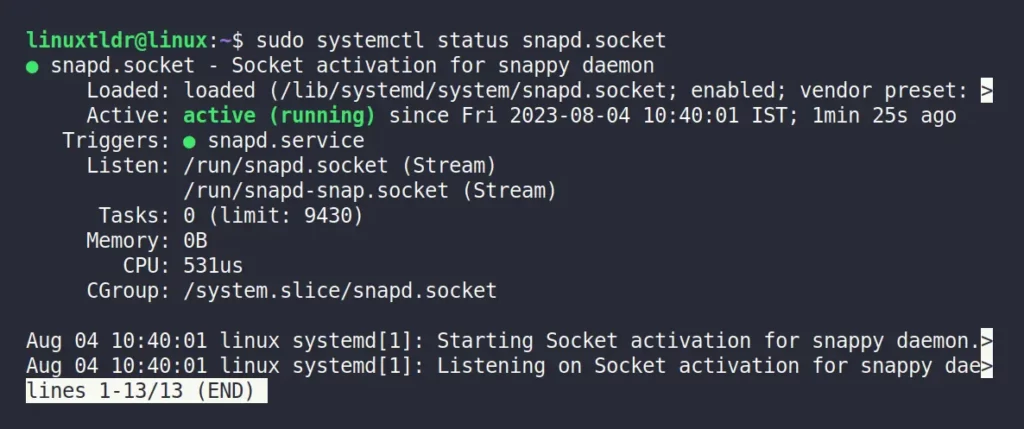
Here, all the steps required to install and run the Snapd service are done. Next, you can check the examples of “snap” command usage.
How to Use the Snap Command in Linux
The following are beneficial commands that you should be aware of before using Snap.
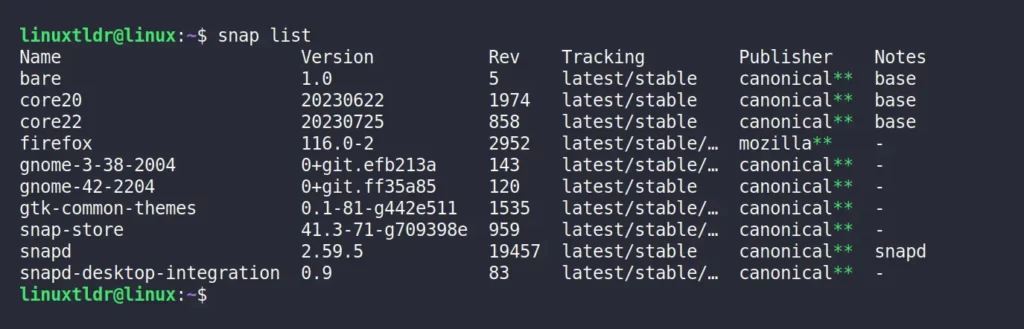
1. List Installed Snaps
To check the list of Snaps installed on your system, issue the following command:
$ snap listOutput:
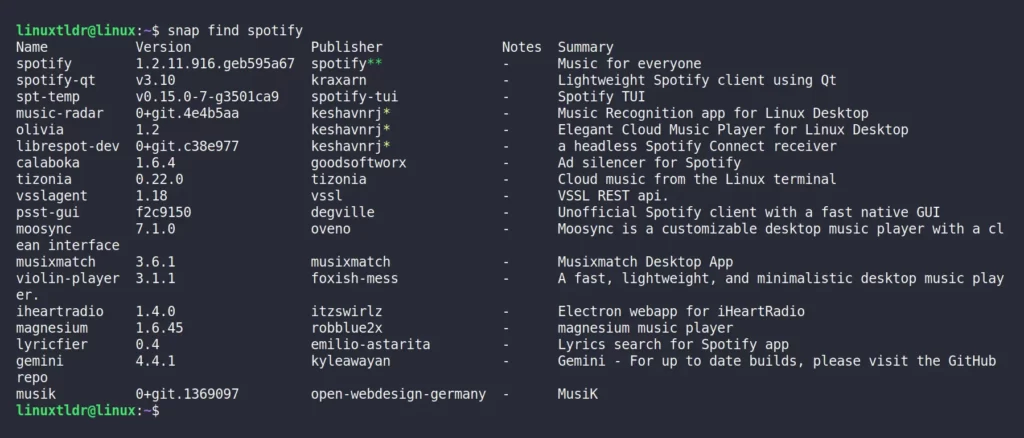
2. Search for Available Snaps
To quickly locate your desired application in the Snap Store from the command-line, simply type the name after the “snap find” command.
$ snap find spotifyOutput:
3. Install a Snap
Once you have located your desired application, you can install it by specifying its name in the following command:
$ sudo snap install spotifyOutput:

To install a package from different channels, you have to specify their flags, for example:
- Without any flags, the stable version of the application will be installed.
--candidate: It will install the application from the candidate channel that needs additional real world experimentation before they move to the stable release.--beta: It will install the application from the beta channel that contains unfinished parts, resulting in breaking the application on occasion.--edge: It will install the application from the edge channel, which is the first and most critical part of an application before it moves to beta, causing more breaks and changes.
Please be aware that not all applications provide the option to install them through the listed channels above.
You can use the “snap info <snap-name>” command to find out if it offers any of the aforementioned channels.
4. Refresh All Installed Snaps
In Snaps, the update terminology is known as refresh. So, you can execute the following command to refresh all the installed applications to their latest release.
$ sudo snap refreshOutput:

5. Refresh a Specific Snaps
The following command will only refresh the assigned Snap (ex: “spotify“).
$ sudo snap refresh spotifyOutput:

6. Revert a Snap to a Previous Version
To revert the Snap to a previous version, the Snap should have a revision to which it can revert. For example, Spotify does not have a revision to revert to. So, in this case, you will get the following error:
$ sudo snap revert spotifyOutput:

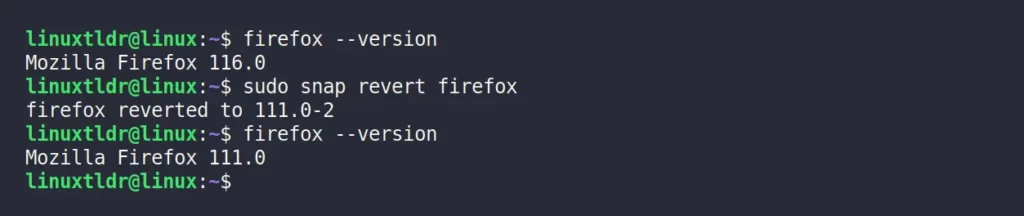
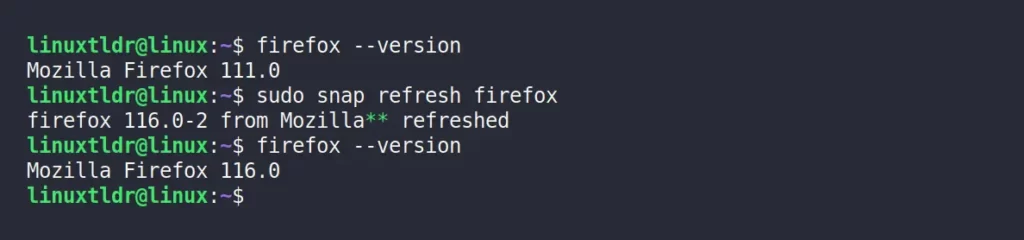
However, Snap, which has a revision like Firefox, can be easily reverted back to the previous version using a single command, as shown.
$ firefox --version                                               #Checking the current version before reverting
$ sudo snap revert firefox                                  #Reverting Firefox to a previous version
$ firefox --version                                               #Checking the current version
Output:
If you want to switch back to the latest version, simply specify the reverted Snap (in this case, Firefox) in the “sudo snap refresh” command:
$ firefox --version                                                #Checking the current version
$ sudo snap refresh firefox                                  #Refreshing Firefox to a latest version
$ firefox --version                                                #Checking the current version
Output:
7. Remove a Snap
Execute the following command to remove an unused Snap.
$ sudo snap remove spotifyOutput:

8. View Snap Information
The following command will show you various information about installed and uninstalled Snap, such as publisher, store-url, contact, license, description, snap-id, and channels.
$ snap info spotifyOutput:

9. View Snap Revision
The revisions are different variants of the Snap that are used when reverting or updating them. For example, the following command will give you the revision list of Firefox.
$ snap list --all firefoxOutput:

In the above picture, the interesting thing to look for is the “Notes” column. The “disabled” state that this Snap is not the one in current use, while the “-” state the Snap in current use.
10 Enable or Disable Automatic Snap Refresh
You can set a timer to allow all Snaps to refresh automatically at the specified interval. For example, the following command will refresh Snap only on Sunday between 10 and 15 p.m.
$ sudo snap set system refresh.timer=sun,10:00~15:00Output:

To disable it, you can set the timer value to its default, which is to refresh four times a day.
$ sudo snap set system refresh.timer=00:00~24:00/4Output:

11. Hold a Specific Snap from Automatic Refresh
Snaps are automatically refreshed at specific intervals, which can sometimes be the latest version working well but may lead to issues.
To prevent potential problems, you can hold the refresh for a specific Snap. For example, if you want to hold the refresh for the Spotify Snap until “2023-08-15” at “12:00:00“, the command would be:
$ sudo snap set spotify refresh.hold=2023-08-15T12:00:00ZOutput:

12. Check if the Snap is Set to Hold
To check if you have accidentally set any Snap on hold for a specific time. For example, to know if Spotify is set to hold for automatic refresh, the command to check would be:
$ sudo snap get spotify refresh.holdOutput:

13. Remove Snap from Hold
The following command will remove the hold from Spotify Snap to allow it to automatically refresh at a specific interval.
$ sudo snap unset spotify refresh.holdOutput:

14. Disable Snap
Disabling a snap halts its automatic startup with your system or login, effectively preventing it from running, updating, and appearing in the Application menu.
$ sudo snap disable spotifyOutput:

15. Enable Snap
To enable the disabled Snap, issue the following command:
snap list” command to check the disabled Snaps.$ sudo snap enable spotifyOutput:

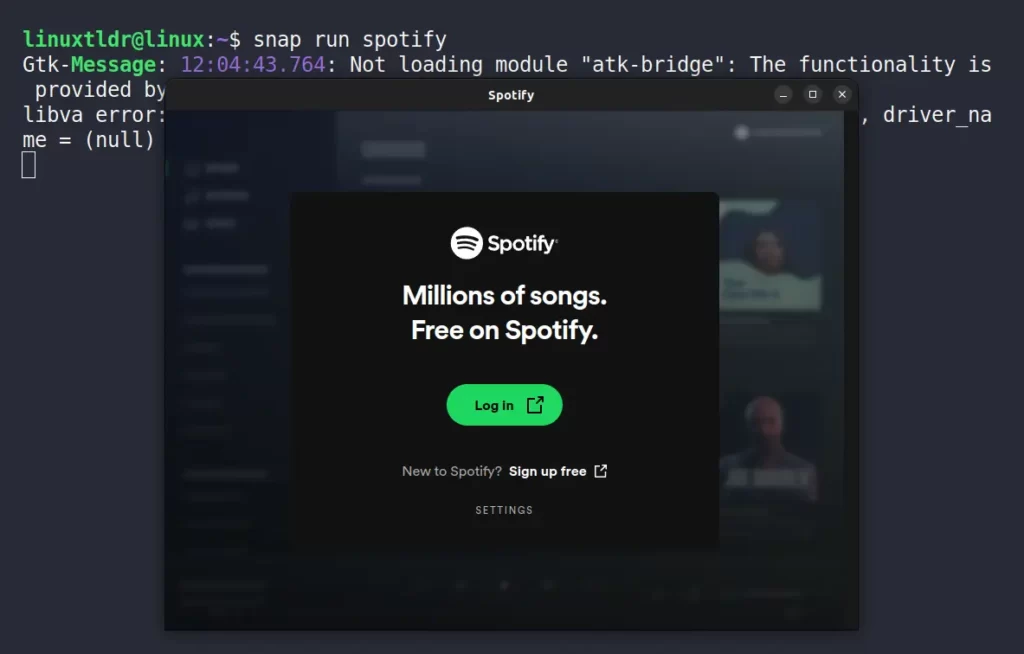
16. Run a Snap Application
Once you install Snap, the application icon will be visible in the start menu or can be found via a simple search. However, you can use your terminal to launch your application.
For example, the following command will launch the Spotify Snap.
$ snap run spotifyOutput:
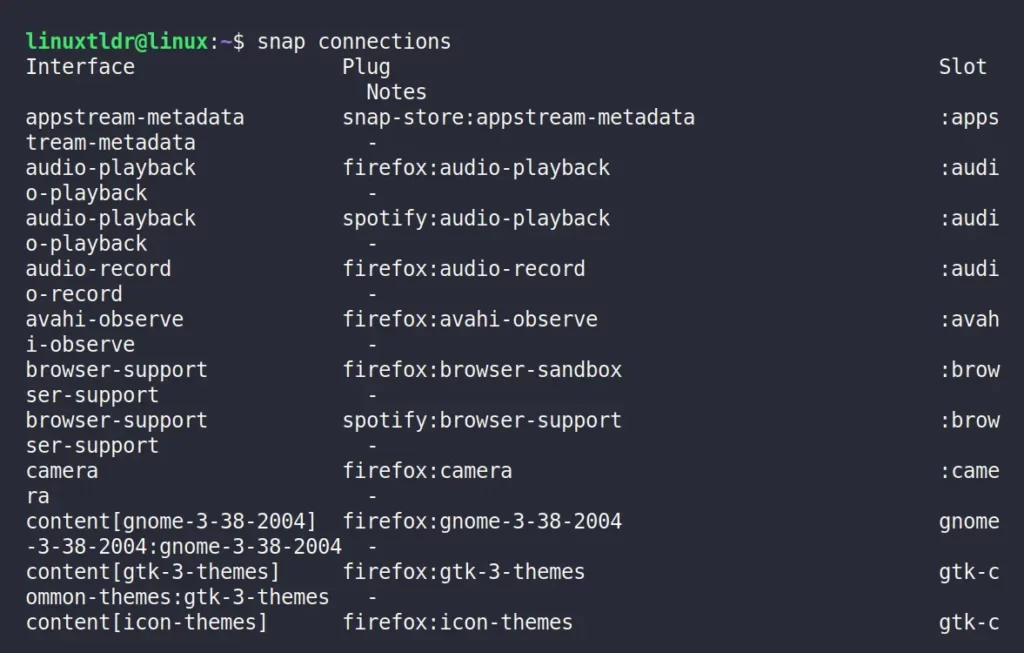
17. Get Information About Connected Interfaces
The interface is used to allow (or deny) access to resources outside of Snaps confinement. Most users don’t need to worry about interfaces. However, to check the list of all the interfaces and Snaps that are utilizing them, run:
--all” flag will also include interfaces with unconnected slots or plugs.$ snap connectionsOutput:
18. Connect an Interface Between Snaps
To manually connect an interface, such as granting “audio-playback” interface access to Spotify for audio playing, the command should be as follows:
$ sudo snap connect spotify:audio-playbackOutput:

To connect an interface to a slot offered by another snap, simply include this as an extra argument:
$ snap connect <snap>:<plug interface> <snap>:<slot interface>19. Disconnect an Interface Between Snaps
To disconnect an interface, such as removing the granted “audio-playback” interface access from Spotify, the command should look like this:
$ sudo snap disconnect spotify:audio-playbackOutput:

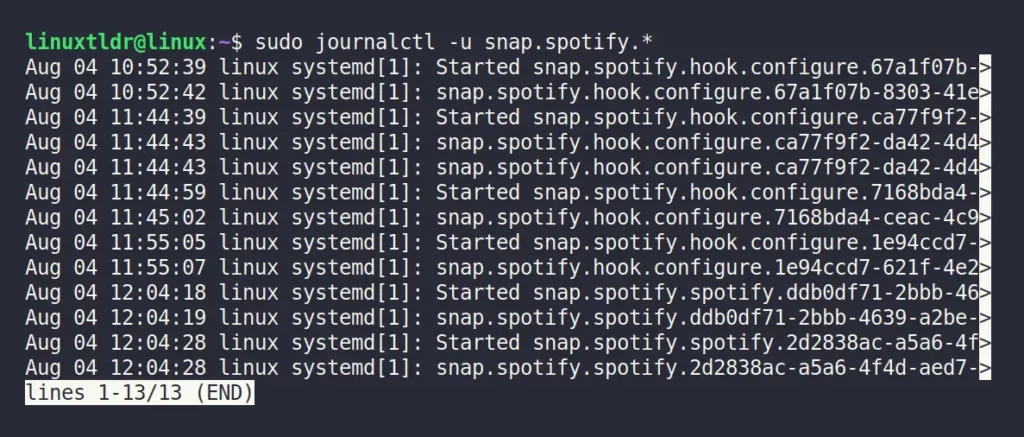
20. View Logs for a Snap
To check the logs of your desired Snap, you can specify its name in the “journalctl” command. For example, to check the Spotify Snap log, the command should look like this:
<snap-name>” from “snap.<snap-name>.*” with the desired Snap name.$ sudo journalctl -u snap.spotify.*Output:
How to Remove Snapd on Linux
To remove Snapd, the service responsible for managing Snap packages on your Linux distribution, run the appropriate command based on your distribution.
$ sudo apt remove snapd                                                                                            #For Debian or Ubuntu
$ sudo dnf remove snapd                                                                                            #For Red Hat or Fedora
$ sudo pacman -R snapd                                                                                             #For Arch or Manjaro
$ sudo zypper remove snapd                                                                                      #For OpenSUSE
Final Word
I prioritize implementing examples that vividly showcase Snap’s capabilities and provide new users with a clear understanding of what to expect.
However, if you have anything that should be included in this article, then feel free to tell us.
Till then, peace!


