JDownloader is one of my favorite tools, as it is a free and open-source download management tool for multi-platform use, making it a perfect alternative to proprietary software such as IDM.
It can perform all the tasks that other tools, like IDM, can do. To highlight a few differences among them, let me tell you that this tool allows you to replace the source URL instead of launching a grabber, as in IDM.
Apart from that, you can easily manage parallel download streams, set the maximum number of downloads, unpack the archive once the file has completed downloading, and many more.
To state limitations, one notable aspect is its heavy reliance on Java, making it approximately 10x larger than other programs. Although it offers an extension, there are certain sites from which it cannot grab the desired source file. Instead, you must manually copy and paste the URL to initiate the download.
Overall, it’s a great download management tool, so I suggest you read the entire article to learn about its features, what annoys me, how to install JDownloader 2 in your favorite Linux distribution, and a few usage examples.
Tutorial Details
| Description | JDownloader |
| Difficulty Level | Low |
| Root or Sudo Privileges | No |
| OS Compatibility | Ubuntu, Manjaro, Fedora, etc. |
| Prerequisites | – |
| Internet Required | Yes |
Features of the JDownloader
At the time of writing this article, here is a list of features you can expect from this tool.
- It’s a free, open-source, cross-platform tool with huge community support.
- It supports start, pause (set limited bandwidth), delete, or disable download options.
- The option to edit the source download URL is provided.
- It allows you to set bandwidth limitations, parallel downloads, and the maximum number of simultaneous downloads.
- It features an auto-extract archive function after the file finishes downloading.
- Provides an account manager to add premium sites for downloading.
- Offers the option to add a new proxy for supported protocols such as HTTP/s, Socks/4-5, and direct.
- It also provides access to a large marketplace where you can download various add-ons.
- A captcha service to automatically prove you’re not a robot on secure sites.
- Schedule a specific time or date for auto-downloads to begin.
It’s quite intriguing, isn’t it? It offers almost all the necessary features that a modern download manager tool should have, including a few additional ones lacking in other proprietary software, such as IDM.
Not always a bloom, so certain things that annoy me when using this tool are followed by.
- Slightly overwhelming for beginners to begin (but worth it).
- The program’s size increases tenfold due to dependencies on Java.
- The browser extension is annoying and requires a JDownloader account for full access.
- It fails to capture files on some sites (though you rarely encounter such cases).
- It annoyingly begins a JDownloader updater each time you launch it.
Aside from that, it’s an amazing open-source alternative to other proprietary software, so I encourage you to give it a shot at least once.
How to Install JDownloader 2 on Linux
The latest version of JDownloader, v2 (also referred to as JDownloader 2), runs on Java 1.5 or higher and is compatible with various systems such as Linux, macOS, Windows, or any other systems that support Java runtime.
As of writing this article, it is not available in the Linux repository, making downloading and installing from the official website the only option for all supported systems.
Here are the steps to download and install JDownloader 2 on your favorite Linux distribution.
1. The first step is to install the latest version of Java on your Linux system.
$ sudo apt install default-jdk                                                                    #For Debian, Ubuntu, Linux Mint
$ sudo dnf install java-latest-openjdk                                                     #For RHEL, Fedora, AlmaLinux
$ sudo pacman -S jdk-openjdk                                                                 #For Arch, Manjaro, EndeavourOS
To install it on another system, check out the official Java download page for the installer.
2. Visit the official JDownloader website, click on the desired system, and then click on the “Download Installer (System Java)” link, as shown.
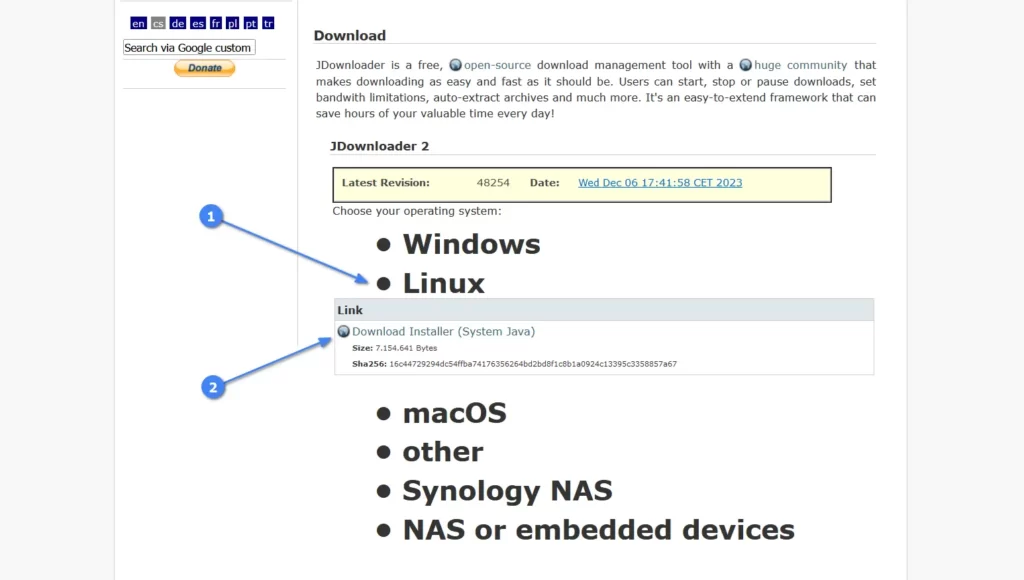
If you choose Windows, it will begin the download, but for Linux and macOS, it will open the MEGA link from where you can download the JDownloader installer.
3. Once the JDownloader installer is downloaded, go to the download directory and initiate the script by running it.
$ cd Downloads/
$ bash JDownloader2Setup_unix_nojre.sh
It will launch the JDownloader installation window, so continue by clicking on the “Next” button.
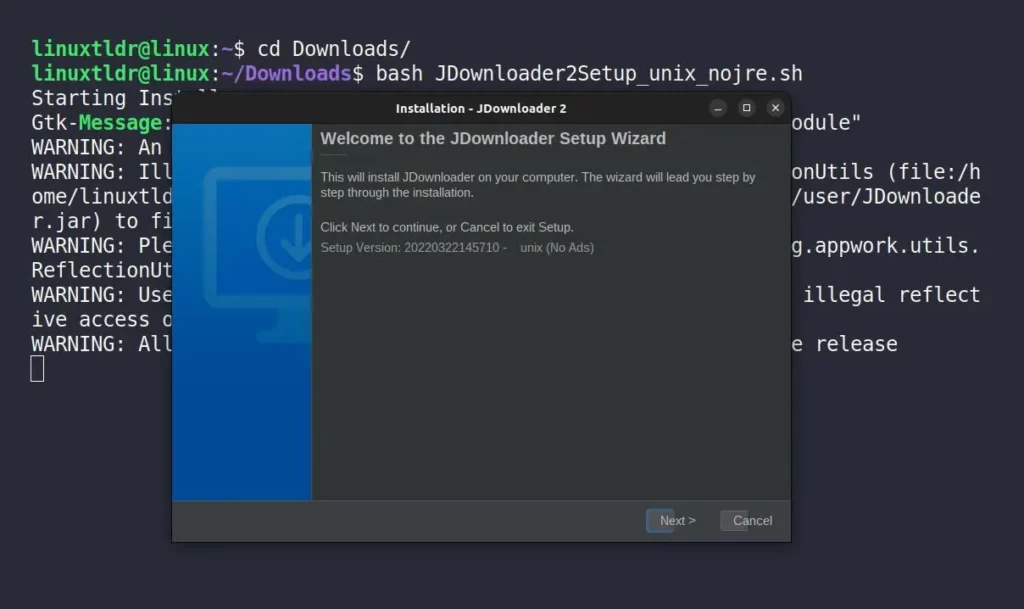
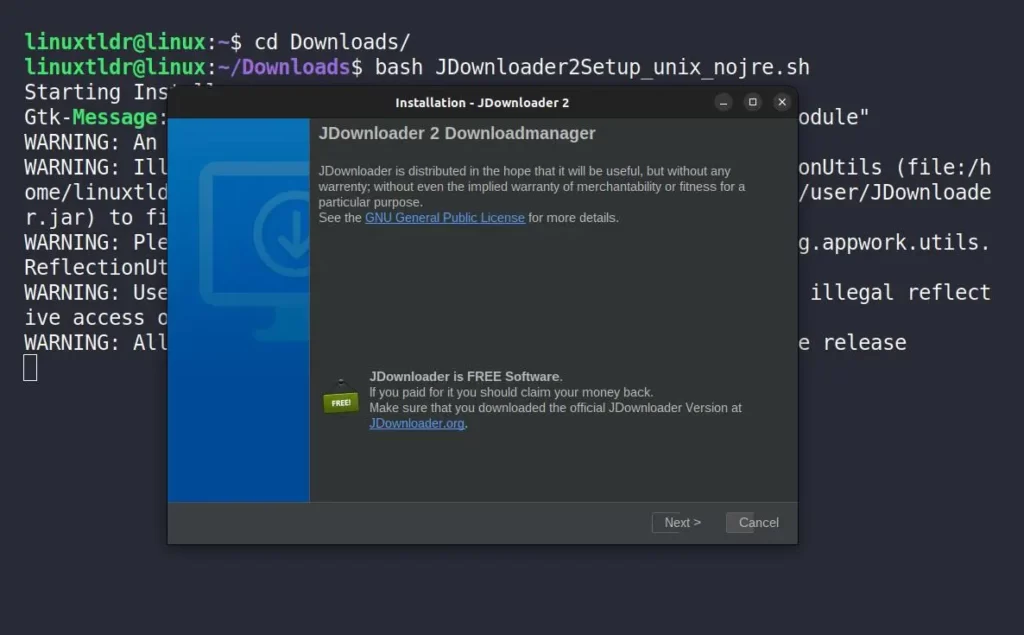
Here, it will prompt some warnings, terms, and policies; simply proceed by clicking on the “Next” button.
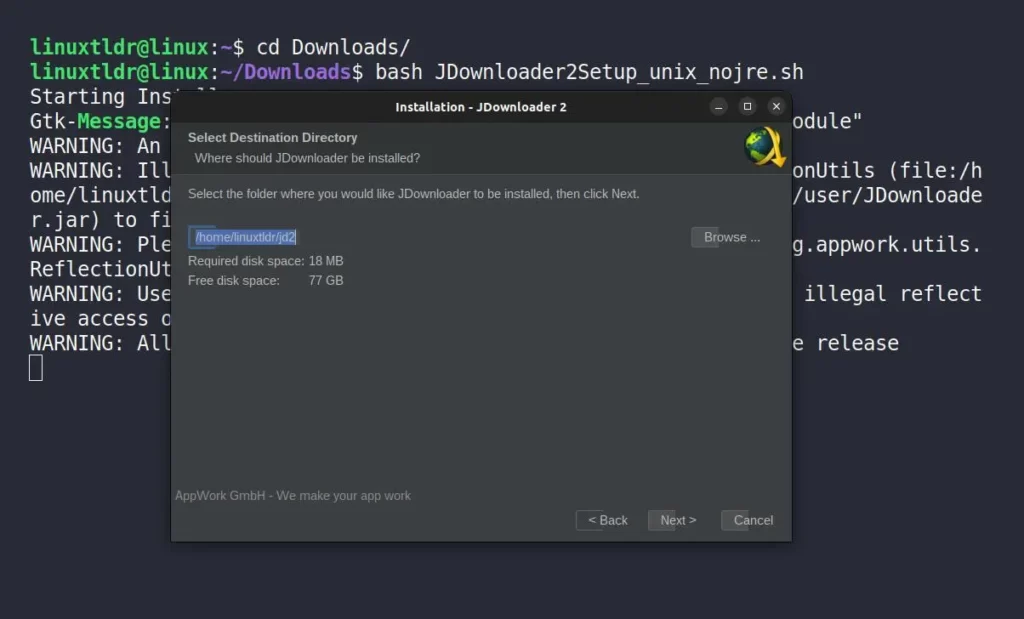
To change the download location, you have that option right in this window, but I would suggest continuing with the default installation path.
To create a desktop icon or launch JDownloader once installed, you can customize these options according to your preferences, which are available in this window.
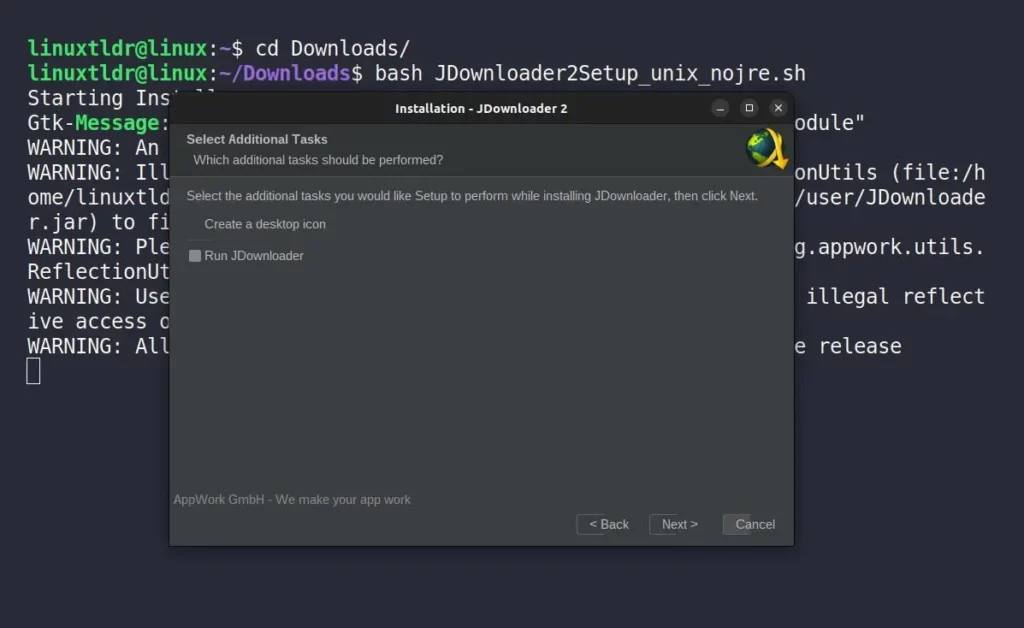
Lastly, it will begin the installation of JDownloader on your system.
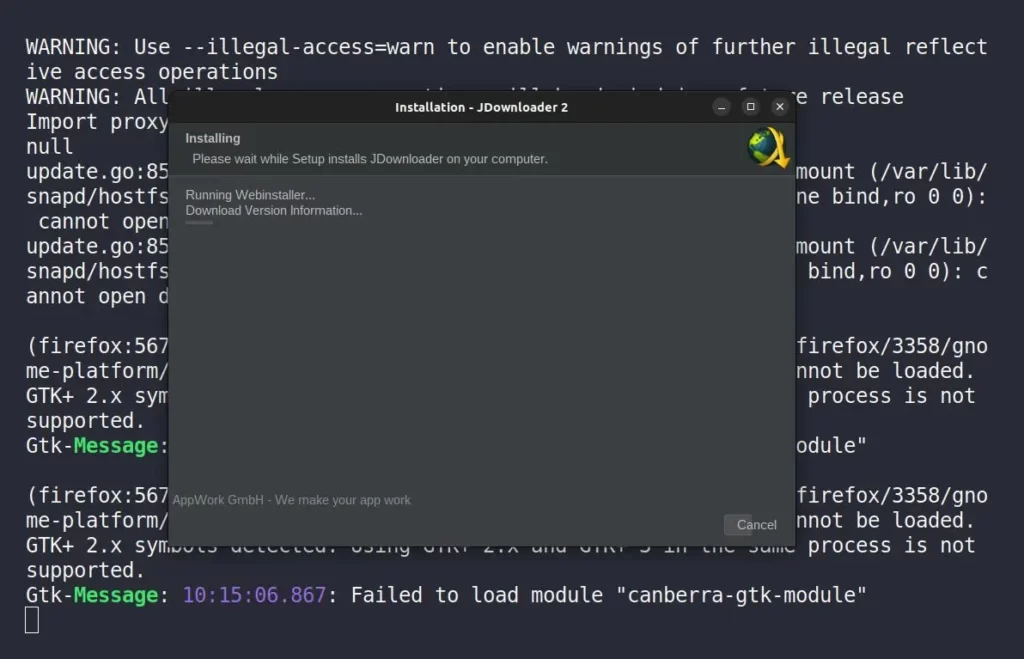
Once the installation is finished, it will prompt the last window; simply close the installation window by clicking on the “Finish” button.
4. (Optional) For a seamless experience, you can download and install the JDownloader browser extension for supported browsers such as Chrome, Firefox, Opera, and Edge from this link.
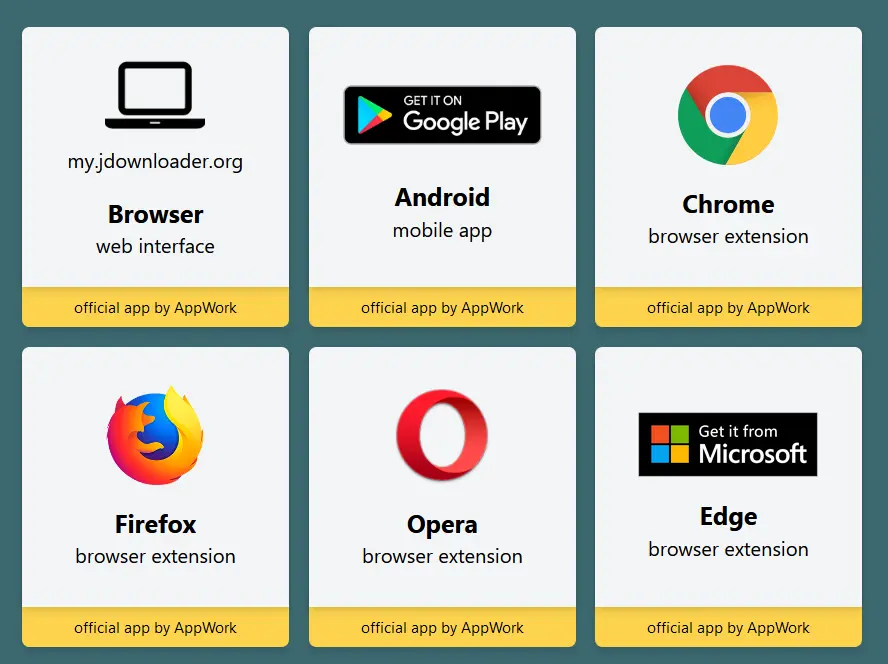
But please be aware that, in order to use it, you need to create a new JDownloader account. Afterward, log in with this account on both the JDownload browser extension and your JDownload system app by navigating to “Settings“, “My JDownloader (Ctrl+M)“, and under “My Account“, input the login credentials. Finally, click on the “Connect” button to complete the login process.
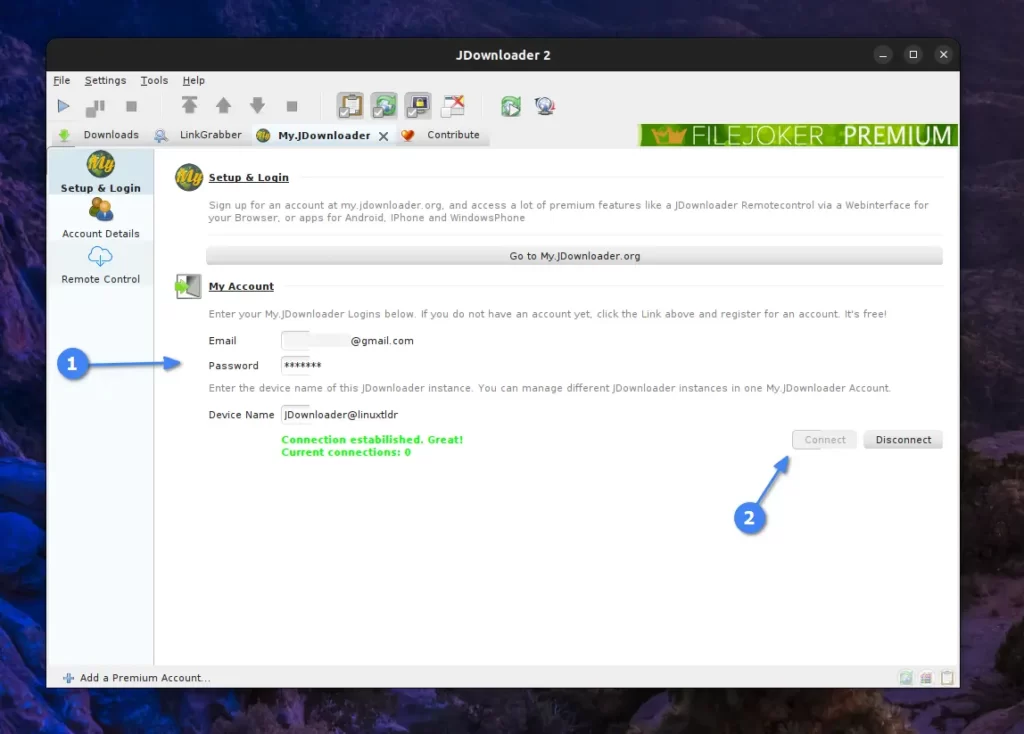
Honestly, I personally prefer download manager extensions such as IDM over the JDownloader browser extension. The JDownloader extension initially requires creating an account, and unlike other download management tools, it does not automatically grab download files in JDownloader.
Here, either right-click on the link and choose the “Download with JDownloader 2” option from the context menu, or copy the link and add it directly to JDownloader, which is what I usually do and avoid using the JDownloader browser extension.
Usage of JDownloader 2
Once JDownloader 2 is installed, you can locate and launch it from the application menu.

To download any file via JDownloader, you can either copy its download file URL and then navigate to the “File” -> “Analyse Text with Links” option, or use the “Ctrl + L” shortcut key to paste the copied URL and begin by clicking on the “Continue” button.
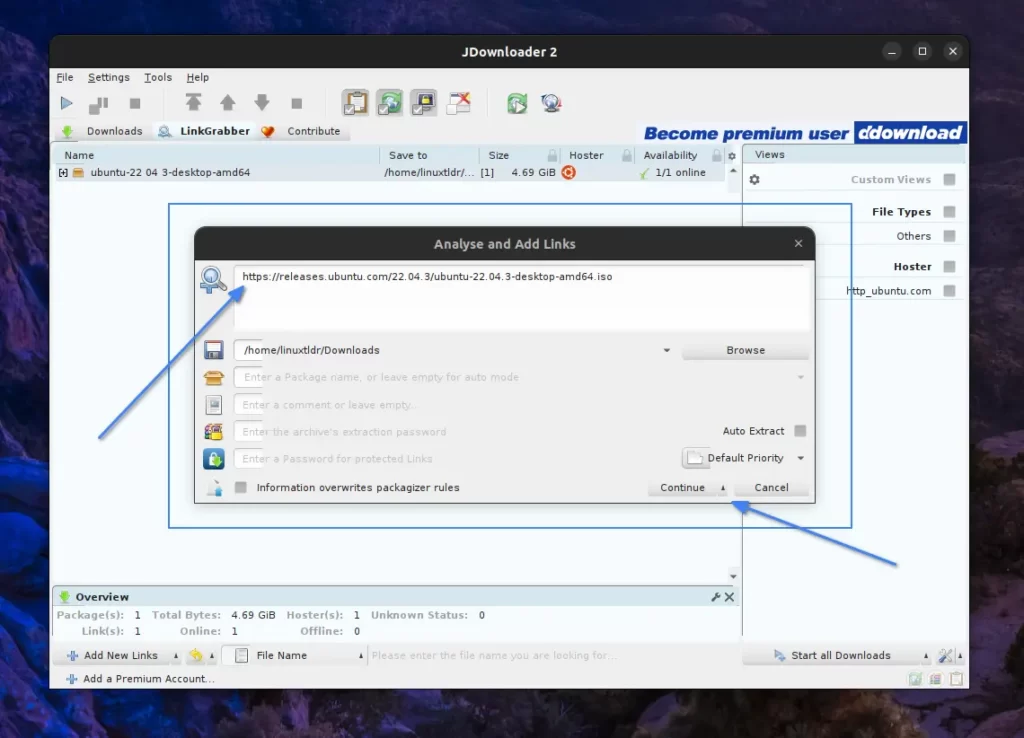
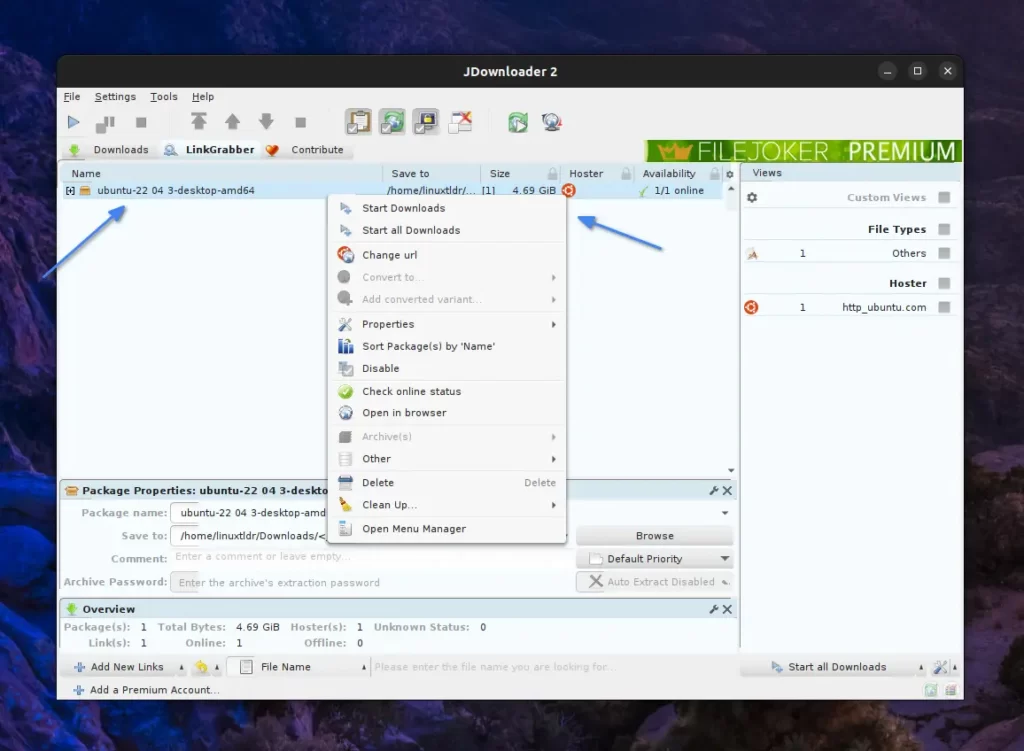
Here, it will attempt to fetch all downloadable material from the provided URL in the “LinkGrabber” panel. However, if you directly provided a URL containing a file (in my case, “ISO“), it would be the only file for which you can right-click on the listed package and begin the download process by clicking on the “Start Downloads” option.
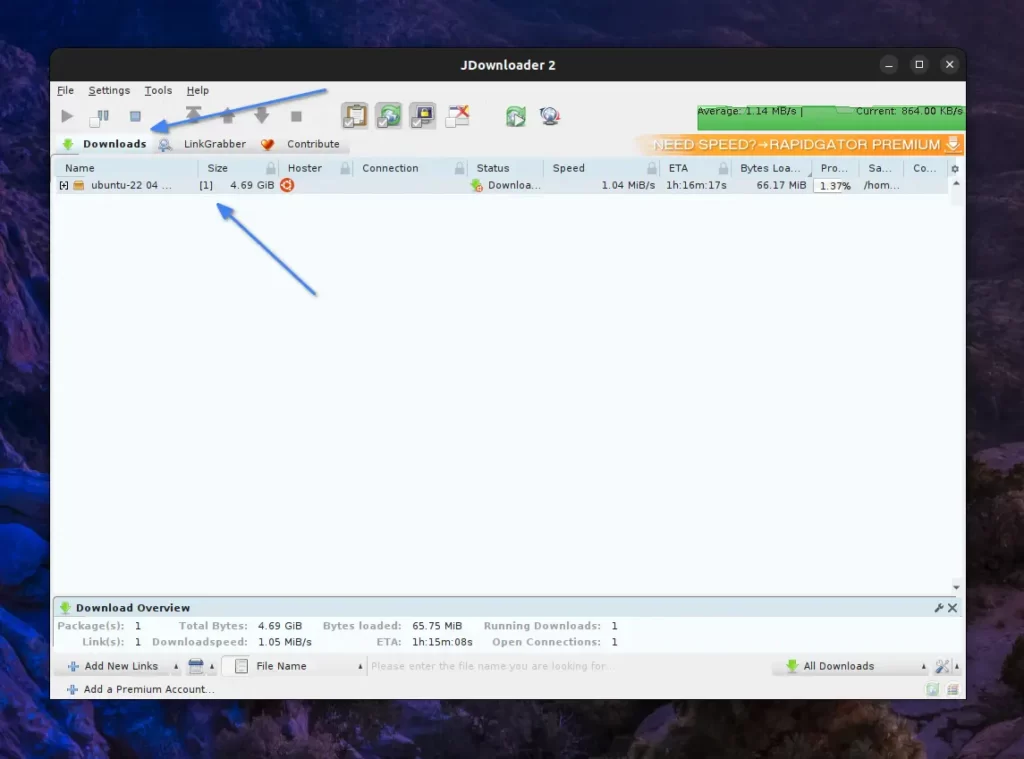
Now, the file will be moved to the “Downloads” panel, where you can monitor the status, download speed, estimated time to download, amount of bytes downloaded, progress bar, and the path of the downloaded file.
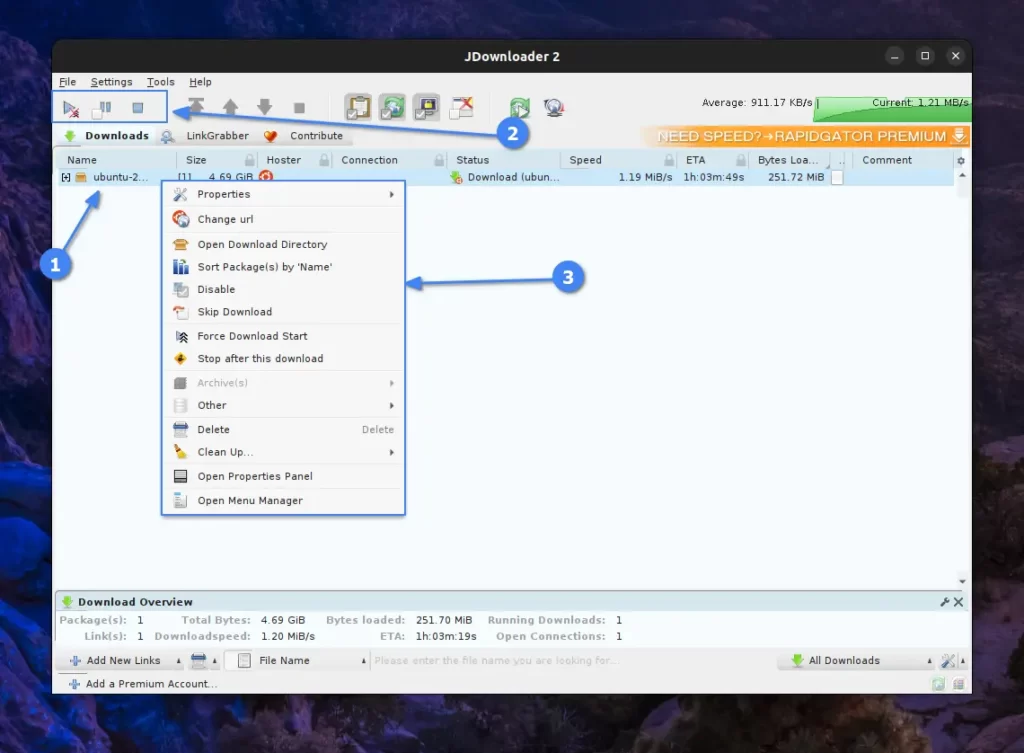
To pause, continue, or delete the file, you can click on it, manage it from the menu icon, or right-click and choose the desired option.
When you pause and later resume the file download, there’s a possibility of the file source changing, leading to a potential error.
In this scenario, you can revisit the source, copy the new URL, right-click on the file in the “Downloads” panel, choose the “Change URL” option, paste the new URL, and initiate the download with the updated link.
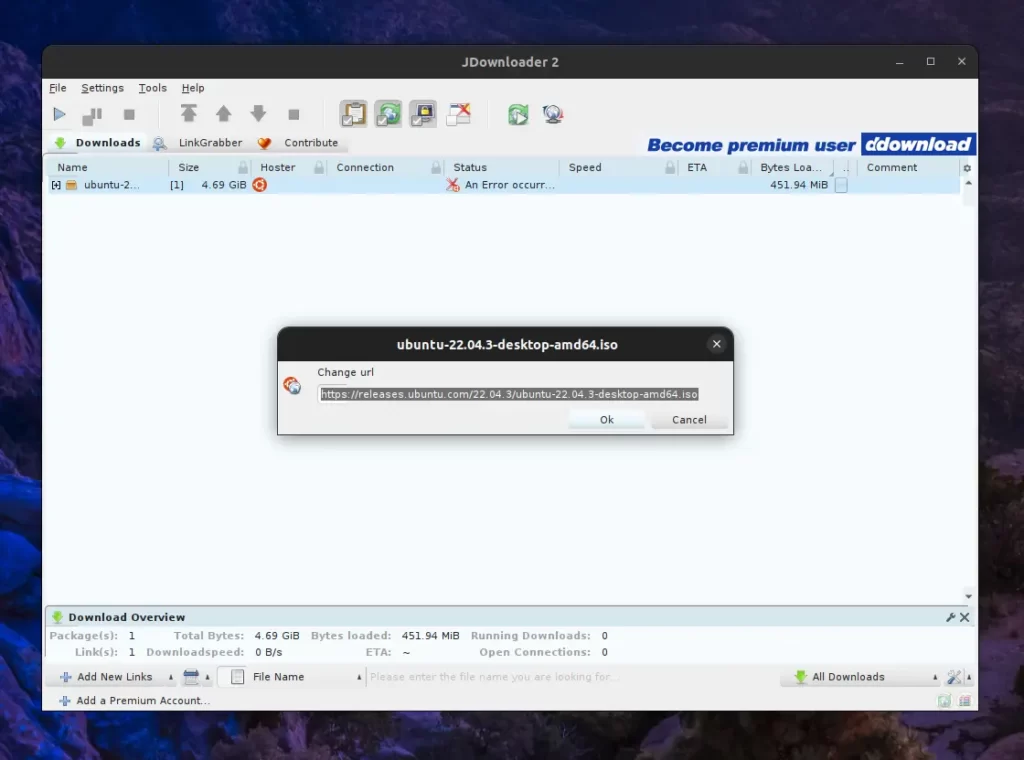
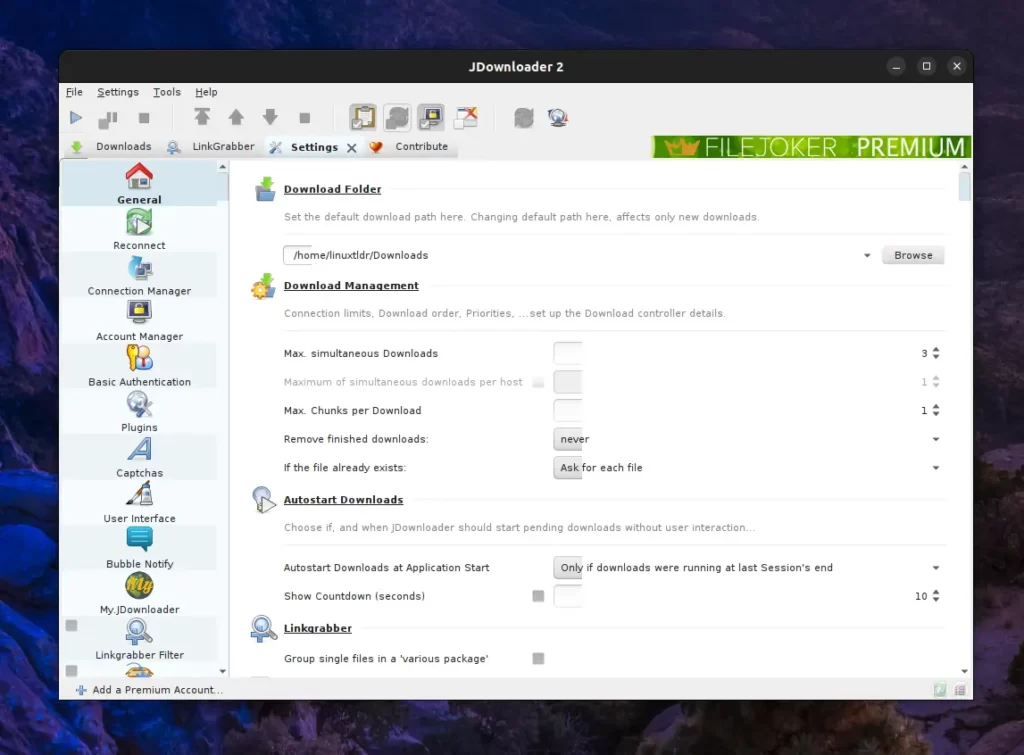
To change the default download directory, maximum simultaneous downloads, maximum parallel downloads, or for other options, navigate to “Settings -> Settings“. Alternatively, you can use the “Ctrl + P” shortcut key to open the “Settings” window directly.
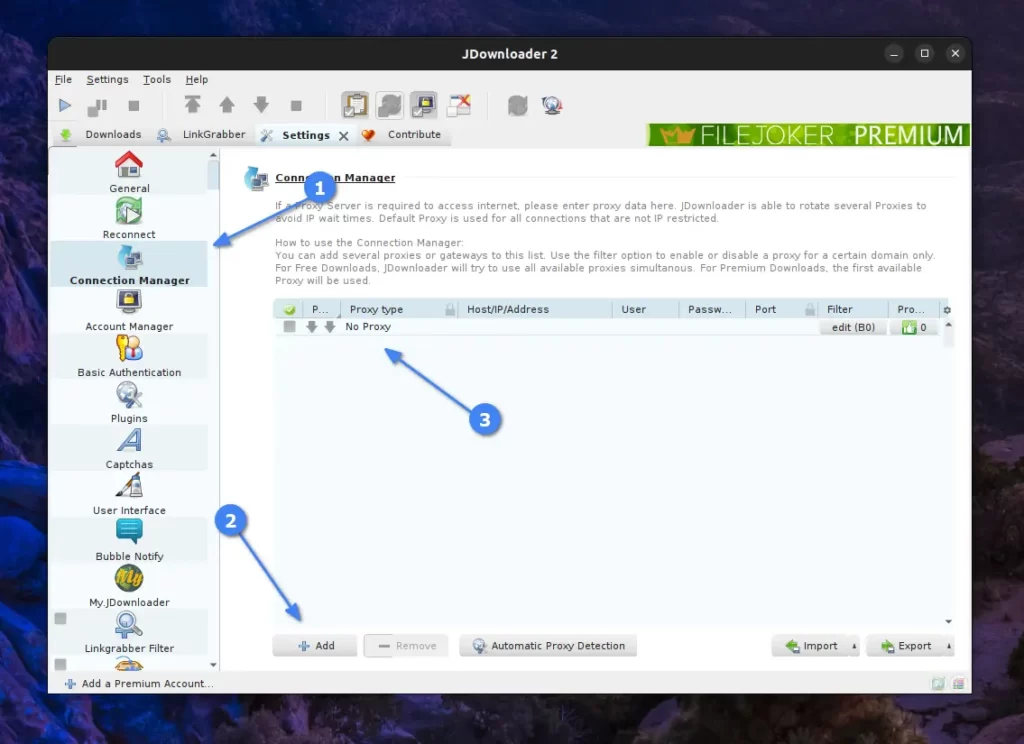
In the “Connection Manager” section, you can add your desired proxy for supported protocols such as HTTP/s, Socks 4/5, and others.
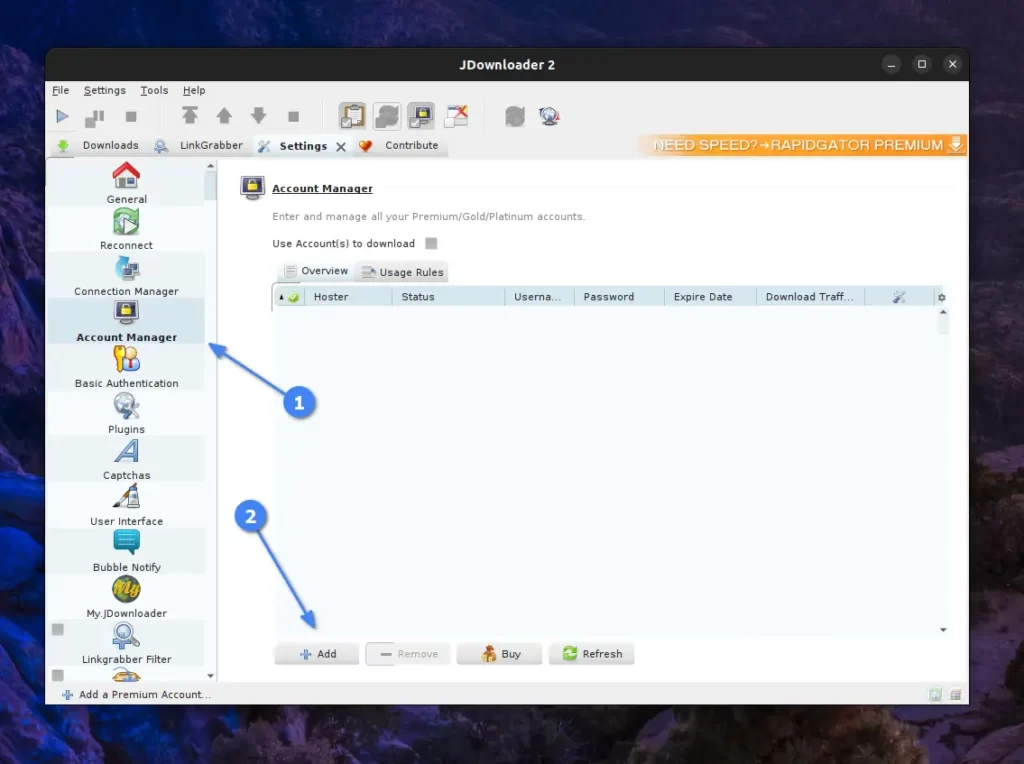
To download files from premium sites that require login, you can visit the “Account Manager” and provide credentials for your desired site if it’s listed in the supported sites.
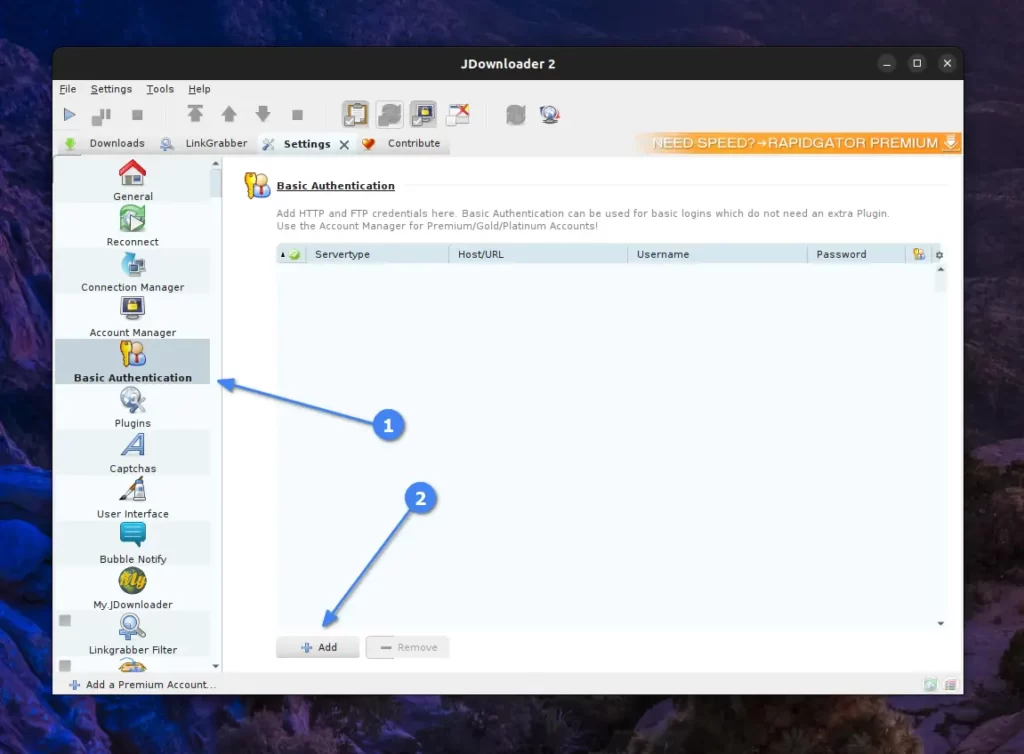
You can alternatively provide HTTP or FTP credentials in the “Basic Authentication” section.
Here, I will end this article as it is sufficient to help kickstart your journey in JDownloader, but you can dig deeper into advanced options and share your experience in the comment section.
How to Remove JDownloader 2 from Linux
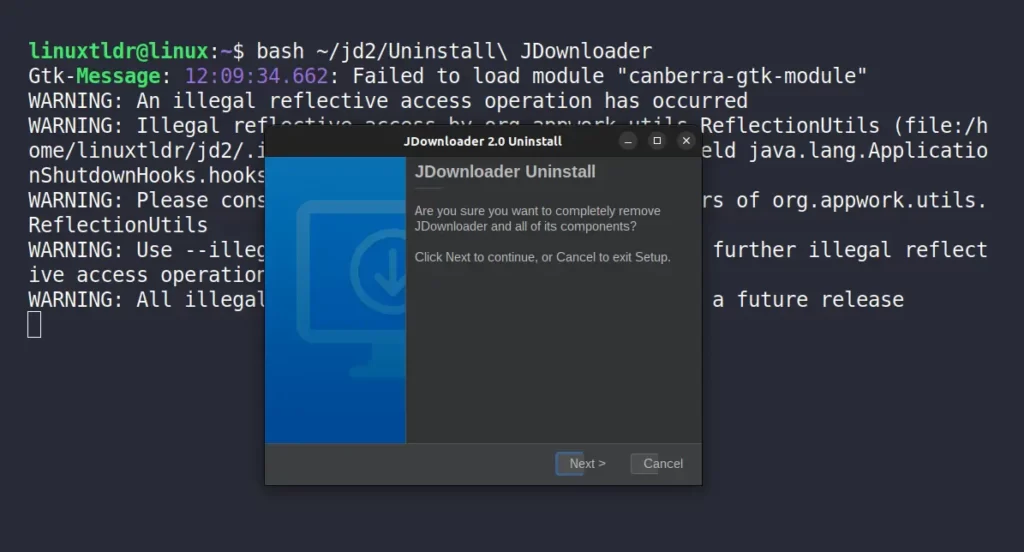
The removal steps are quite easy; simply run an “Uninstall JDownloader” script in the “~/jd2” directory.
$ bash ~/jd2/Uninstall\ JDownloaderIt will launch the uninstallation wizard, so simply begin the removal process by clicking on the “Next” button.
Final Word
JDownloader is generally a superb alternative to proprietary software in the realm of open source. However, it can be a bit bothersome when transitioning from other download management tools, especially IDM, due to its superior integration and site support compared to JDownloader.
I’m still stuck in a situation where I’m confused about which download manager to choose; my mind suggests going with IDM, while my heart, filled with open-source love, urges me to use JDownloader.
Therefore, I typically opt for JDownloader exclusively on Linux systems, while IDM remains my top choice for Windows systems. Additionally, using IDM on Linux requires Wine, which automatically limits its benefits, making it less sensible.
Nevertheless, it’s up to you, but I suggest you at least give it a try and share your experiences, questions, and queries in the comment section.
Till then, peace!


For years, I have used JDownloader. But tired of its heavy startup, its memory consumption and the fact that, being in Java, it didn’t adapt to Wayland on HDPi screens, I decided to look for an open source alternative: DownZemAll. The project is slow, but what works, works well enough. It doesn’t have the possibility to use DLC files, but I didn’t use them either.