
MongoDB, a leading open-source document-oriented database management system, is a powerful “NoSQL” database that empowers businesses to effortlessly store and manage massive amounts of data.
Data is stored as BSON (Binary JSON) documents, which are similar to JSON documents but encoded in a binary format for optimal efficiency and compactness.
MongoDB stands as the favored DBMS among industry giants such as eBay, Adobe, CERN, Shutterstock, and numerous others, prominently integrating MongoDB into their cutting-edge tech stacks.
In this article, you will learn its features and how to install and use MongoDB on your preferred Linux system.
Tutorial Details
| Description | MongoDB |
| Difficulty Level | High |
| Root or Sudo Privileges | Yes |
| OS Compatibility | Ubuntu, Manjaro, Fedora, etc. |
| Prerequisites | – |
| Internet Required | Yes |
Key Features
MongoDB is well-known for its capability to effortlessly store and manage massive amounts of data. However, the following list might give you more insight into it:
- Open-Source
- JSON-Like Queries
- Document-Oriented (allows to store different types of data in the same collection)
- Scalability (capable of scaling horizontally across multiple servers through sharding)
- High Performance (fast read-write operations, handling high-throughput workloads for real-time applications)
- Indexes (create indexes on fields within documents to improve query performance on frequently accessed data)
- Community and Enterprise Editions (the community edition comes with basic features enough for small scale businesses, and the enterprise edition has some additional features, support, and security options for large scale businesses)
The aforementioned features are well known in MongoDB. Now, let’s check out how to install it on your preferred Linux system.
How to Install MongoDB on Linux
The installation steps for MongoDB can vary slightly depending on the Linux distribution you’re using. Rest assured, I’ll guide you through installing MongoDB on the most popular Linux distributions. Let’s begin with:
Installing MongoDB on a Debian and Ubuntu System
On “Debian 11” and “Ubuntu 22.04“, we’ll efficiently install MongoDB using its dedicated repository. Keep in mind that the instructions for each system have slight differences, but fear not, as I’ll provide a clear and concise guide for both.
1. Open your terminal and install the following required packages (Debian/Ubuntu):
$ sudo apt install gnupg curl -y2. Import the MongoDB public GPG key depending on your Linux distribution:
#Debian 11
$ curl -fsSL https://pgp.mongodb.com/server-6.0.asc | sudo gpg -o /usr/share/keyrings/mongodb-server-6.0.gpg --dearmor

#Ubuntu 22.04
$ curl -fsSL https://pgp.mongodb.com/server-6.0.asc | sudo gpg -o /usr/share/keyrings/mongodb-server-6.0.gpg --dearmor
3. Add the MongoDB repository using the following command appropriate to your Linux distribution:
#Debian 11
$ echo "deb [ signed-by=/usr/share/keyrings/mongodb-server-6.0.gpg] http://repo.mongodb.org/apt/debian bullseye/mongodb-org/6.0 main" | sudo tee /etc/apt/sources.list.d/mongodb-org-6.0.list

#Ubuntu 22.04
$ echo "deb [ arch=amd64,arm64 signed-by=/usr/share/keyrings/mongodb-server-6.0.gpg ] https://repo.mongodb.org/apt/ubuntu jammy/mongodb-org/6.0 multiverse" | sudo tee /etc/apt/sources.list.d/mongodb-org-6.0.list
4. Update the local package database:
$ sudo apt update5. Install the latest version of MongoDB.
$ sudo apt install mongodb-org -yInstalling MongoDB on a Red Hat and Fedora System
MongoDB is not available in this system’s default repositories, but you can use the official MongoDB repository provided for this system.
1. Create the “mongodb-org-6.0.repo” file at the “/etc/yum.repos.d/” path using your choice of text editor or the vim command:
$ sudo vim /etc/yum.repos.d/mongodb-org-6.0.repo2. Add the following content to it:
[mongodb-org-6.0]
name=MongoDB Repository
baseurl=https://repo.mongodb.org/yum/redhat/$releasever/mongodb-org/6.0/x86_64/
gpgcheck=1
enabled=1
gpgkey=https://www.mongodb.org/static/pgp/server-6.0.asc
3. Run the following command to install MongoDB:
$ sudo dnf install mongodb-org -yInstalling MongoDB on an Arch and Manjaro System
MongoDB is available in the Arch User Repository (AUR). You can use AUR helpers like Yay to easily install MongoDB on these systems.
$ yay -S mongodb-binInstalling MongoDB on an OpenSUSE-Based System
Follow the below steps to install MongoDB community edition on your “SUSE 15” system using the Zypper package manager:
1. Import the MongoDB public key:
$ sudo rpm --import https://www.mongodb.org/static/pgp/server-6.0.asc2. Add the MongoDB repository using the following command:
$ sudo zypper addrepo --gpgcheck "https://repo.mongodb.org/zypper/suse/15/mongodb-org/6.0/x86_64/" mongodb3. Install the latest version of MongoDB:
$ sudo zypper install mongodb-org -yStarting the MongoDB Service
Once the installation is successfully completed, you have to ensure that the MongoDB service is up and running by issuing the following command:
mongod” for most systems. However, on certain systems, like Arch-based Linux, the service name will be “mongodb“, instead.$ sudo systemctl status mongodOutput:
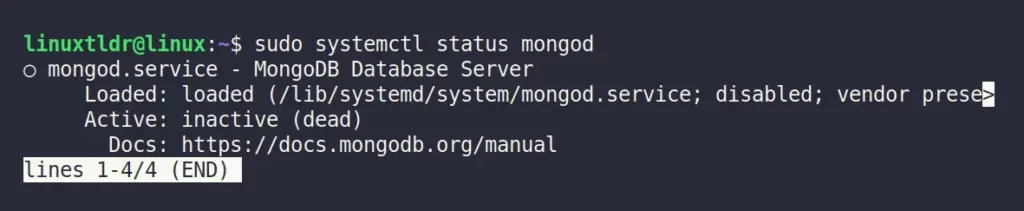
As you can see from the above picture, the service is not running. So, issue the following command to start and enable the MongoDB service:
$ sudo systemctl start mongod
$ sudo systemctl enable mongod
Output:

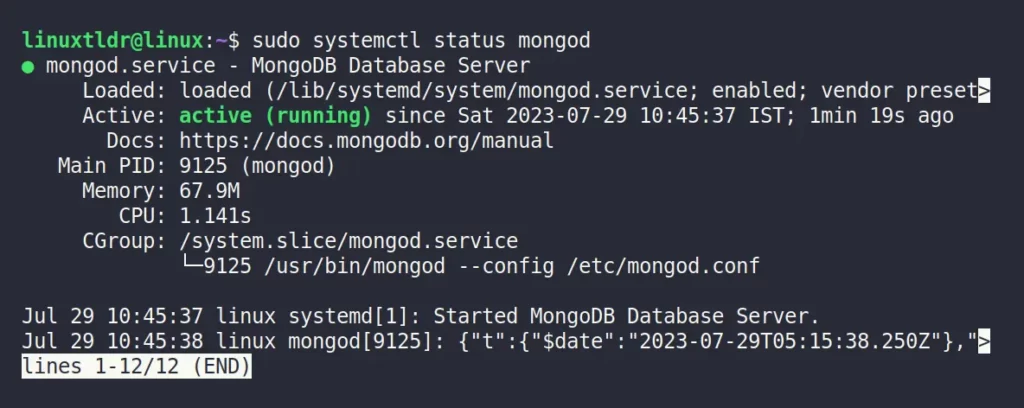
Finally, re-check again to ensure the service is up and running.
$ sudo systemctl status mongodOutput:
How to Use MongoDB in Linux
If you only use MySQL or any other RDBMS and are unfamiliar with JSON, MongoDB might initially pose a challenge. However, the following examples can significantly alleviate any difficulties and ease your pain.
Connecting and Disconnecting from MongoDB
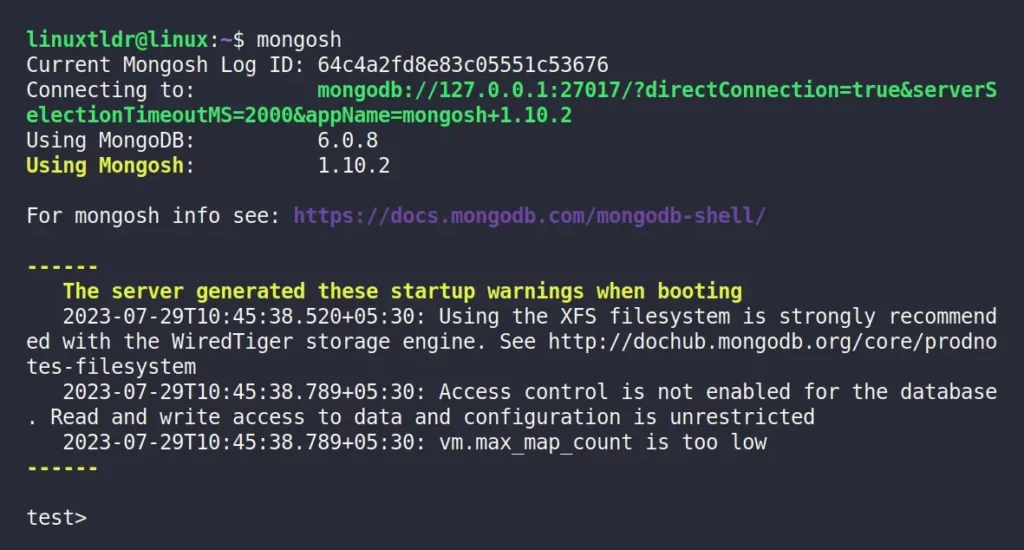
Connect to MongoDB installed on the same host system without specifying any flags by executing the following command:
$ mongoshOutput:
If MongoDB is installed on a different system, then you can specify the username and password along with the hostname, as shown:
#Connecting to MongoDB on a different system without authentication
$ mongosh "mongodb://hostname:27017"

#Connecting to MongoDB on a different system with authentication
$ mongosh "mongodb://username:password@hostname:27017"
To disconnect from a connected MongoDB instance, either issue the “Ctrl+C” shortcut twice or “Ctrl+D” once, or you can use the “exit” command, as shown.
test> exitOutput:

List All the Existing Databases
Once connected, you can use the following command to list all the existing databases:
test> show dbsOutput:

Switch to a Specific Database
To switch to a specific database and start working with it, use the following command.
db” command to find out your current working database.test> use adminOutput:

List the Content of a Specific Database
Once you switch to your preferred database, use the following command to list its content (collections):
admin> show collectionsOutput:

Create a New Database
To create a new database, specify the desired unused database name when using the ‘use‘ command.
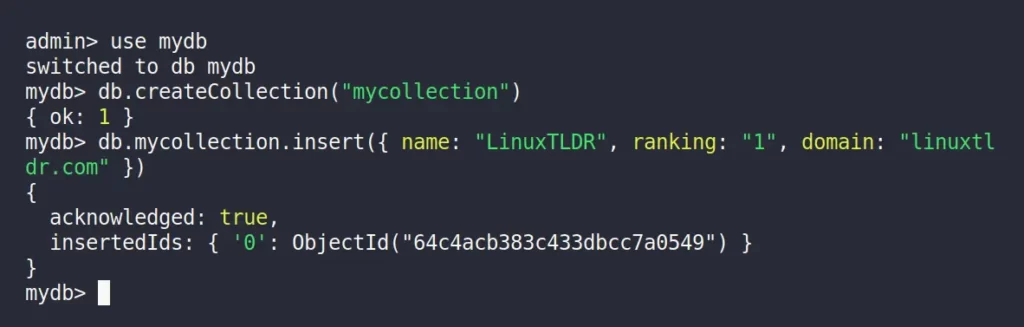
admin> use mydbCreate Collections
Let’s create a collection called “mycollection” in the “mydb” database.
mydb> db.createCollection("mycollection")Output:

Insert Data
Lastly, insert a document into the “mycollection” collection.
mydb> db.mycollection.insert({ name: "LinuxTLDR", ranking: "1", domain: "linuxtldr.com" })Output:
Note that whenever you insert a new document in the collection, MongoDB will dynamically attach uniquely generated indexes (or IDs) to the inserted document. This index allows MongoDB to perform fast indexing, document identification, sharding, and sorting.
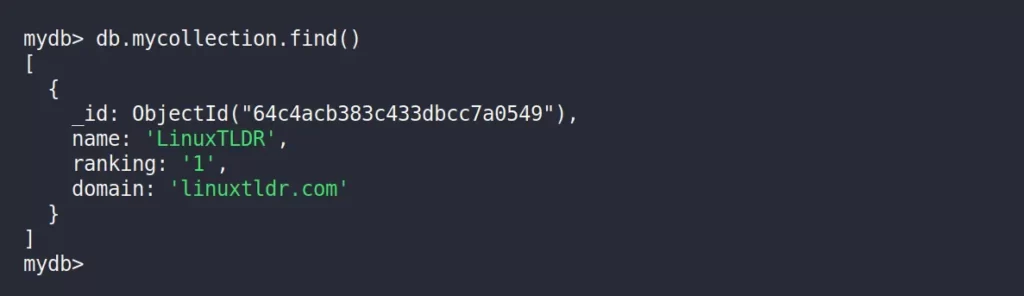
Query Data
You can list (or query) the data in the “mycollection” collection using the following command”
mydb> db.mycollection.find()Output:
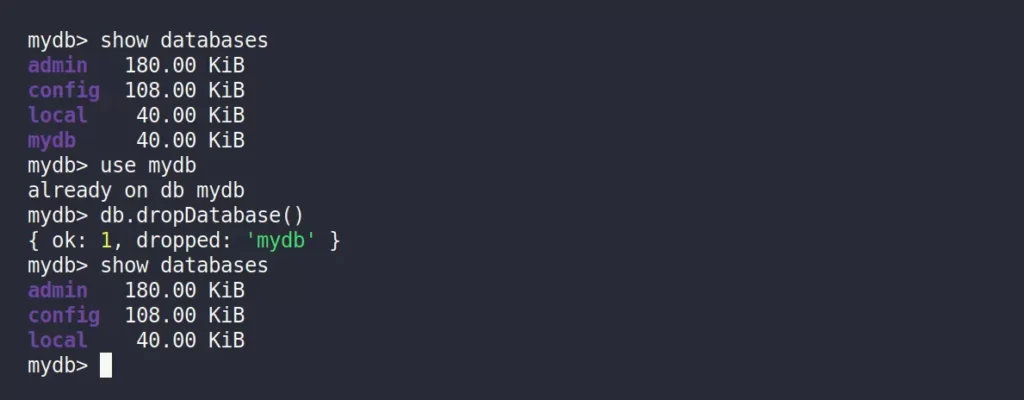
Drop Database
Before dropping the database, switch to the database that you want to delete, and then use the following command to delete it:
mydb> show databases
mydb> db.dropDatabase()
mydb> use mydb
mydb> show databases
Output:
Let’s finish it here.
Final Word
In terms of installation and usage (if you are unfamiliar with JSON), you might face some difficulty while using MongoDB, but it’s worth the time if your intention is to have a cutting-edge database for your next project.
If you have any questions or queries related to this article, then feel free to tell us in the comment section.
Till then, peace!


