Norka is a GUI text editor that I find to be the best alternative to Gedit or other GUI text editors on Linux. Wondering why? Then hear me out: it’s free and open-source (which it definitely should be), but it offers an auto-save feature that constantly saves your document with each change. When you want to quit, just quit; it won’t ask for any confirmation.
Why am I finding this feature so useful when other tools like VSCode offer it? Well, the answer is quite simple: it’s lightweight compared to others, so it launches quite fast and offers a bit more features than other lightweight editors.
Just because I’ve minimized using VSCode (yes, I’ve left Gedit) doesn’t mean I’ve abandoned it; I still use it to write my programs, but I use Norka to write my thoughts, poems (don’t judge me), and summaries of my learnings, as it allows me to write them quickly and efficiently.
So, stick with this article till the end to gain more insights on its features, installation, and quick usage guide.
Tutorial Details
| Description | Norka |
| Difficulty Level | Low |
| Root or Sudo Privileges | No |
| OS Compatibility | Ubuntu, Manjaro, Fedora, etc. |
| Prerequisites | – |
| Internet Required | Yes (for installation) |
Features of Norka
Here’s a list of features offered by Norka that set it apart from other alternatives:
- It’s free, open-source, and offers support for markdown and an autosave feature.
- Common text editing features like text search, file drag-and-drop, and spell checking are available.
- Unique features such as document preview in grid layout, reading time, and document archiving are also available.
- It is the only editor I’ve found that has built-in integration with Medium.com and Write.as.
- You can also easily export your document to HTML, Docx, and even PDF with just one click.
- It offers various color schemes, including classic, cobalt, kate, norka (default), and norka dark.
It’s nearly better in every aspect compared to the other lightweight text editor, with just one annoyance: as of writing this article, it’s only available for installation as a Flatpak package, but I hope to see other alternatives in the future.
How to Install Norka on Linux
At the time of writing this article, it’s only available for installation as a Flatpak package, so if you have Flatpak installed on your system, then simply execute the following command to begin its installation.
$ flatpak install flathub com.github.tenderowl.norkaHow to Use Norka on Linux
Once the installation is complete, you can locate and launch it from the application menu.

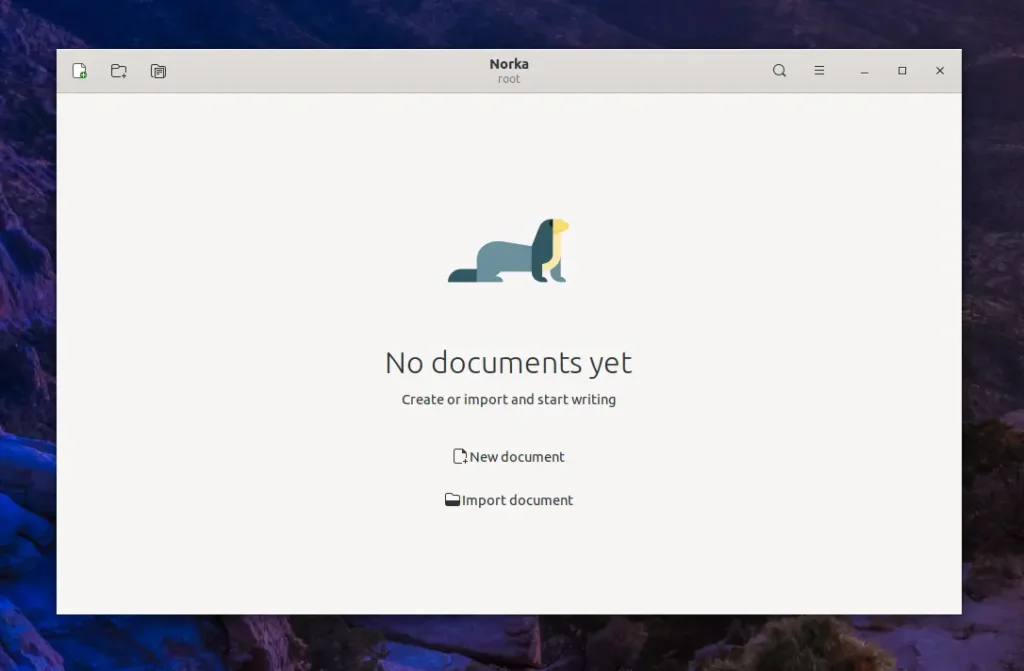
Once launched, you will interact with the following Norka window, where you can begin your editing journey.

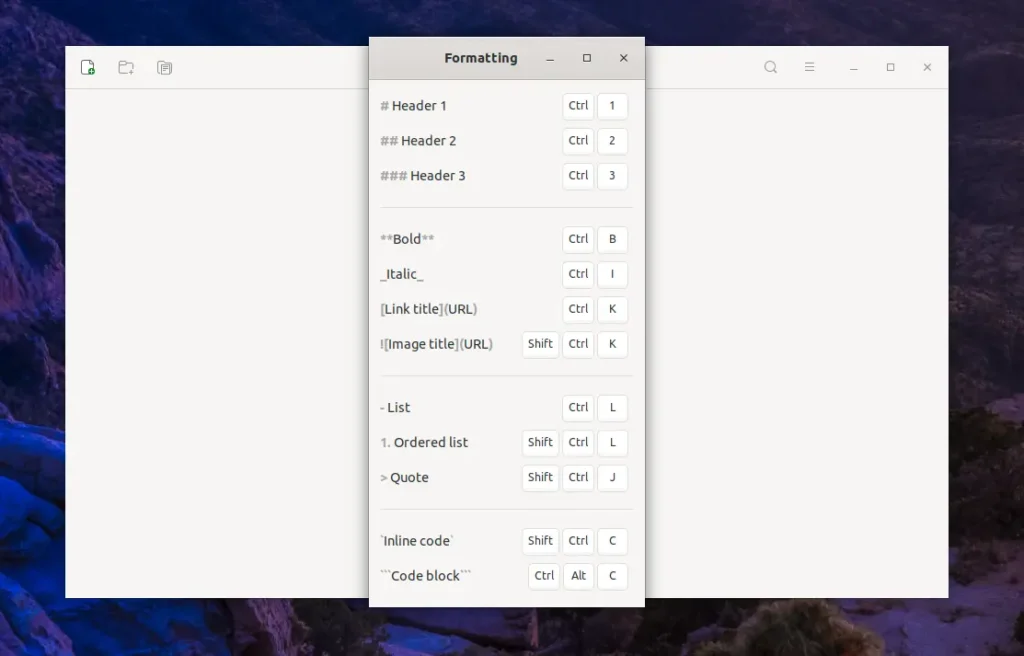
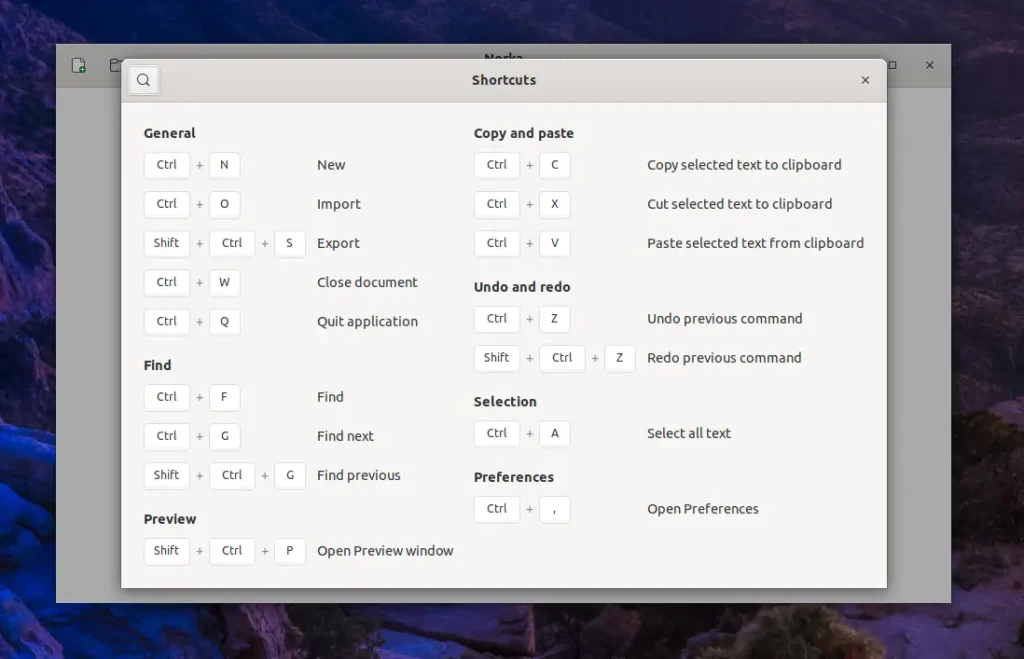
I don’t go further explaining every nit of this text editor, as it only took me 30 seconds to understand the complete functionality. But I suggest you check out its markup shortcuts and keyboard shortcuts, as they will later improve your editing experience.
So, for you, I’ve already attached the picture of the Markup shortcuts below.

Here is a picture of keyboard shortcuts.

If I were to offer my recommendation, I would advise against making any changes to the settings, as they are already optimal. And if you want to apply different color schemes, you can do so in the settings. But as someone who loves using the Dark theme, I also loved the Norka Light theme, so I haven’t changed it.
In the future, if you wish to remove it from your system, you can quickly do so by executing the following command:
$ flatpak uninstall com.github.tenderowl.norkaHere, I’ll end this article, but if you have any questions or queries related to the topic, then do let me know in the comment section.
Till then, peace!


