We wrote an article a few days ago about the tuptime command, which is used to view the historical and statistical records of the uptime command.
In this article, we will discuss another similar utility named uprecords, which is used to record and keep track of Linux system uptime during every session.
The output of this command gives a summary of historical uptime records, like how long the system has been up on each session, the highest uptime, when the system has been rebooted, etc.
Stick with this article to learn each and everything about this tool using its options (with practical examples).
Tutorial Details
| Description | Monitor Linux System Uptime Using Uprecords |
| Difficulty Level | Low |
| Root or Sudo Privileges | No |
| OS Compatibility | Ubuntu, Manjaro, Fedora, etc. |
| Prerequisites | uptimed |
| Internet Required | Yes |
How to Install Uprecords in Linux
It is a third-party tool that is not part of the Linux distribution and must be installed separately using the Linux package manager.
Note that the uprecords tool is part of a package called uptimed, and you can install it on your Linux system by running any of the following commands:
$ sudo apt install uptimed                                                                      #On Debian and Ubuntu
$ sudo dnf install uptimed                                                                      #On Red Hat and Fedora
$ sudo pacman -S uptimed                                                                    #On Arch and Manjaro
During installation, it will create and set up a systemd daemon (or service) that will keep track of how long each session of Linux has been running.
Execute the following command to ensure the service is running on your Linux system:
$ sudo systemctl status uptimedOutput:
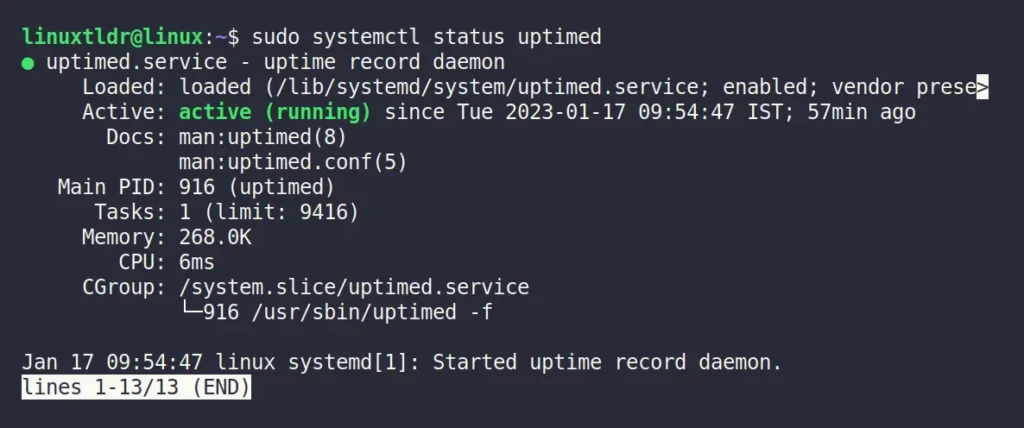
In the above picture, it’s clear that this daemon is active and running perfectly fine; however, in your case, if it’s stopped, then start it using the following command:
$ sudo systemctl start uptimedOnce the uptimed is installed and configured, you can use the uprecords command to check the historical record of your system uptime.
Usage of the Uprecords Command
The uprecords command takes one argument as an option (optional).
$ uprecords [OPTION]Most of the time, you will run this command without any options, in which case you will see the following:
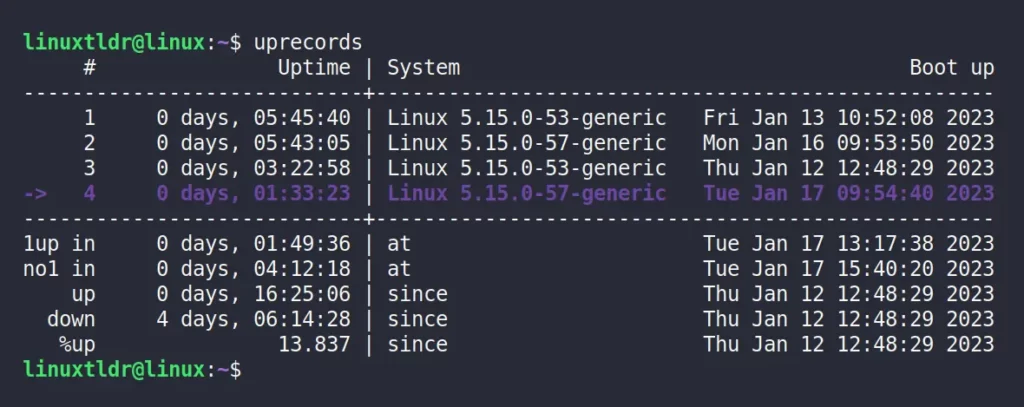
As you can see from the above picture, this command shows the output in tabular format with additional information about the boot time, duration, and Linux kernel version. The arrow mark in the column indicates the most recent uptime.
Display the N Number of Entries in the Output
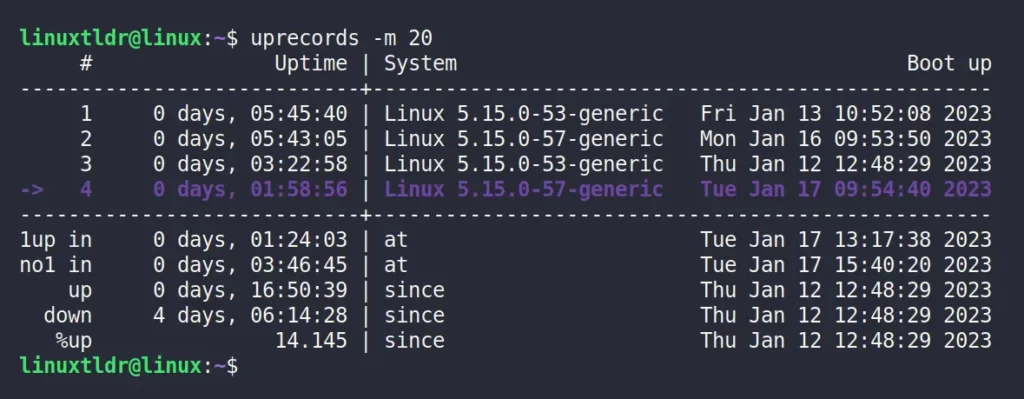
By default, ten entries are shown in the output when this command is executed without any options, but that can be changed to “N” number of entries using the “-m” flag.
$ uprecords -m 20Output:
Sort the Output Based on Boot Time
The “-b” flag will output the Linux uptime information sorted by boot time.
$ uprecords -bOutput:

Or, use the “-B” flag to reverse sort the boot time, which will show you the most recent uptime.
$ uprecords -BOutput:

Display the Downtime in the Output
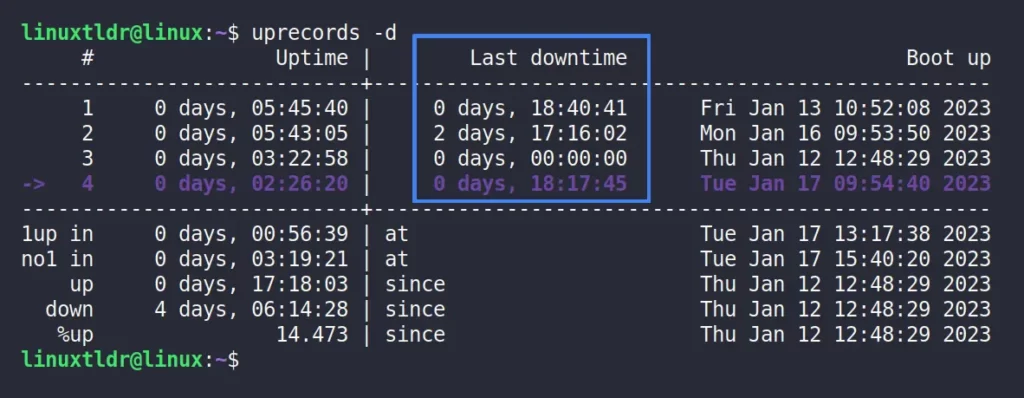
The “-d” flag will display the downtime between reboots instead of the kernel version.
$ uprecords -dOutput:
Don’t Omit Any Information
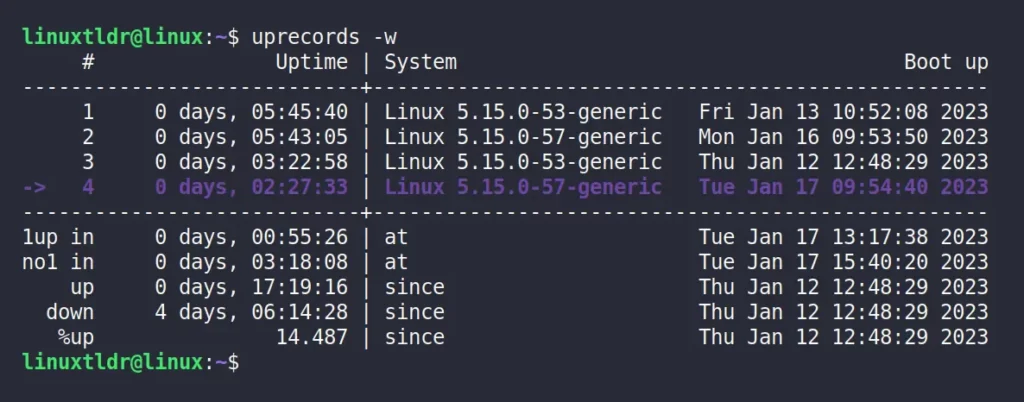
The output is fitted based on the terminal width, which cuts the results that do not fit in the output. To avoid truncating, use the “-w” flag.
$ uprecords -wOutput:
That’s all the necessary examples with the uprecords option that are important for Linux users to know.
However, this article cannot be ended without showing you the removal section.
How to Uninstall/Remove Uprecords in Linux
Execute any one of the following commands to uninstall/remove this tool from your Linux system.
$ sudo apt remove uptimed                                                                      #On Debian and Ubuntu
$ sudo dnf remove uptimed                                                                      #On Red Hat and Fedora
$ sudo pacman -R uptimed                                                                       #On Arch and Manjaro
If you have any questions or queries related to this topic, then feel free to ask them in the comment section.
Till then, peace!


