
WordPress is one of the most popular and user-friendly CMS (content management systems) available on the market and can be easily used by coders and non-coders.
The biggest reason for its popularity can be said to be its intuitive admin interface and plugin support, which extend the built-in functionalities even further.
However, if you are a command-line geek and want to manage your WordPress site using the command-line interface, then you can use the WP-CLI command-line tool.
In this article, you will learn how to install and use the WP-CLI to handle multiple WordPress sites and install or update the WordPress backend core or plugins, including troubleshooting and restoring an unresponsive WordPress frontend.
Tutorial Details
| Description | WP-CLI Tool |
| Difficulty Level | Moderate |
| Root or Sudo Privileges | Yes |
| OS Compatibility | Ubuntu, Manjaro, Fedora, etc. |
| Prerequisites | wp |
| Internet Required | Yes |
What is the WP-CLI?
WP-CLI is a command-line tool that lets you manage your WordPress site through a command-line interface. This way, you can perform tasks such as installing and configuring WordPress, managing plugins and themes, managing users and content, and so on from the command-line.
The biggest advantage of using this command-line tool is that it offers a fast and efficient way to manage websites. For example, you can make a script to install or remove a group of plugins on multiple WordPress sites all at once.
Another advantage of using this tool is that it allows you to run multiple queries on the database at the same time, such as searching, removing, or replacing specific strings. Beside this, you can easily reset a forgotten admin password without interacting with the database by simply using this tool.
How to Install WP-CLI in Linux
Unfortunately, the Linux repository does not contain this command-line tool, but you can find the binary file on the official site for all Linux distributions, and you can easily install and configure it by following the steps below.
1. Install the wget program in your Linux distribution:
# On Debian or Ubuntu
$ sudo apt install wget

# On Red Hat or Fedora
$ sudo dnf install wget

# On Arch or Manjaro
$ sudo pacman -S wget
2. Download the WP-CLI Phar file:
$ wget https://raw.githubusercontent.com/wp-cli/builds/gh-pages/phar/wp-cli.phar3. Give executable permission to the downloaded file for the logged-in user:
$ chmod +x wp-cli.phar4. Move the file to the “/usr/local/bin” directory to make it accessible from everywhere:
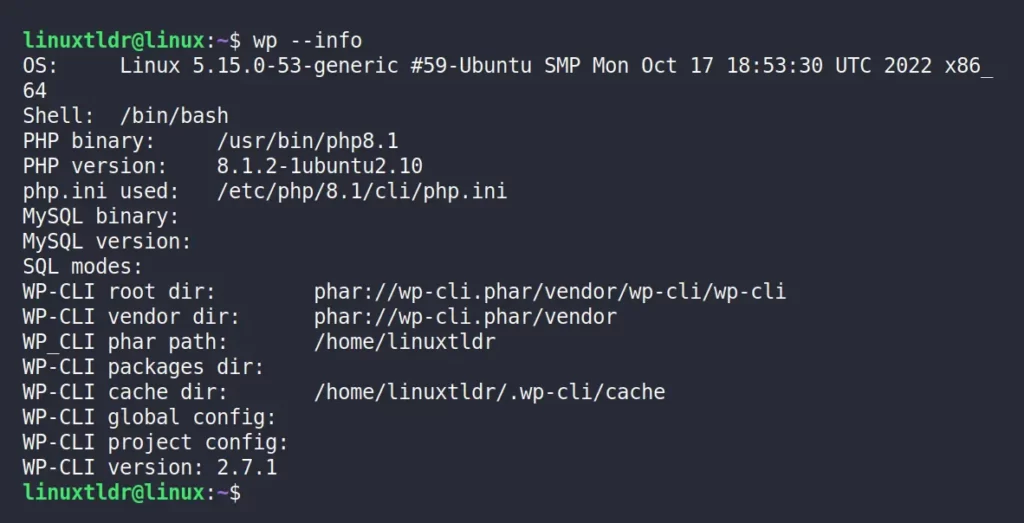
$ sudo mv wp-cli.phar /usr/local/bin/wp 5. To verify the WP-CLI tool is accessible and everything is done correctly, run:
$ wp --infoOutput:
Once the existence of this tool is confirmed, you can update the binary file in the future by executing the following command:
$ sudo wp cli updateNow, before jumping to the command-line usage, I suggest you install the WP-CLI tab completion tool by following the next section.
How to Install WP-CLI Tab Completions
The WP-CLI bash completion script allows you to use the “Tab” key to automatically finish the WP-CLI command, and it gives you a list of all available commands related to the provided strings.
To install the WP-CLI bash completion, run the following commands in sequence:
# Download the script
$ wget https://raw.githubusercontent.com/wp-cli/wp-cli/v2.6.0/utils/wp-completion.bash

# Add the downloaded script to your shell configuration file
$ cat wp-completion.bash >> ~/.bashrc

# Reload the shell configuration file using the source command to reflect the changes
$ source ~/.bashrc
Now, let’s see a few examples of the command-line usage of this tool.
Usage of the WP-CLI Command in Linux
As I mentioned at the beginning of this article, this command-line tool can manage WordPress sites, plugins, themes, users, content, database management, and so on.
Installing and Configuration WordPress Using WP-CLI
Download the WordPress CMS using the following command:
$ wp core downloadOutput:

Now you need to configure the “wp-config.php” file in the WordPress directory and set the database name, database user, and database password by using the following command:
$ wp core config --dbname=database_name --dbuser=database_user --dbpass=database_passwordLastly, you need to provide the other details of your site, such as its title, admin username, admin password, and admin email, by using the following command:
$ wp core install --url=example.com --title=LinuxTLDR --admin_user=admin --admin_password=password [email protected]To check if WordPress is installed, run:
$ wp core is-installedTo check for an available update, run:
$ wp core check-update If there is an update available, then execute the following command to update WordPress to its latest release:
$ wp core updateTo check the WordPress version, run:
$ wp core version To check the database status, run:
$ wp core update-dbNow, let’s see how you can manage the plugins using this command-line utility:
Managing WordPress Plugins Using WP-CLI
This command-line utility allows you to easily install any plugin from the WordPress plugin store by passing its name as an argument to the following commands:
However, before you install them, you should always check what plugins you already have installed and activated by executing the following command:
$ wp plugin listYou can now install a new plugin by specifying its name as an argument to the following command:
$ wp plugin install plugin-nameTo activate the installed plugin, run:
$ wp plugin activate plugin-nameYou can activate all the plugins at once with one single command:
$ wp plugin activate --allTo update the plugin, run:
$ wp plugin update plugin-nameYou can update all the plugins at once with one single command:
$ wp plugin update --allTo deactivate the plugin, run:
$ wp plugin deactivate plugin-nameYou can deactivate all the activated plugins at once with one single command:
$ wp plugin deactivate --allDelete the deactivated plugin with the following command:
$ wp plugin delete plugin-nameYou can delete all the deactivated plugins at once with one single command:
$ wp plugin delete --allNow, let’s see how you can manage the themes using this command-line utility:
Managing WordPress Themes Using WP-CLI
Similarly to the plugin, any themes from the WordPress theme store can be easily installed and managed by specifying their name as an argument to the following commands:
First, execute the following command to get the list of installed and activated themes:
$ wp theme listThen, install your favorite theme by specifying its name as an argument to the following command:
$ wp theme install theme-nameTo activate the installed theme, run:
$ wp theme activate theme-nameTo update the activated theme, run:
$ wp theme update theme-nameTo delete the deactivated theme, run:
$ wp theme delete theme-nameYou can delete all the deactivated themes with one single command:
$ wp theme delete --allNow, let’s learn how to manage WordPress users using this command-line utility.
Managing WordPress Users Using WP-CLI
In WordPress, there are five types of user roles, followed by:
- Administrator – Ability to access everything within a single site.
- Editor – Ability to add plugins and manage posts, including those of other users.
- Author – Somebody who can publish and manage their own post.
- Contributor – Somebody who can write and manage their own posts but cannot publish them.
- Subscriber – Only able to manage their own profile.
To get detailed information about each of these roles, check out this page.
Now, if you want to create a new user with any one of the following roles, then specify the user information, like their username, email address, and role, in the following command:
$ wp user create user_name [email protected] --role=authorOutput:

To update the user password, run:
$ wp user update user_name --user_pass=passwordTo delete the user, run:
$ wp user delete user_nameNow, let’s see how you can manage your content (or posts) using this command-line utility.
Managing WordPress Content Using WP-CLI
It’s true, you can easily manage the WordPress content using the WP-CLI command-line tool, but you will be unable to access (or use) the WordPress block editor.
To list all the existing posts, run:
$ wp post listTo create a new piece of content (or post), specify its title and content with the following command:
$ wp post create --post_type=post --post_title='A sample post' --post_content="This is a sample post."Output:

To update the post, run:
$ wp post update 7 --post_content='This is an updated sample post.'To delete the post, run:
$ wp post delete 7Now, let’s learn how you can manage databases using this command-line tool.
Managing WordPress Database Using WP-CLI
The following command will use the “mysqlcheck” utility with the “--optimize=true” option and the WordPress database credentials to optimize the database:
$ wp db optimizeInstead of optimizing, you can repair your database by issuing the following command:
$ wp db repairIf you want to run MySQL queries, you can do so directly using this command-line tool, followed by:
$ wp db query 'SELECT * FROM wp_users'The above command will list all the existing users using the MySQL “SELECT” query.
Export/Import WordPress Using WP-CLI
To export the posts, terms, authors, comments, and attachments to an XML file, run:
$ wp exportThe XML file will be exported in your current working directory with the site name and date in “yourwebsitename.WordPress.2023-01-01.xml” format.
To import the exported XML file into a freshly installed WordPress site, install and activate the WordPress Importer plugin using the following command:
$ wp plugin install wordpress-importer --activateOnce the plugin is installed, you can use the “--authors” flag to import the XML file you exported with a new author name:
$ wp import yourwebsitename.WordPress.2023-01-01.xml --authors=user_nameSo, let’s end this article here.
Wrap Up
I’ve got a lot of examples with different use cases for this command-line utility, but including them all would increase the size of this article and also become boring for some users.
Although most of the examples will be explained in separate articles, if you want me to write on a specific topic, then let me know in the comment section.
Till then, peace!


