
In Linux, “zip” and “unzip” are two popular command-line utilities that are used to create or extract Zip archives, respectively.
These utilities are capable of efficiently compressing and decompressing large files or directories, all while ensuring the preservation of their original file structures, permissions, and metadata.
This kickstart guide will teach you the distinctions between Zip and Tarball and the installation of Zip and Unzip on your chosen Linux system, with command examples.
Tutorial Details
| Description | Zip and Unzip |
| Difficulty Level | Low |
| Root or Sudo Privileges | No |
| OS Compatibility | Ubuntu, Manjaro, Fedora, etc. |
| Prerequisites | – |
| Internet Required | No |
Difference Between Zip and Tarball
When you begin your Linux journey, you will find out that there are two types of tools, Zip and Tarball (or tar), used to provide archive (or compressed) files.
While the common differences between them are quite predictable, they vary in terms of extensions, features, and command-line options.
What sets them apart most significantly is their compression algorithm. Zip utilizes the Zip compression algorithm, a lossless method designed to minimize file size while safeguarding data integrity.
However, Tarballs rely on external compression tools such as “gzip” or “xz” to generate compressed tar archives (e.g., “tar.gz” or “tar.xz” files), as they lack a native compression algorithm.
How to Install Zip and Unzip on Linux
Although widely available in Linux distributions, the “zip” and “unzip” utilities might be absent in rare cases. In such situations, select the suitable command for your distribution to install them.
Installing Zip and Unzip on a Debian or Ubuntu System
$ sudo apt install zip
$ sudo apt install unzip
Installing Zip and Unzip on a Red Hat or Fedora System
$ sudo dnf install zip
$ sudo dnf install unzip
Installing Zip and Unzip on an Arch or Manjaro System
$ sudo pacman -S zip
$ sudo pacman -S unzip
Installing Zip and Unzip on an OpenSUSE-Based System
$ sudo zypper install zip
$ sudo zypper install unzip
Verify the Installation
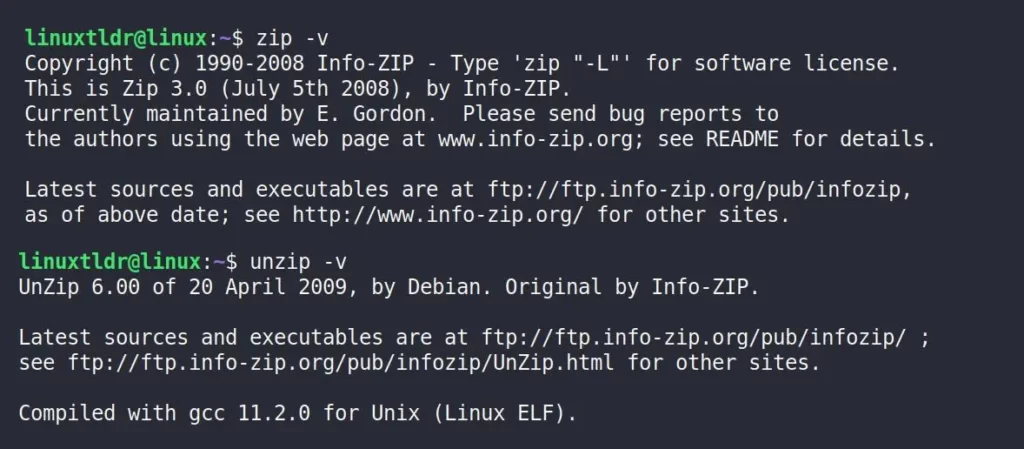
After completing the installation, you can ensure command accessibility via the terminal by executing the following command:
$ zip -v
$ unzip -v
Output:
Installation is complete. Let’s now explore a few examples showcasing the usage of the “zip” and “unzip” commands.
How to Use Zip and Unzip Commands on Linux
Please note that while there are numerous options available for the “zip” and “unzip” commands, I’ve focused on including only the most common and essential ones in this guide, making it easier for beginners to grasp. Let’s begin with…
Usage of the Zip Command
Here are some practical examples of how to use the “zip” command:
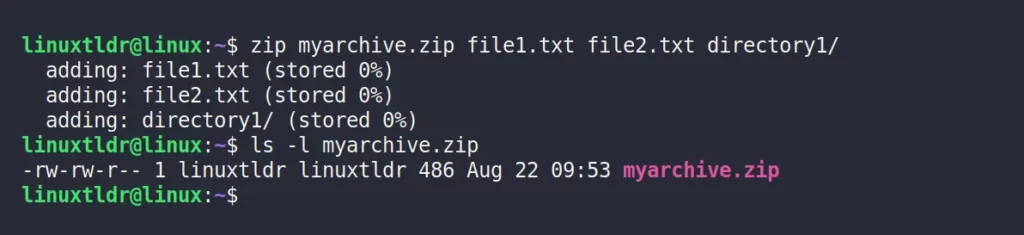
Create a Zip Archive
To create a Zip archive, simply provide the desired name for the archive file as the initial parameter, followed by a list of the files and directories you wish to include within the archive.
directory1/“.$ zip myarchive.zip file1.txt file2.txt directory1/Output:
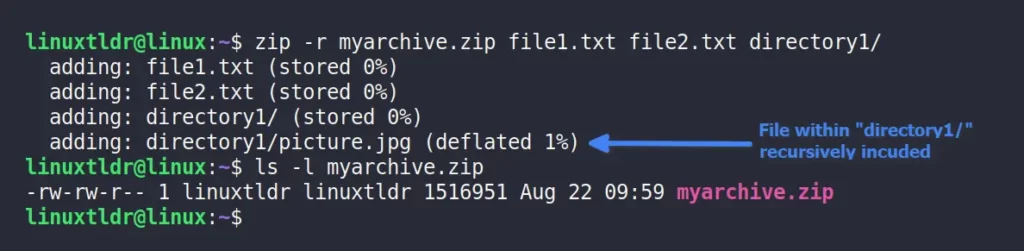
Including Subdirectories
Traditionally, the “zip” command excludes files and subdirectories within the specified directory.
However, by using the “-r” flag, you can recursively include both file and subdirectory content in the archive.
$ zip -r myarchive.zip file1.txt file2.txt directory1/Output:
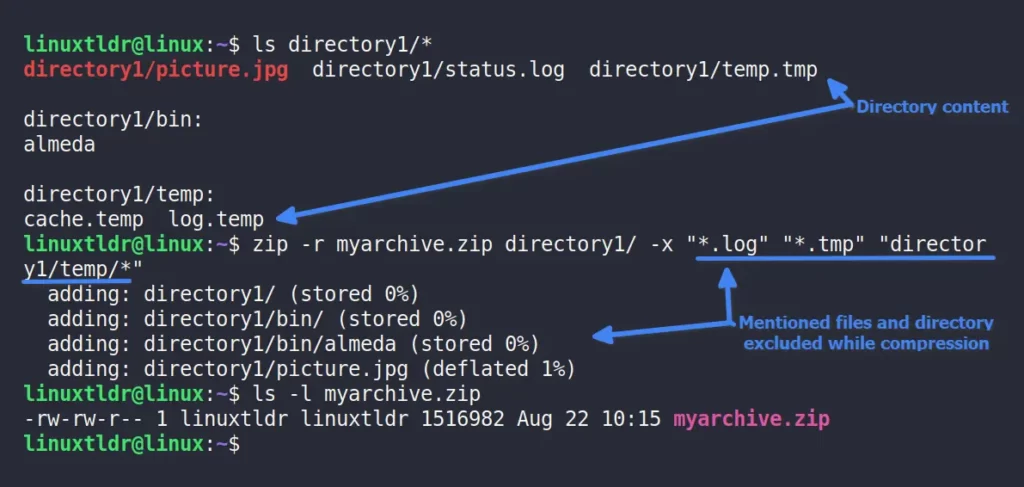
Excluding Files/Directories
If the directory you intend to archive contains specific files (such as “.log” and “.tmp“) that you do not want to include in your archive.
You can exclude these specific files or directories from the archive using the “-x” flag.
$ zip -r myarchive.zip directory1/ -x "*.log" "*.tmp" "directory1/temp/*"Output:
Verbose Output
To see a detailed list of files and directories that are being added to the archive, use the “-v” flag.
$ zip -rv myarchive.zip directory1/Output:

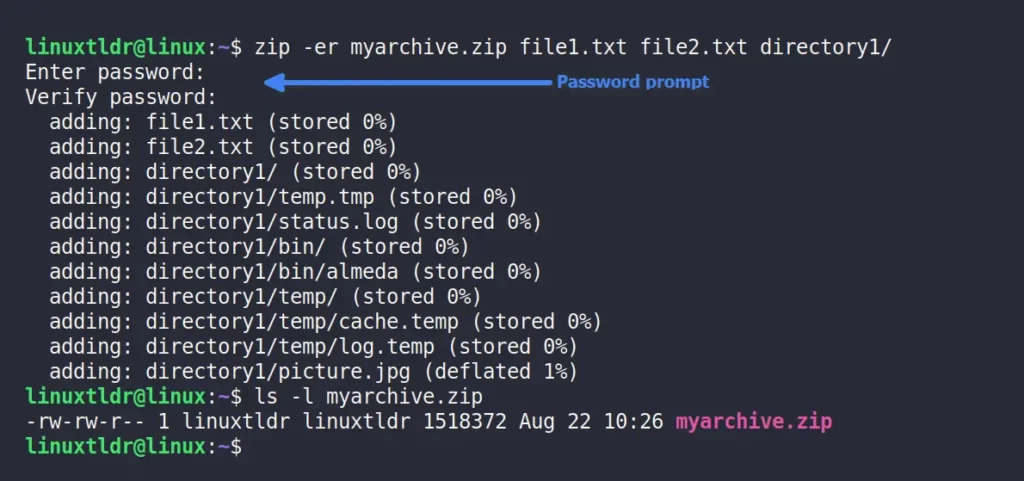
Encrypting the Archive
You can password-protect the zip archive using the “-e” flag; it will prompt you to enter a password before the archive is created.
$ zip -er myarchive.zip file1.txt file2.txt directory1/Output:
Updating an Existing Archive
If you want to add new files or directories to an existing archive, you can use the “-u” flag.
$ zip -u myarchive.zip newfile.txtOutput:

Viewing Archive Contents
To list the contents of an archive without extracting it, use the “-sf” flag with the “zip” command.
$ zip -sf archive.zip

#OR

$ unzip -l myarchive.zip
Output:

Usage of the Unzip Command
Here are some practical examples of how to use the “unzip” command:
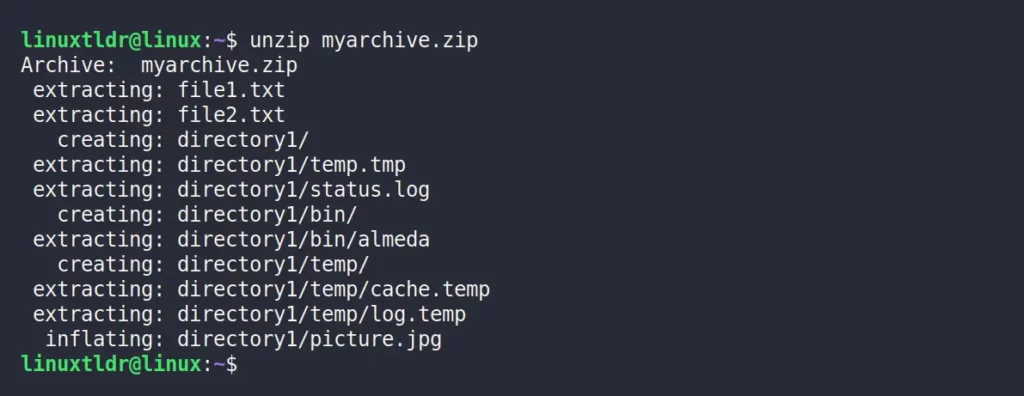
Basic Extraction
Use the following command to extract all files and directories from a Zip archive named “myarchive.zip“.
$ unzip myarchive.zipOutput:
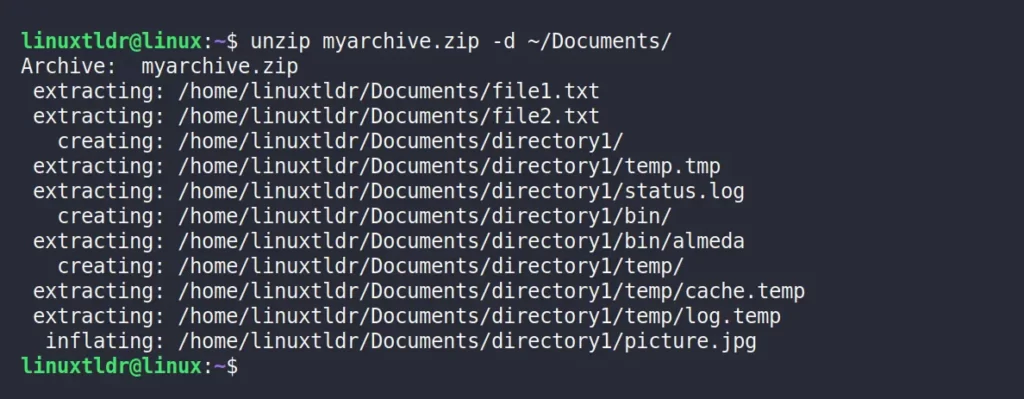
Extract to a Specific Directory
Using the “-d” flag, you can specify the directory where the extracted files will be placed.
$ unzip myarchive.zip -d ~/Documents/Output:
Extract Specific Files
To extract particular files or directories from the archive, ensure you specify them simultaneously.
.txt” files, you can employ wildcards. Utilize “*.txt” to exclusively extract files with this extension.$ unzip myarchive.zip file1.txt file2.txtOutput:

Excluding Files
You can exclude certain files or directories from being extracted using the “-x” flag.
$ unzip myarchive.zip -x file2.txt directory1/*Output:

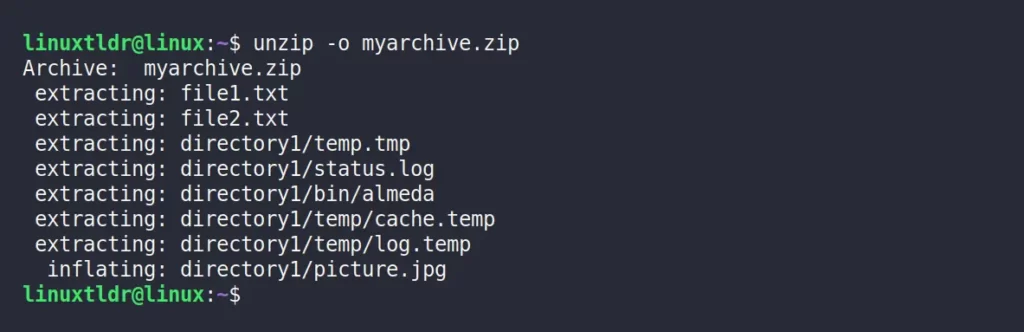
Overwrite Existing Files
Unzip’s default behavior avoids overwriting files or directories at the target location if they already exist, but you can enforce overwriting by using the “-o” flag.
$ unzip -o myarchive.zipOutput:
Quiet Mode
To suppress all output except for error messages, you can use the “-q” flag:
$ unzip -q myarchive.zipOutput:

That’s it for now.
Final Word
The process of compressing and decompressing files and directories can be a tedious task, particularly within the Linux environment, where an array of tools exist for achieving the same task.
Yet, I tried to make this article simple and easier for beginners to grasp. If you have any questions or queries related to this article, then feel free to ask them in the comment section.
Till then, peace!


