
This article focuses on explaining different software packaging concepts, highlighting what AppImage is, its installation, and its removal from your Linux system.
Traditionally, the software packages are shipped in DEB packages for Debian or Ubuntu-based distributions and RPM packages for RHEL and Fedora-based distributions, but there is a problem with this approach.
While it’s convenient for end-users, it demands twice the effort for developers to create and package software in both DEB and RPM formats.
Introduction to Sandboxed Technologies
In 2015 and 2016, both Fedora’s Flatpak and Canonical’s Snap were introduced to address this issue, offering robust sandboxing technology that packages all the necessary software components together, enabling them to run across various distributions.
This article isn’t focused on them, but for those unfamiliar, both are impressive yet face different criticisms. For instance, Flatpak has fewer packages compared to Snap, and Snap is criticized for reasons such as Canonical’s monopoly.
One of my personal concerns with sandboxed technologies is the need for an additional program, specifically a daemon, to continuously run in the background, providing support for them and various other functionalities.
Meanwhile, another packaging technology (non-sandboxed) is gaining popularity and doesn’t need any additional software (or daemon) for support, unlike Flatpak and Snap.
Introduction to AppImage
An AppImage is a self-sufficient software bundle that contains an application along with all the required components, such as libraries and dependencies, necessary for its execution and does not require any daemon to run in the background.
This means you can easily download an AppImage, make it executable, and run the app without needing to install it or worry about compatibility issues.
From the developer’s end, it’s also convenient to efficiently package their software with all the necessary components, ensuring it can run smoothly on various Linux distributions without any complications.
Check out the next section to learn more about the features offered by AppImage.
AppImage Features
AppImages have several features that make them popular among Linux users. Here’s a list of some key features:
- Portability
- Isolation
- Security
- No Root Access
- No Installation required
- Version Control
- Cross-Distribution Compatibility
- Easy Removal
Quite interesting features, right? Now the question is: from where do you download them? To find out, check out the next section.
Where can I download AppImages?
The traditional approach would be to check the desired application website that you want to install and look for the option to download AppImage from their download page.
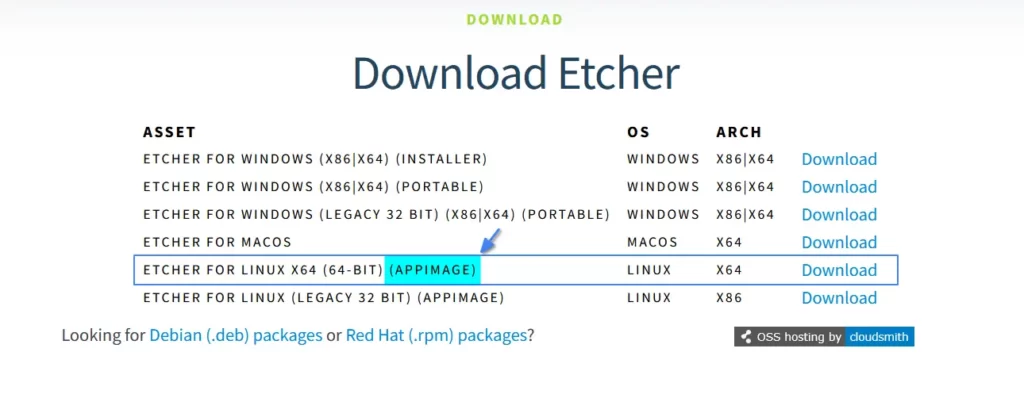
As an illustration, when seeking to install the Etcher program on my Linux system using AppImage, my first action involves visiting their website’s Download page, looking for AppImage, and then downloading it if it’s available.
Alternatively, there is a more simple way to find your favorite application AppImage, by searching for it in this list of AppImages maintained by the AppImage project.
You can also explore other sites like AppImageHub, where you have the opportunity to discover incredible applications and acquire their corresponding AppImage files for download.
How to Use AppImage in Linux
Using an AppImage on Linux is a simple process, generally requiring the following three steps:
- Download your desired AppImage file
- Assign an executable permission
- Run the AppImage
The following is the practical implementation of the above-mentioned steps:
1. Download the AppImage
Revisit the source to download the AppImages section to learn where to download your favorite AppImages you want to use.
For instance, I’ll be using Etcher in this guide, and I’ve already downloaded its AppImage from its official website.
2. Make the AppImage Executable
Typically, an AppImage won’t have executable permission by default. You need to manually assign executable permissions, either using your file manager or from the command line.
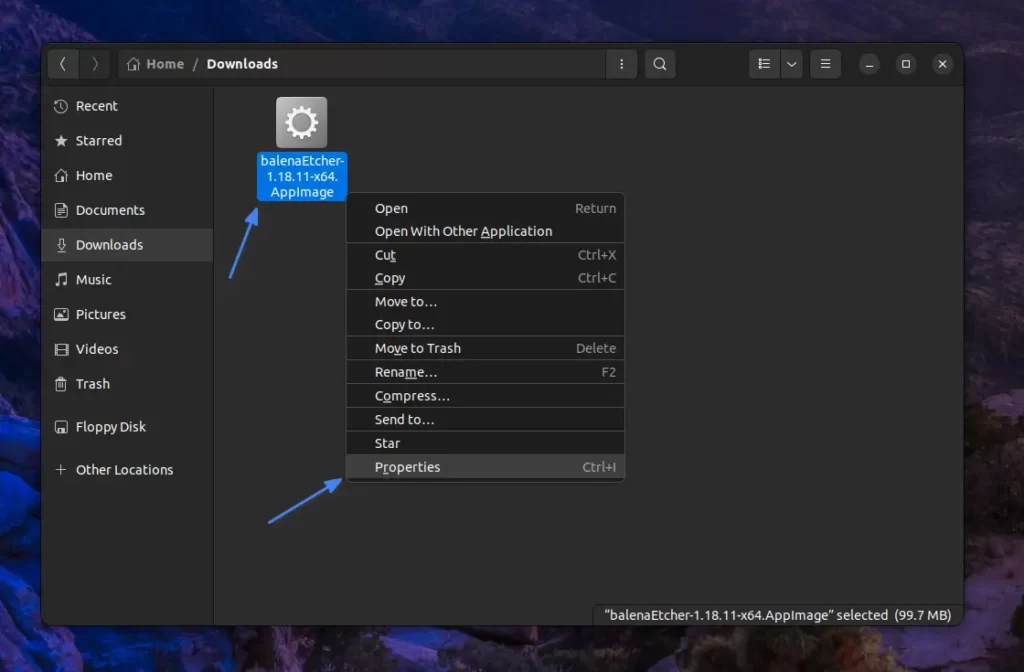
If you favor a graphical approach, start by opening your distribution’s File Manager, navigating to the download directory where the AppImage is located, and then right-clicking on it to access the Properties.
In the Properties window, navigate to the “Permissions” tab and select the “Allow executing file as program” checkbox.
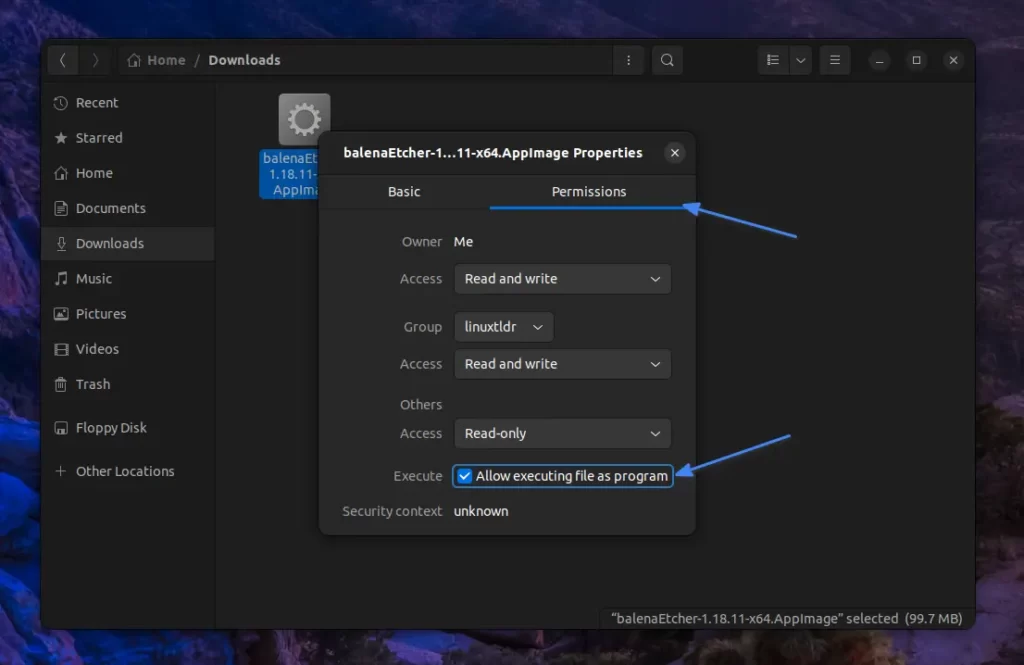
Here, you are done, and you can now close the Properties windows.
Additionally, if you’re comfortable with the command-line interface (CLI), you can easily grant executable permissions to your AppImage with a simple one-line chmod command.
$ chmod +x <APPIMAGE>3. Run the AppImage
Once the AppImage has been made executable, you can easily launch it with a simple double-click, similar to how a Windows user opens an application.
Alternatively, you can also launch it by entering its name in the terminal, like running a shell script, which is useful for inspecting important logs during troubleshooting.
4. Optional: Create a Desktop Shortcut
An AppImage is a self-contained, portable file for Linux that doesn’t require installation on your Linux system. As a result, it doesn’t generate any shortcut files in your system menu or on your desktop.
Therefore, whenever you want to launch an AppImage, you need to go to its location and double-click on it, which is totally time-consuming and unproductive.
To resolve this problem, there is an amazing program known as AppImage Launcher that allows you to integrate your favorite AppImage into your system menu with one click and manage, update, and remove them from there.
If you’re using an Ubuntu-based distribution, you can begin by adding its PPA and then installing it on your Linux system.
$ sudo add-apt-repository ppa:appimagelauncher-team/stable
$ sudo apt update
$ sudo apt install appimagelauncher
Once the installation is complete, you just have to download your desired application AppImage, and simply double-click on it without assigning any executable permissions, as everything will be done by AppImage Launcher.
So, when you double-click, the AppImage Launcher prompt will appear, asking your permission to integrate the AppImage with the system menu.
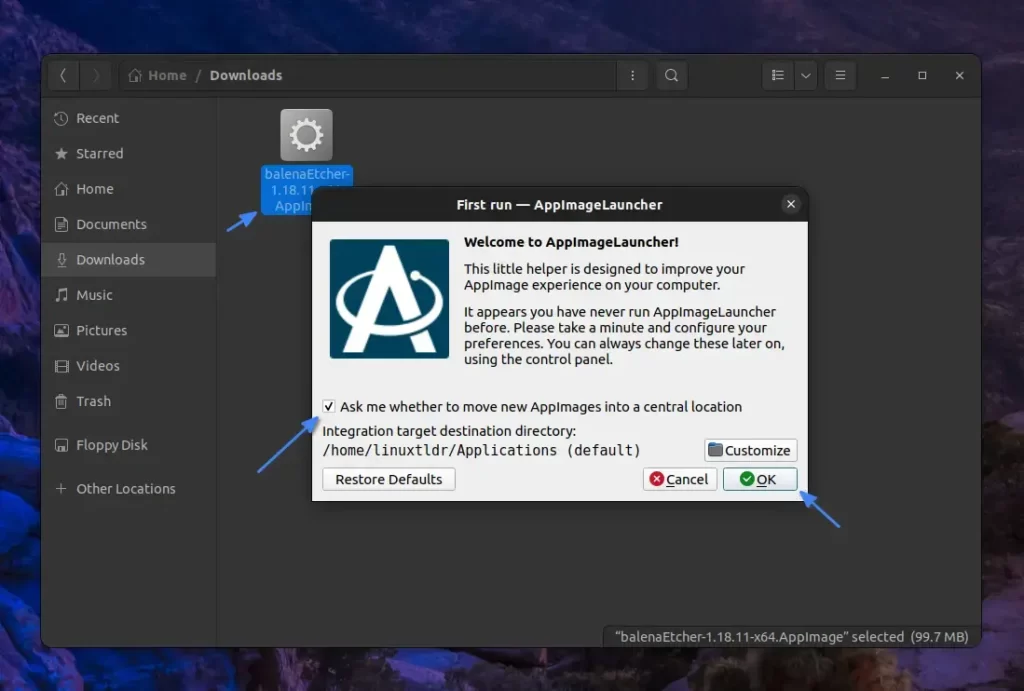
If the “Ask me whether to move…” checkbox is unchecked, the new AppImage will be automatically moved to the specified “Integration target destination directory“. Feel free to adjust these settings as desired and proceed by clicking the Ok button to move on to the next prompt, as shown.
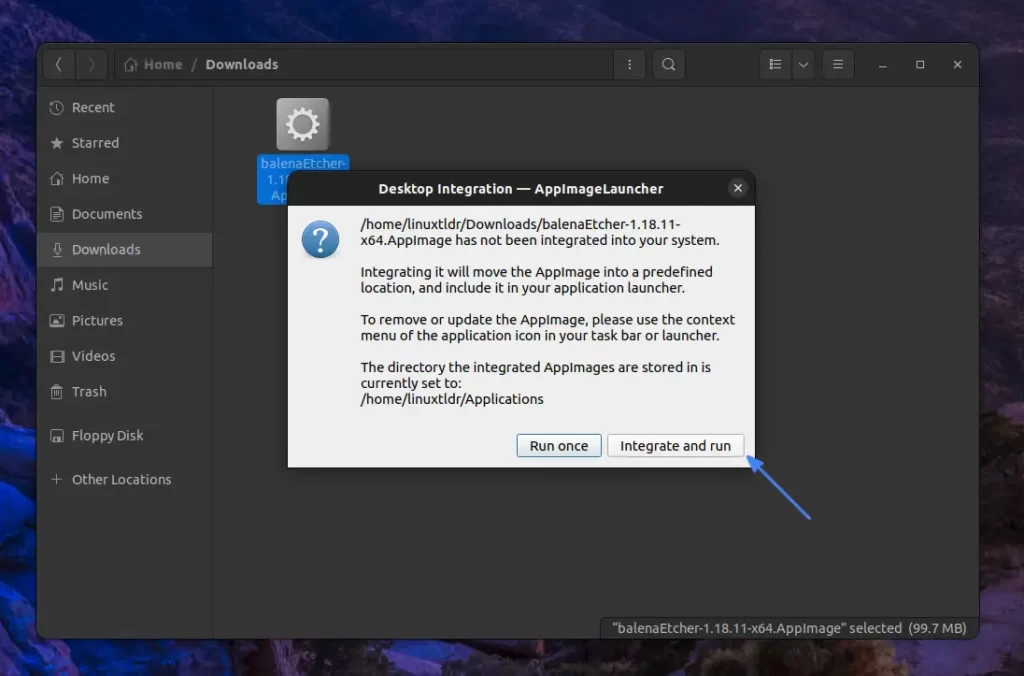
Here, you’ll be prompted to choose “Run once“, which means executing the AppImage without integration, as our focus is on integration, so proceed by clicking the “Integrate and run” button.
Now, your AppImage will be moved to the integration target directory and easily accessible from the system menu.
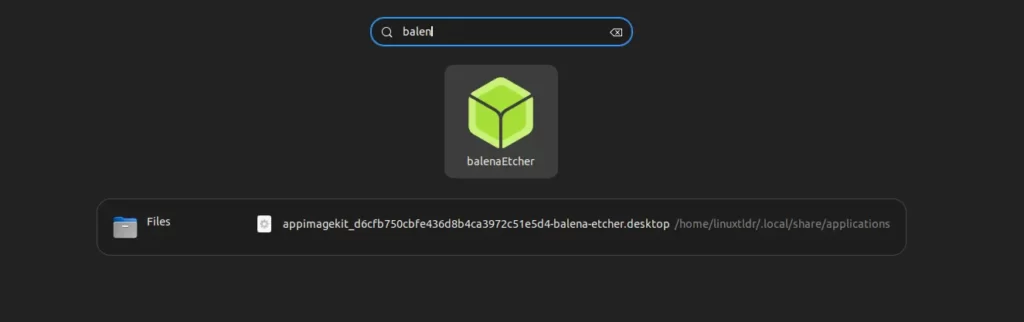
Here, your work is done.
Note that this method is effective for Ubuntu-based users, other Linux distributions have some different apps (LMK if you know in the comment section), and you can also create desktop shortcut files for your AppImage (not recommended).
5. Update the AppImage
Unlike sandboxed technologies such as Flatpak or Snap, AppImage does not rely on a continuous background daemon for updates. Instead, updates are only possible through the application itself after it has been released.
If the update is available and the developer has enabled the option to notify users, you’ll see a prompt within the application, ready for your one-click update.
6. Remove the AppImage
If you want to remove the AppImage, simply delete the AppImage file. This will uninstall the application since all its files are contained within the AppImage itself, leaving no residual files or configurations on your system.
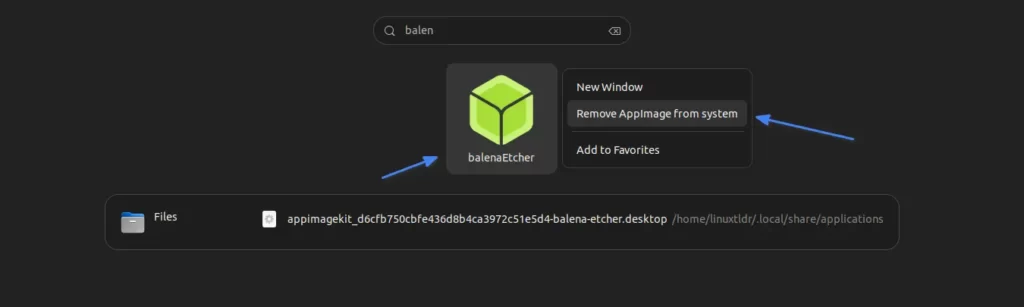
If you’ve integrated the AppImage with the AppImage Launcher, your application may still show up in the system menu. To remove it, right-click on the application and choose the “Remove AppImage from the system” option.
Final Word
I hope you’ve understood the AppImage use case. Keep in mind that occasionally, AppImages may encounter errors due to missing libraries or dependencies. This typically occurs when the AppImage is poorly managed and developers forget to include these components.
When this happens, immediately inform the developer to resolve this issue, and other problems like FUSE can be easily resolved.
Now, if you have questions or queries related to the topic, feel free to tell us via the comment section.
Till then, peace!


AppImage is good but not used by many 🙁
True