
As Linux users, we primarily rely on the Linux terminal and prefer to use GUI alternatives to the CLI like Ranger (a CLI based file manager) or w3m (a CLI based web browser).
In the ongoing buzz of LLM models like ChatGPT, accessing them via a web browser is required. However, a GitHub user name 0xacx created a project called chatGPT-shell-cli to make it easier to access ChatGPT prompts via the CLI.
In this article, you will learn how to access the ChatGPT Prompt in your Linux terminal.
Tutorial Details
| Description | Access ChatGPT Prompt in your Linux Terminal |
| Difficulty Level | Moderate |
| Root or Sudo Privileges | No |
| OS Compatibility | Ubuntu, Manjaro, Fedora, etc. |
| Prerequisites | Free or Paid OpenAI Account |
| Internet Required | Yes |
What is the ChatGPT-Shell-Cli?
The chatGPT-shell-cli is a lightweight shell script that uses the ChatGPT model “gpt-3.5-turbo” and all other OpenAI models with the “completions” endpoint and the “images/generations” endpoint for generating images.
In layman’s terms, you can access the ChatGPT prompt the same way you do in your web browser. However, you have to keep in mind that this script uses an OpenAI API key, so to use it, you must have an OpenAI free or premium account.
Features
In terms of features, you will have almost all the elements that ChatGPT prompt offers, with a few additional ones listed below.
- Communicate with ChatGPT via terminal.
- Generate images from the text prompt.
- View your chat history.
- List all OpenAI models.
- Set the OpenAI request parameters.
- Pass the input prompt with a pipe, as a script parameter, or in normal chat mode.
With that, let’s check out the installation process.
Installation
There are two ways to install this chatGPT-shell-cli: either using the curl command or manually placing the script file on your system and giving the path to environment variables. Arch users can directly install it from their default package manager.
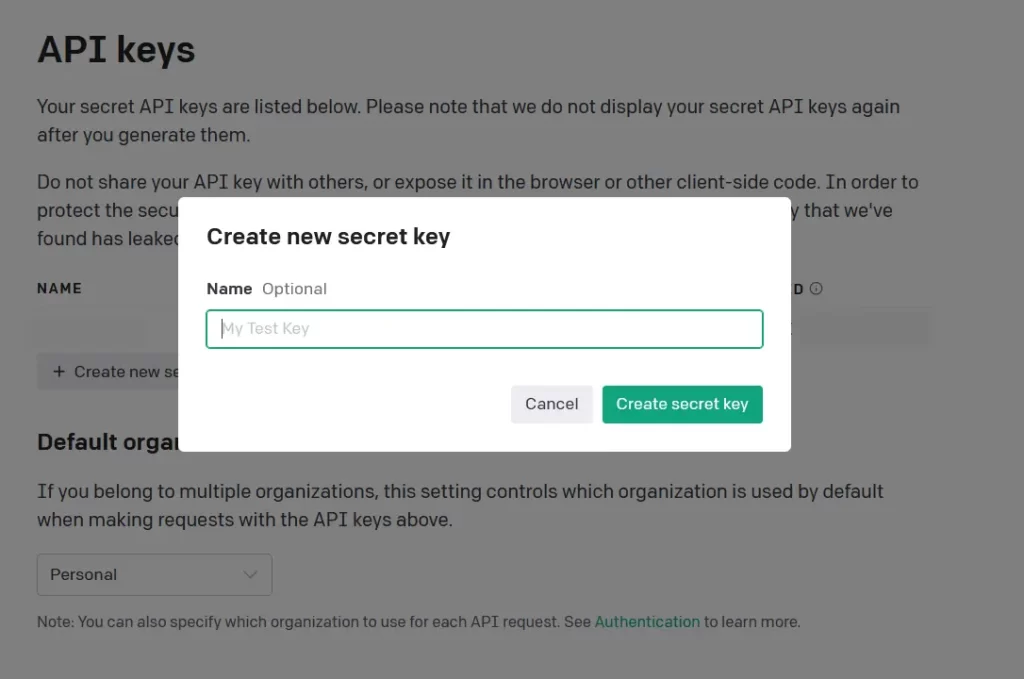
Now, before we start the installation process, let’s create an OpenAI account. If you already have one, then visit OpenAI and click on the “Create a new secret key” button.

Now, it will ask for a name for the given secret key (optional).
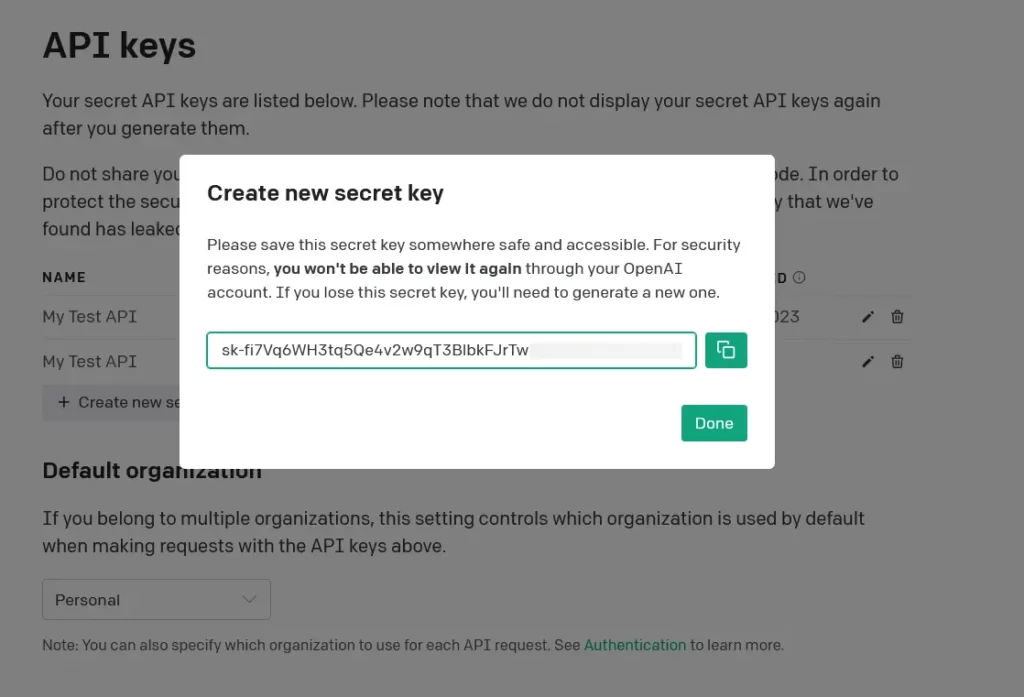
Lastly, it will show you the secret key (only the last time); simply copy and save it somewhere else for later use.
Now, let’s check out all the steps to install this script on your Linux system.
Debian, Ubuntu, or Pop!_OS
Execute the following commands and provide your OpenAI API key when asked (got an error!).
$ sudo apt install curl jq -y
$ curl -sS https://raw.githubusercontent.com/0xacx/chatGPT-shell-cli/main/install.sh | sudo -E bash
And then you need to set your OpenAI API key to use this script.
$ echo "export OPENAI_KEY=[You-OPENAI-API-KEY]" >> ~/.bashrc
$ source ~/.bashrc
Red Hat, Fedora, or AlmaLinux
Run the aforementioned commands, and when prompted, enter your OpenAI API key (got an error!).
$ sudo dnf install curl jq -y
$ curl -sS https://raw.githubusercontent.com/0xacx/chatGPT-shell-cli/main/install.sh | sudo -E bash
And then you need to set your OpenAI API key to use this script.
$ echo "export OPENAI_KEY=[You-OPENAI-API-KEY]" >> ~/.bashrc
$ source ~/.bashrc
Arch, Manjaro, or EndeavourOS
Directly issue the Yay command, and it will install the script for you.
$ yay -s chatgpt-shell-cliAnd then you need to set your OpenAI API key to use this script.
$ echo "export OPENAI_KEY=[You-OPENAI-API-KEY]" >> ~/.bashrc
$ source ~/.bashrc
Manual Installation
While following the installation instructions for Debian and Red Hat based distributions, I encountered the following error.
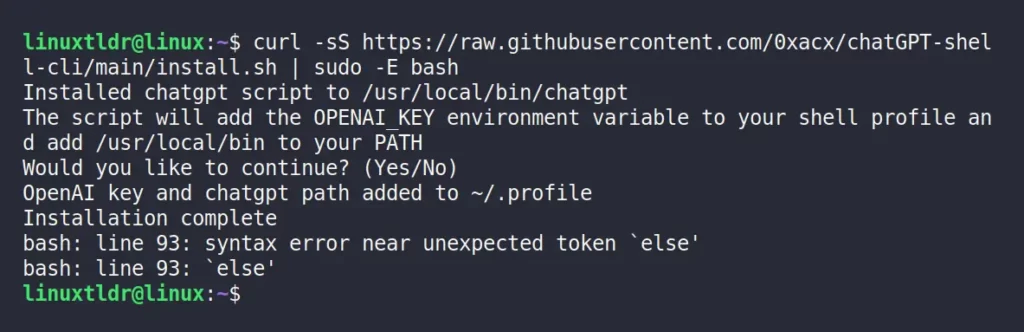
However, if you encounter the same error as me, you can try following the steps below.
1. Install the wget package based on your Linux distribution.
$ sudo apt install wget -y                                                                           #For Debian, Ubuntu, or Pop!_OS
$ sudo dnf install wget -y                                                                           #For Red Hat, Fedora, or AlmaLinux
2. Create a scripts directory in your home directory and download the shell script in that directory using the wget command.
$ mkdir ~/scripts
$ cd ~/scripts
$ wget https://raw.githubusercontent.com/0xacx/chatGPT-shell-cli/main/chatgpt.sh
3. Add the “scripts” directory path to your $PATH environment variable.
$ export PATH=$PATH:~/scripts/4. Add the OpenAI API key to your shell profile by executing the following command:
$ echo "export OPENAI_KEY=[You-OPENAI-API-KEY]" >> ~/.bashrc
$ source ~/.bashrc
Tada!!! You have successfully installed the “chatGPT-shell-cli” script on your Linux system.
Accessing the ChatGPT Prompt in your Linux Terminal
Now, before doing anything else, execute the following command to ensure that everything is working correctly and we are getting the ChatGPT prompt in our terminal.
$ chatgptOutput:

As you can see from the above picture, in my system it’s perfectly installed. Note that when you write something to the prompt in a free account, you might get the following error:
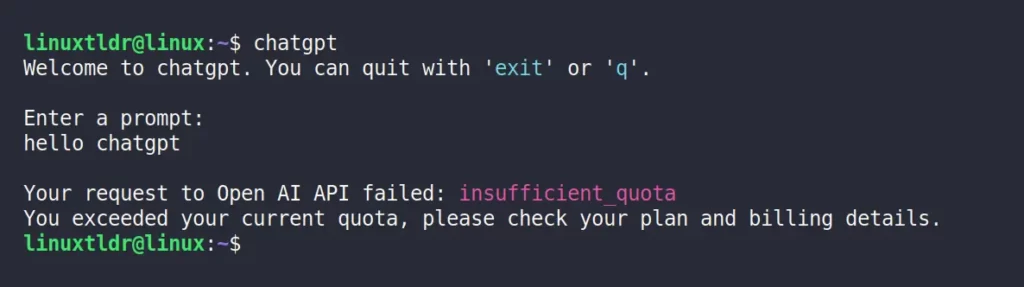
This is the limitation of the free account; we cannot do anything to resolve this except wait or buy the premium membership.
However, if you have access, you can directly start using it. For example, in the following prompt, I’ve asked the ChatGPT to “Write a paragraph about how SystemD is bad, in the style of Donald Trump“, and look what I got in return.
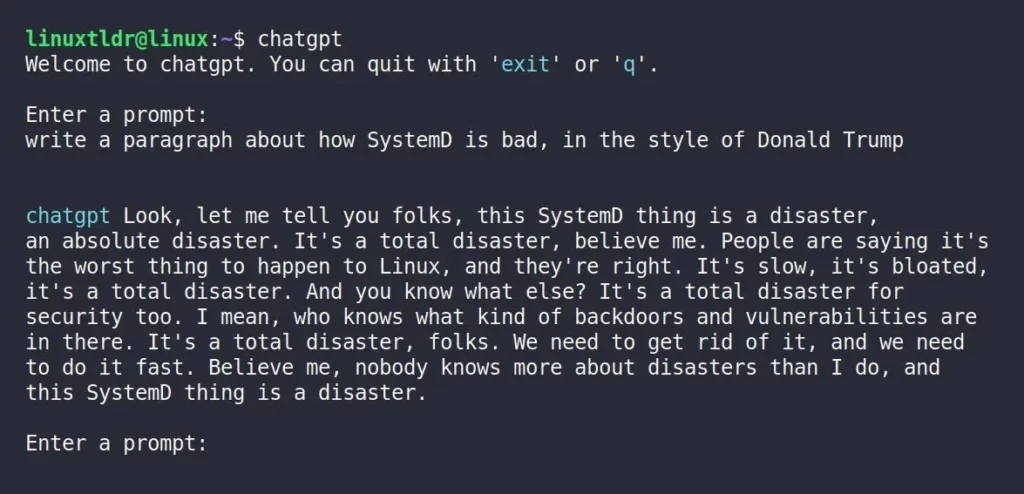
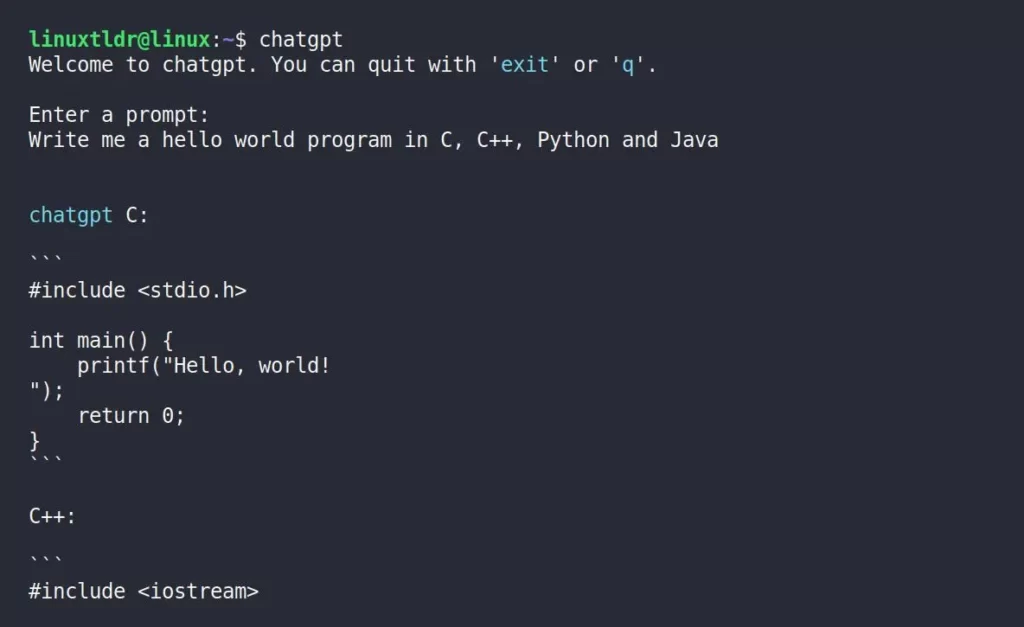
Quite amusing, right? Now in the next prompt, I’ve asked the ChatGPT CLI prompt to “Write me a hello world program in C, C++, Python and Java” and look what I got in return.
Now, you can also use the following commands to perform specific things:
| Commands | Usage |
|---|---|
image: | Generate an image by using the “image: [describe your image]” command. If you are using iTerm, you can view the image directly; otherwise, it will provide you with a URL to view the generated image in the browser. |
history | Prompt you with your chat history. |
models | Give you a list of all the available models for the OpenAI API. |
model: | Check the detailed description of a specific model by using the “model: [model ID shown in models command]” command. |
command: | It will interact with your system, you can use the “command: [list the current directory content]” command as an example. |
You can check commands on your own, as they are easy to do and self explanatory. However, I’ve shown you a few examples of image commands.
So, in the following prompt, I’ve asked ChatGPT to generate an image of “luffy fighting with gold d. roger” and look what I’ve got.
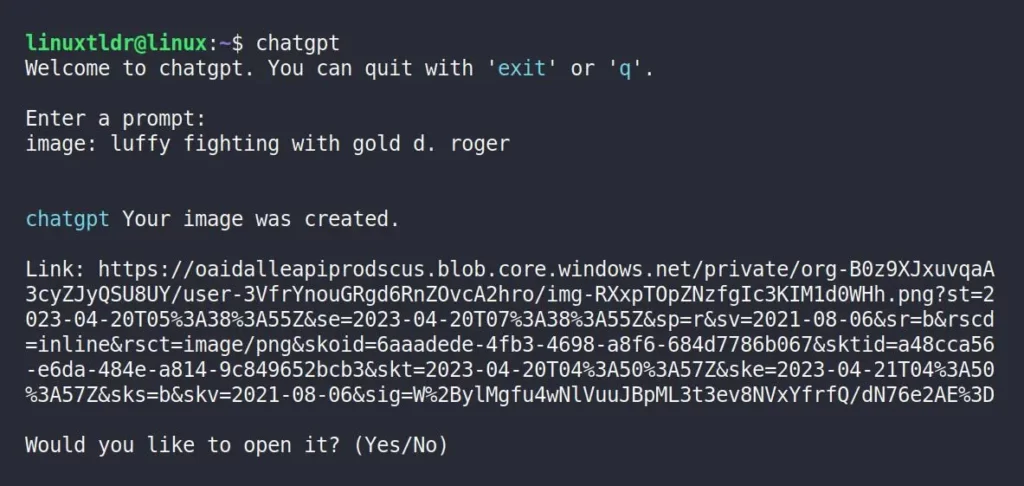
And now look at the following result:

Well, I didn’t expect it, but let’s let it go after all; it’s luffy. In another prompt, I asked ChatGPT to generate a “cat liking its paw”, and this was quite satisfying.
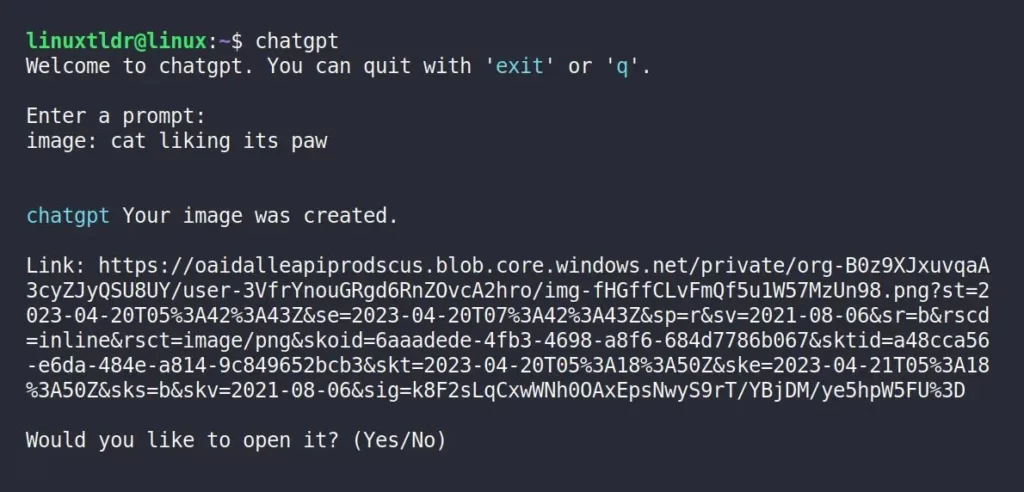
And the result is:

This time, I can fairly say it was quite promising. I’ve tried and tested it until my quota is finished, and it was quite an impressive project.
Like, you can use the following command to pipe your query to the ChatGPT CLI prompt:
$ echo "What is the command to get all pdf files created yesterday?" | chatgptOr, you can pass your query as a command-line argument using the “-p” flag.
$ chatgpt -p "What is the regex to match an email address?"The following are lists of known flags (or parameters) that you can use.
| Flags/Parameters | Descriptions |
|---|---|
“-t” or “--temperature“ | Set an temperature |
“-m” or “--model“ | Specify the model |
“--max-tokens“ | Specify the max number of tokens |
“-s” or “--size“ | Specify the image size (accepted are 256×256, 512×512, 1024×1024) |
“-p” or “--prompt“ | Prompt |
“--prompt-from-file“ | Specify the file containing the prompt in your system |
Now, let’s end this article here.
I hope you find this article interesting; however, if you have any questions or queries related to this topic, feel free to ask them in the comment section.
Till then, peace!


How can I remove the packages after installation?
If you’ve installed it via the installation script on Debian, Ubuntu, RedHat, Fedora, etc., then remove the “
chatgpt” script file from the “/usr/local/bin/chatgpt” location. If you’ve installed it manually, then remove the script from where you downloaded it and delete the added PATH in your shell configuration file.How can I run this with ChatGPT-4?