
The finger is an external command-line tool that can be used to list all the logged-in users on a remote machine or server, like “w” or “who” commands.
This tool is also referred to as a “user information lookup program”, as it provides you with user related information like their home directory, default shell, when they logged-in, etc.
In this article, you will learn how to list all users and view their information using the finger command (with practical examples).
Tutorial Details
| Description | User Information Lookup |
| Difficulty Level | Low |
| Root or Sudo Privileges | No |
| OS Compatibility | Ubuntu, Fedora, etc. |
| Prerequisites | finger |
| Internet Required | Yes |
How to Install Finger in Linux
As I’ve already said, this is an external command that doesn’t come with Linux, but it’s easy to install with any of the following commands:
$ sudo apt install finger                                                                                  #On Debian and Ubuntu
$ sudo dnf install finger                                                                                  #On Red Hat and Fedora
After the installation is complete, you can start using it, but first read our complete article.
Usage of the Finger Command
The finger command takes two arguments: one is the option, and the other is the username.
$ finger [OPTION] [USERNAME]The following is an example of this command when executed without any options:
$ fingerOutput:
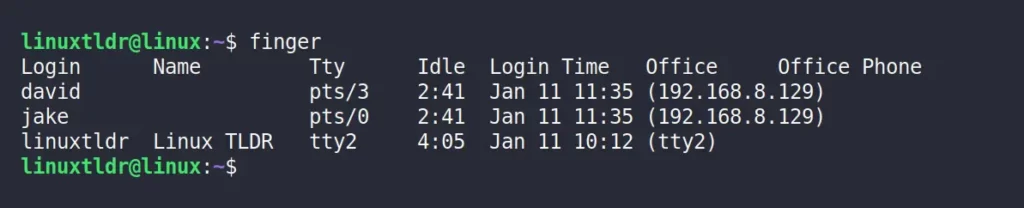
The following is a breakdown of the above output.
Login: User’s account name.Name: The full name of the given user.Tty: How users connected to the system.Idle: User inactivity (or idle time).Login Time: When the users log-in to the system.Office: The user’s hostname or IP address.Office Phone: Show the user phone number form “/etc/passwd” file, if it’s not blank.
Once you are familiar with this output, you can move on to the next section.
Get Information About a Particular User Using the Finger Command
If you give this command any of the users listed above as an argument, it will give you more information about that specific user.
$ finger davidOutput:
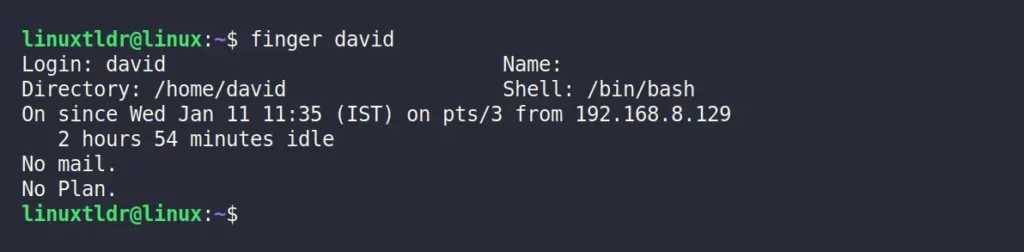
Let’s break down this output to learn more.
Login: User account name.Name: The full name associated with the given username.Directory: User home directory.Shell: User default login shell.- Then comes a brief description of how the user logged in to the target machine (via which method) using their hostname or IP address.
Mail: Display the mails in the user inbox.Plan: Display the content of the “~/.plan” or “~/.project” file in the user’s home directory.
Now let’s check out a few options offered by this command.
Finger Command Options
The finger command offers various options that can change the output based on the specified option, starting with
Display the Output in Columns for a Particular User
The “-s” flag will show the particular user information column-wise, identical to the standard finger output when executed without options or usernames.
$ finger -s davidOutput:

As you can see, the particular user’s login name, real name, terminal name, and other information are arranged in the single column.
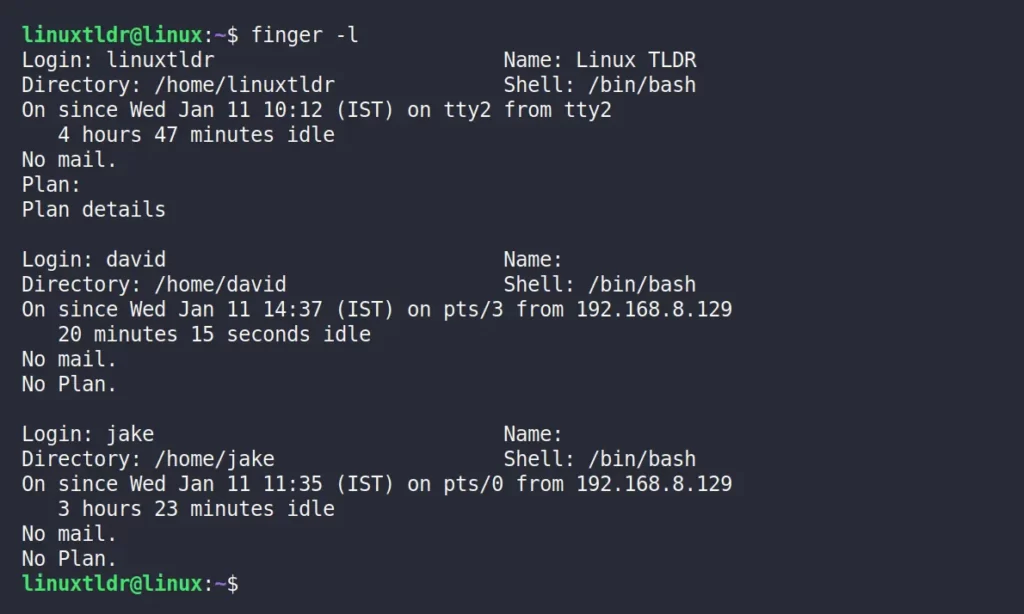
Display the Output in Long Listing for All Users
The default setting for finger command output without any option or argument is to show all the logged-in users information in a single column.
However, you can output all the logged-in users information in a long listing (producing multi-line output) that includes all the users information like home directory, home phone number, login shell, mail status, etc. using the “-l” flag.
$ finger -lOutput:
Hide the Plain Field from the Output
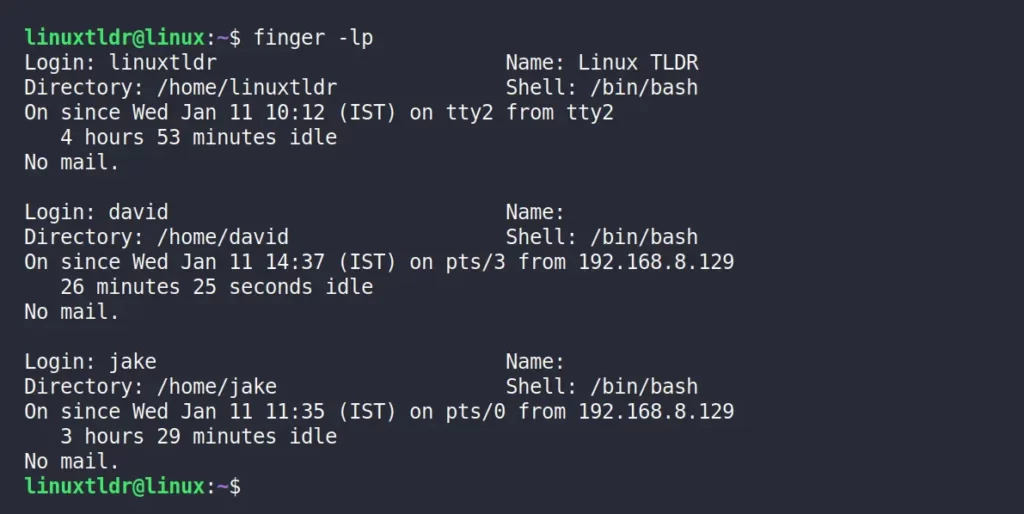
The “-p” flag will show the output without the plan field.
$ finger -p davidOutput:

You can use this option in combination with the “-l” flag to list all the user information without a plan field.
$ finger -lpOutput:
Match Only with Login Names Against User’s Names
When you execute this command with or without any of the flags mentioned above, it will list the users based on their name (real name) and login name (username).
And this way of listing the user might give you multiple results in the output, especially when the name and login name match.
$ finger davidOutput:
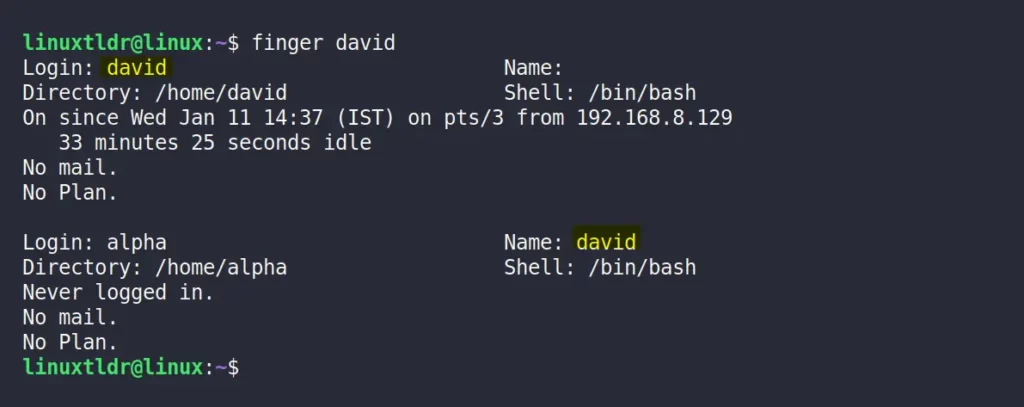
As you can see in the above picture, we have one user with the login name “david” and another user with the real name “david“, Listing the users based on name and login name leads to these two results.
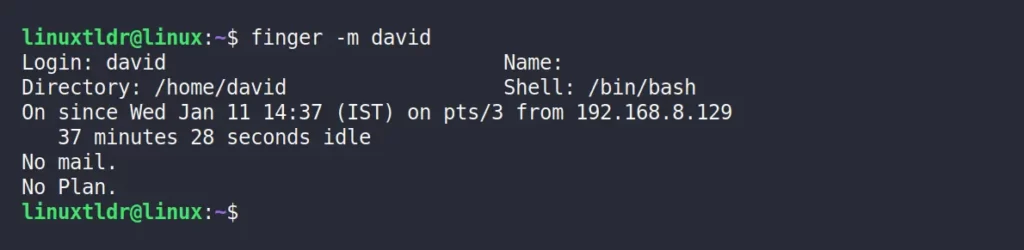
To avoid this, you can use the “-m” flag to list the user based on their login name.
$ finger -m davidOutput:
How to Uninstall/Remove Finger in Linux
In case you didn’t like this program and want to remove it from your system, then execute any one of the following commands based on your system.
$ sudo apt remove finger                                                                                 #On Debian and Ubuntu
$ sudo dnf remove finger                                                                                 #On Red Hat and Fedora
So, that was the last example.
Although, this is an amazing tool, to be honest I still use the w command to find all the logged-in users in the target system and read the “/etc/passwd” file to view all the user account information in the target system.
Still, I would love to hear your opinion regarding these tools.
Till then, peace!


I’m surprised to read a tutorial about “finger” in 2023 without a single word about the security issues involved.
Hi Christian,
You mentioned a good point, and I am aware of the finger command security holes in the past and that they were heavily pursued in 2021 for phishing campaigns. However, I was unable to verify whether the security issues still exist or not.
If you have any information, then do reply to this comment with that information.
Well, opening up a port to remotely list users with additional information is always a nice way for an attacker to find targets. This may be not a big issue for a hobby system at home, but already for a private laptop in another network.
Curiously, the first paragraph of the article describes this as a way to query users remotely, but the tutorial only show the local use case.
Thanks for the suggestion, Christian.
I’ll update the article right away.