
Each command executed in your Linux terminal is taken as an event and associated with an event number (or index number) later found in the “~/.bash_history” file.
Now, you can use a program like a “cat” to read the record of this file, but Linux provides a separate “history” command that gives you more features and functionality.
It involved features like viewing history records, removing single or complete records, executing a specific command from the history using its event number, and many more.
In this article, you will learn how to configure history records, history command usages, and a few more tips that will help you in your Linux journey.
Tutorial Details
| Description | History |
| Difficulty Level | Low |
| Root or Sudo Privileges | No |
| OS Compatibility | Ubuntu, Manjaro, Fedora, etc. |
| Prerequisites | history |
| Internet Required | No |
Syntax of the History Command
The history command takes only one argument for specifying the option (and it is optional).
$ history [OPTION]View the History Record
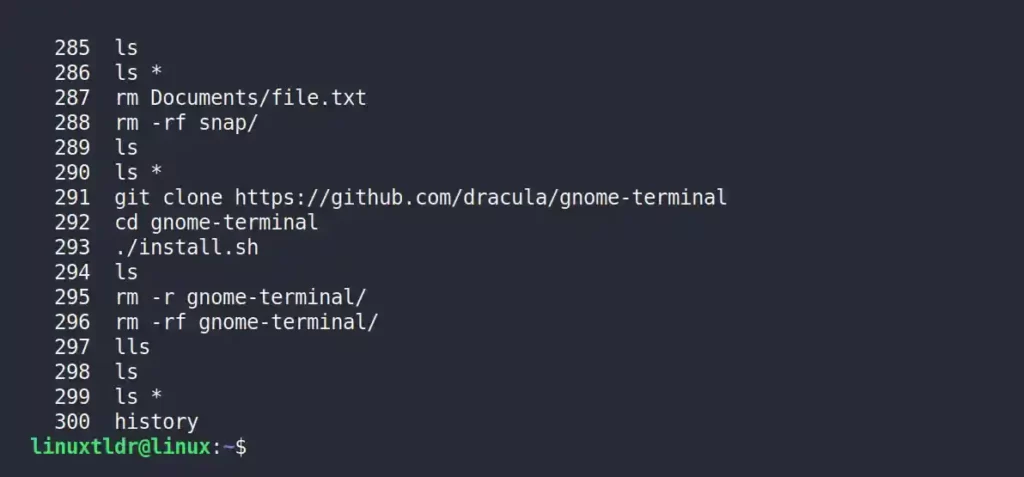
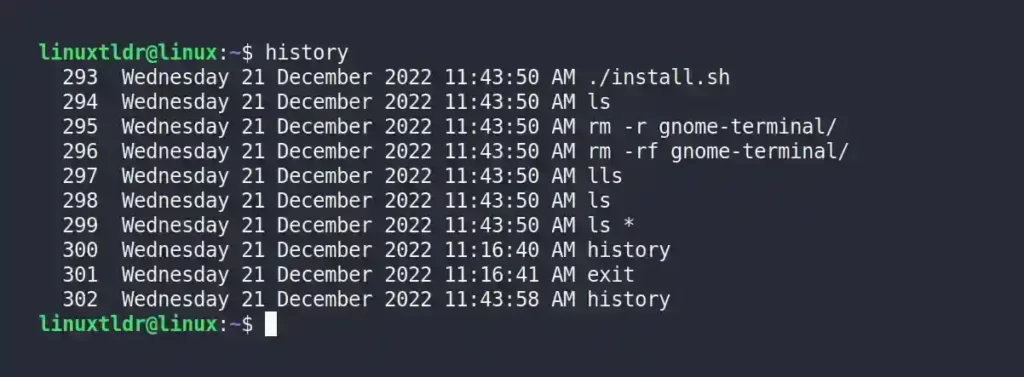
Get to your terminal and execute the following command without any options to display the list of all executed commands in the past.
$ historyOutput:
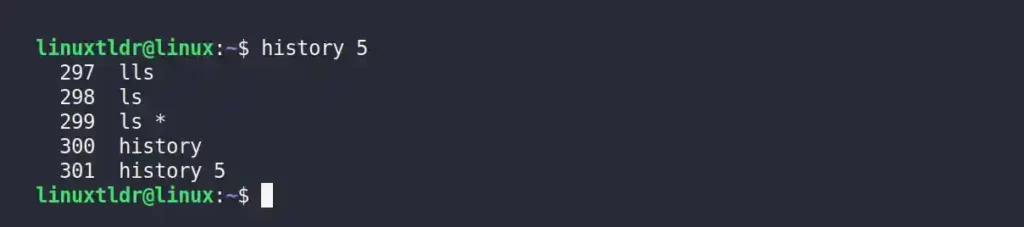
Or, if you are interested in the five most recent history records, specify the number of records you wish to list in integer format using the history command.
$ history 5Output:
Once you close the terminal, the records for the current session will be reflected in the history file.
Displaying Records with Date and Timestamps
Currently, the history command only shows the event number (or index number) along with the user-executed commands; however, you can also display the date and time along with these records.
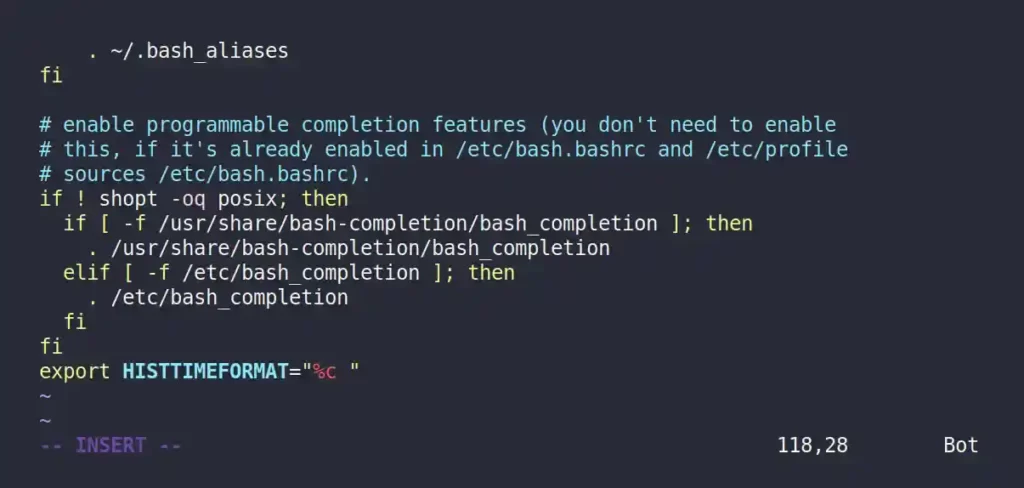
For that, you need to configure your shell configuration file, like “~/.bashrc” for Bash shell, using your choice of text editor, either Vim or Nano.
$ vim ~/.bashrcNow, add the following record at the end of the configuration file.
export HISTTIMEFORMAT="%c "Output:
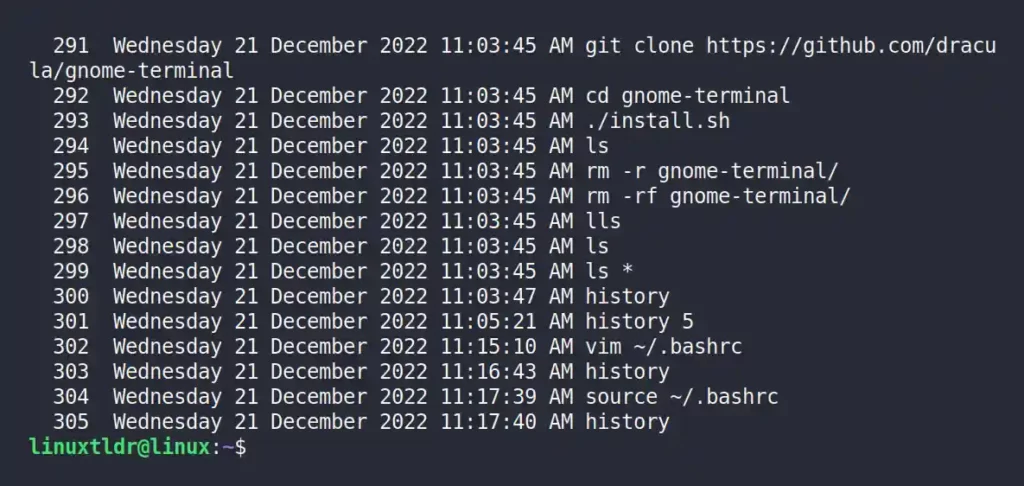
Save and close the file, and then reload the configuration file using the source command to reflect the changes.
$ source ~/.bashrcLastly, execute the history command to verify the changes.
$ historyOutput:
Configuring the History Command
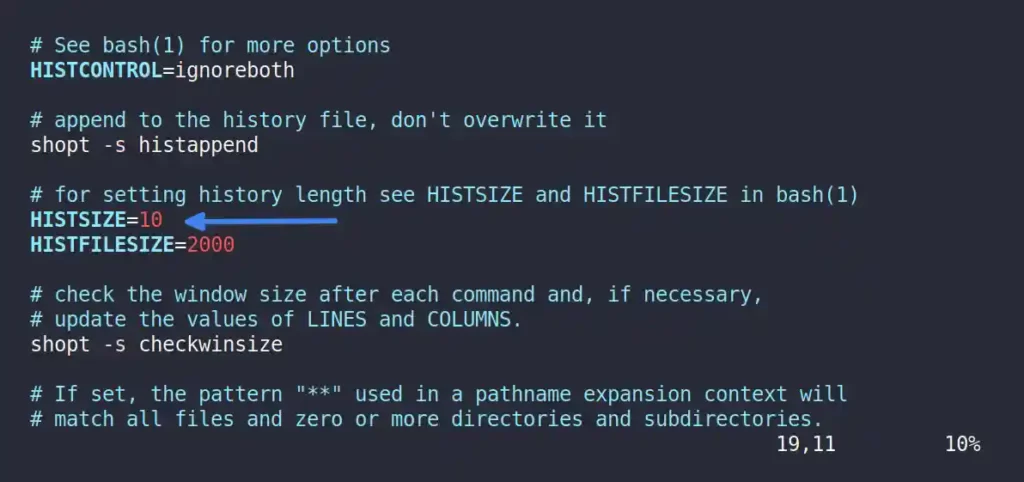
The shell configuration file (“~/.bashrc“) has two variables that control the history buffer.
HISTSIZE: It’s responsible for showing the defined number of results when the history command is executed.HISTFILESIZE: It’s responsible for recording a certain number of user executed commands in the history file.

For example, if “HISTSIZE=1000” is specified, then when you execute the history command, it will only list the 1000 records.
And if “HISTFILESIZE=2000” is set, then only 2000 user-executed commands will be stored in the history file, and once it reaches the edge point, it will start removing and adding one record.
For example, if you want to only list ten results when the history command is executed, replace “HISTSIZE=1000” with “HISTSIZE=10“, as shown.
Save and close the file, restart the terminal session, and execute the history command to view the changes.
$ historyOutput:
Executing Command Using Event Number
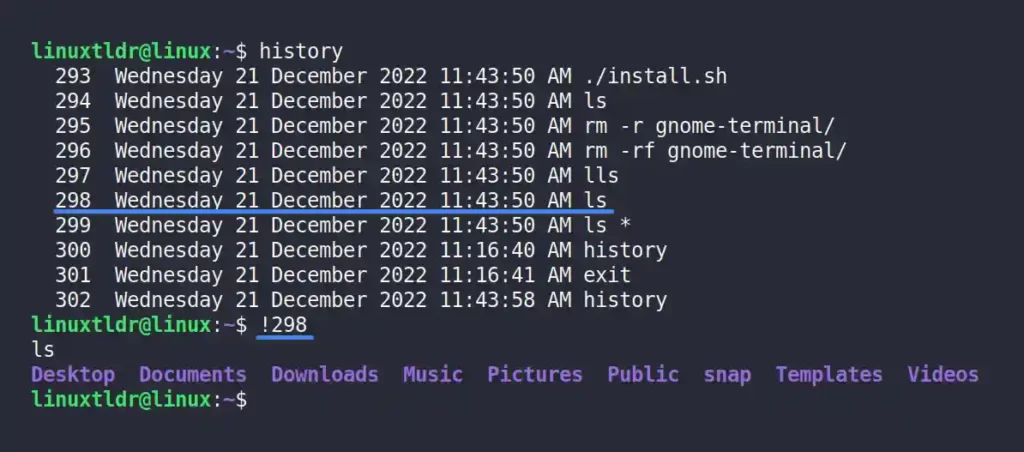
Every executed command is stored with an event number in the history list, and this event number can be used to reuse the assigned command with the (“!“) exclamation mark.
$ !298Output:
Or, use the “:p” after the event number to view the command before executing it, so the wrong command does not get executed.
$ !298:pOutput:

Also, you can add a dash (“-“) before the index number to start counting from the end of the list.
$ !-2The above command will execute the second last command from the history list.

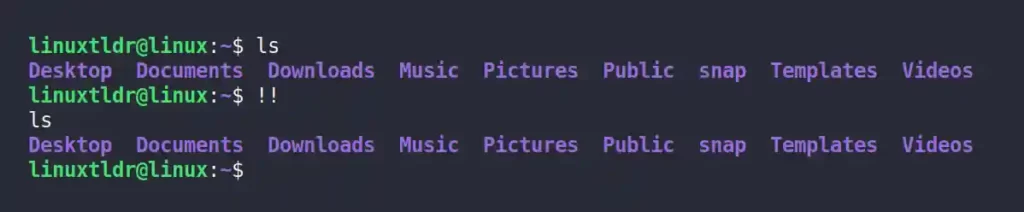
Or, use the double exclamation mark (“!!“) to repeat the last executed command.
$ !!Output:
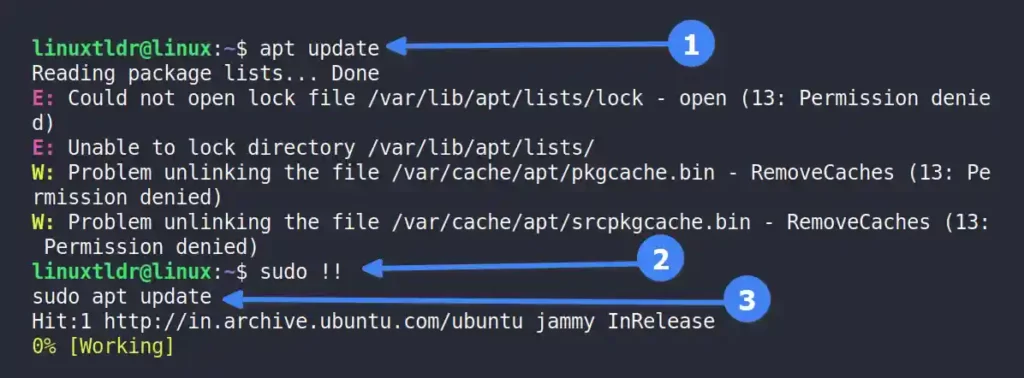
I personally use the double exclamation mark when I forget to add “sudo” in front of any command that requires it, for example, the “sudo apt update” command.
$ sudo !!Output:
Searching for Command by String
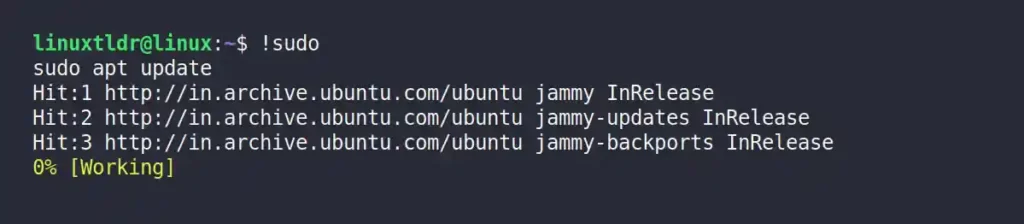
Adding a string in front of the exclamation mark will execute the most recently executed command that starts with the specified string.
Recently, the “sudo apt update” command was executed, so if “sudo” is specified as a string with an exclamation mark, then it reruns the same command.
$ !sudoOutput:
Listing the Matching Commands
You can combine (pipe) the history command with the grep command to get the list of matching commands that contain the specified string.
For example, the following command will display a list of all commands that contain the “sudo” string.
$ history | grep sudoOutput:

Replacing the String from a Recently Executed Command
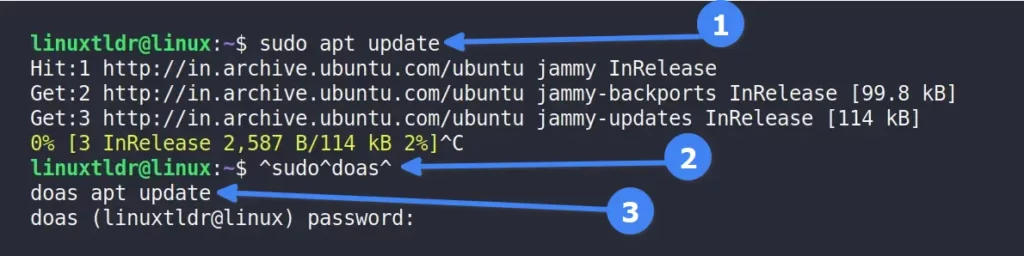
You can use the following syntax to replace the string from a recently executed command:
$ ^[OLD_STRING]^[NEW_STRING]^For example, the last executed command in my system is “sudo apt update“, and I want to replace “sudo” with its minimalist variant “doas” using the following command:
$ ^sudo^doas^Output:
Executing Command Without Recording in History
There are multiple ways to prevent an executed command from appearing in the history record; the most straightforward is using the set command, which will temporarily disable the command recording.
$ set +o historyOnce you’re done with the command execution, you can re-enable it using the following command:
$ set -o historyDeleting the Single or Complete History Record
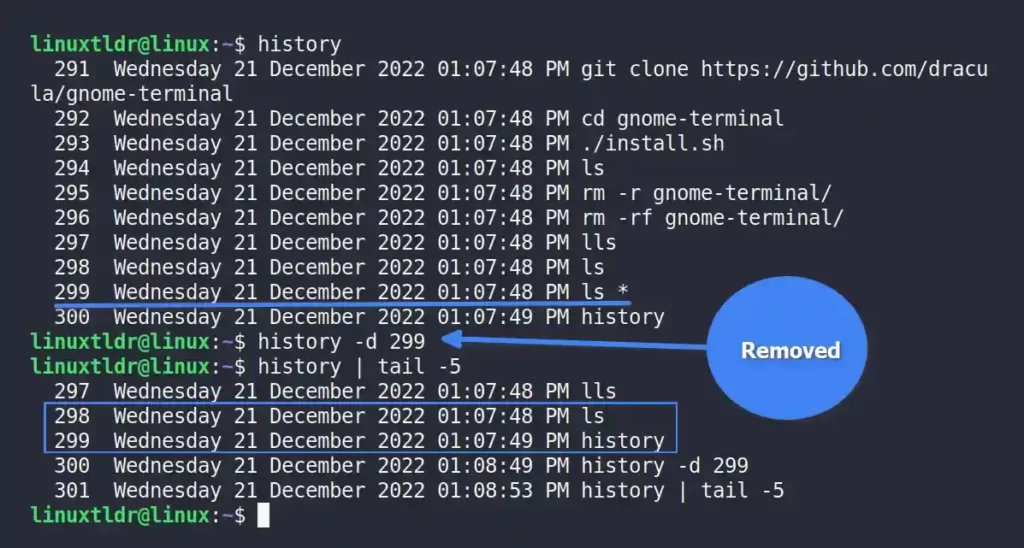
You can use the “-d” flag with a specific event number (or index number) to remove a specific record from the history list.
$ history -d 299The above command will remove the command with event number “299” from the history list.
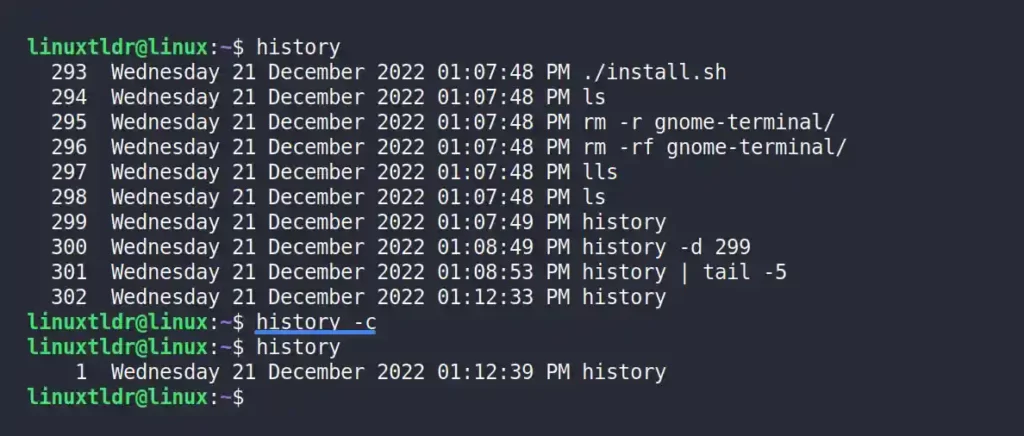
Or, you can use the “-c” flag to wipe out the complete record from the history list.
$ history -cOutput:
That was the last example of this command.
This article is enough for a beginner or professional to understand the concept of history and history records in Linux.
However, if something that needs to be added is not included, please mention it in the comment section.
Till then, sayonara!


