
RabbitMQ is a free and open-source message-broker program used for real-time communication between users in chat applications, supporting protocols such as STOMP, MQTT, AMQP, HTTP, WebSocket, and RabbitMQ Streams.
Its functionality might remind you of Apache Kafka, but the difference is that RabbitMQ prioritizes end-to-end message delivery, while Kafka is a distributed event streaming platform designed for the real-time exchange of continuous big data.
In this tutorial, you’ll learn how to install and configure the RabbitMQ server on major Linux distributions, create an administrator account, set up the management dashboard, and access it via a browser.
How to Install RabbitMQ Server on Linux
There are two ways to install RabbitMQ Server on Linux: either through the default package manager (as it’s available in most Linux repositories) or using the Cloudsmith Mirror, a third-party repository that guarantees the latest version.
You can choose the one that is best suited to you and your work environment. For beginners, I suggest starting with the default package manager, as it’s the easiest and most straightforward to follow.
Method 1: Install RabbitMQ Server via Package Manager
The RabbitMQ server package is available for several popular Linux distributions, such as Debian, Ubuntu, Red Hat, and Fedora. Users of these systems can directly install the stable version using the system’s default package manager.
# On Debian, Ubuntu, Linux Mint, or Kali Linux
$ sudo apt install rabbitmq-server

# On Red Hat, Fedora, CentOS, or AlmaLinux
$ sudo dnf install rabbitmq-server
Method 2: Install RabbitMQ Server via Cloudsmith Mirror
Cloudsmith Mirror is a third-party repository officially provided by RabbitMQ to deliver the latest RabbitMQ server package to users ahead of its availability in the Linux repository.
To add the Cloudsmith Mirror for the RabbitMQ server package on Debian, Ubuntu, Linux Mint, and other related distributions, run:
$ curl -1sLf 'https://dl.cloudsmith.io/public/rabbitmq/rabbitmq-erlang/setup.deb.sh' | sudo -E bashFor Red Hat, Fedora, CentOS, and other related distributions, run:
$ curl -1sLf 'https://dl.cloudsmith.io/public/rabbitmq/rabbitmq-erlang/setup.rpm.sh' | sudo -E bashAfter adding the repository, you can proceed to install the latest version of RabbitMQ Server using the default package manager.
# On Debian, Ubuntu, Linux Mint, or Kali Linux
$ sudo apt install rabbitmq-server

# On Red Hat, Fedora, CentOS, or AlmaLinux
$ sudo dnf install rabbitmq-server
Manage RabbitMQ Server Service
Once the RabbitMQ Server installation is complete, make sure to check that the RabbitMQ service created during installation is enabled and active by running the following commands:
$ systemctl is-enabled rabbitmq-server
$ systemctl status rabbitmq-server
Output:
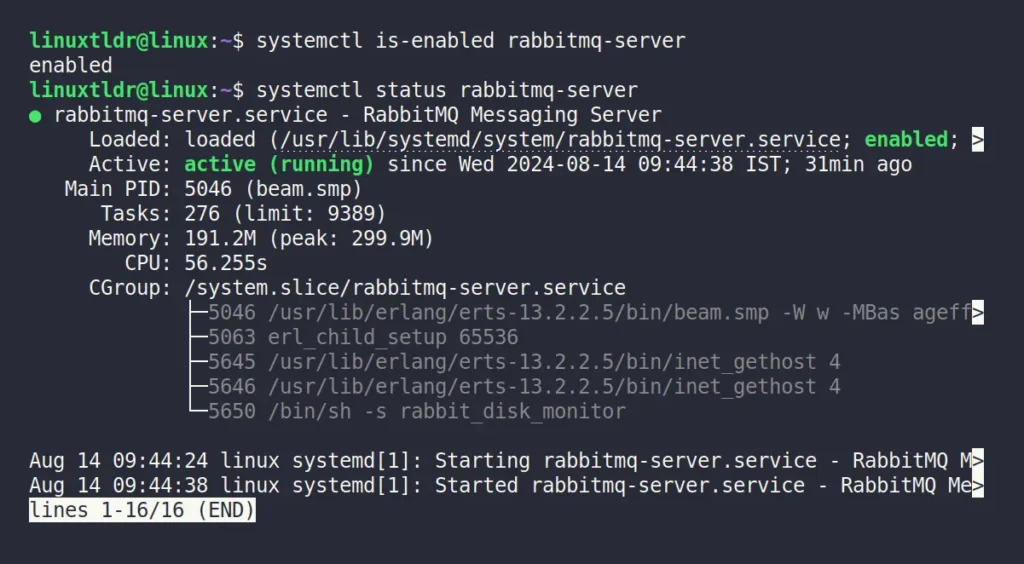
As you can see, it’s enabled and active in my case. If it’s not for you, make sure to enable and start the service in the background using the following command:
$ sudo systemctl enable --now rabbitmq-serverOutput:

Troubleshoot
If you encounter a service failure when starting the services, ensure that the default 5672 port used by the RabbitMQ Server is not occupied by another service by using the ss command:
$ sudo ss -tulpn | grep 5672Output:

In the above output, the “beam.smp” process is managed by RabbitMQ Server, so the issue is not with it. However, if another user or service is utilizing the port, make sure to close the service by its port number or service name.
Configure the RabbitMQ Server
To configure the RabbitMQ server with the hostname and network settings. We need to adjust the parameters in the “rabbitmq-env.conf” file. This configuration file is used to set global environment variables for RabbitMQ, like node names, directory locations, runtime flags, etc.
Our main motivation for editing this file is to configure it with our hostname and internal network (DO NOT EXPOSE IT TO PUBLIC IP ADDRESSES). To proceed, first open the file using your preferred text editor (I selected Nano).
$ sudo nano /etc/rabbitmq/rabbitmq-env.confOnce the file is open, you will see the following parameters commented with a “#” prefix.
#NODENAME=rabbit
#NODE_IP_ADDRESS=127.0.0.1
#NODE_PORT=5672
To configure it with the internal network, find your hostname and internal (or local) IP address, uncomment the NODENAME and NODE_IP_ADDRESS lines by removing the “#” prefix, and replace their parameter values with your chosen ones. After making the necessary changes, your file should appear like this:
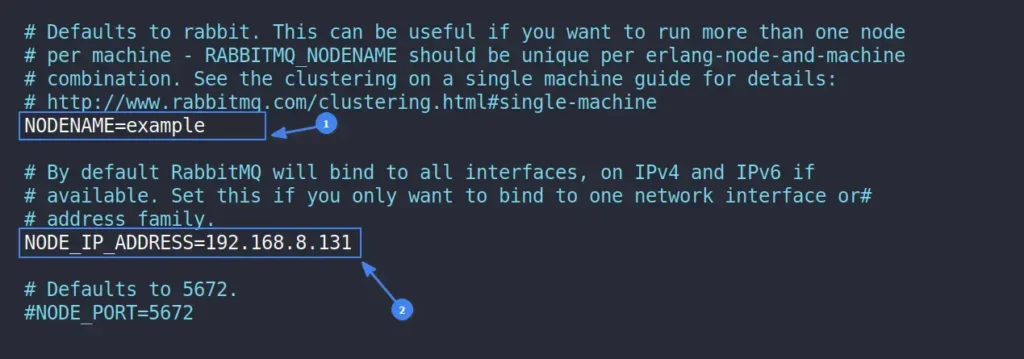
If needed, you can adjust the port by uncommenting the NODE_PORT parameter and replacing the port number with your desired one. However, I don’t recommend doing this unless it’s your only option. Beside this, you can now save and close the file, and don’t forget to restart the RabbitMQ Server by running:
$ sudo systemctl restart rabbitmq-serverCreate Admin Account for RabbitMQ
To access the RabbitMQ web interface (which will be discussed later), you need an administrator account. For that purpose, you can use the following command to create a new administrator account with full permissions for all vhosts on the RabbitMQ server.
$ sudo rabbitmqctl add_user rabbituser changeme
$ sudo rabbitmqctl set_user_tags rabbituser administrator
$ sudo rabbitmqctl set_permissions -p / rabbituser ".*" ".*" ".*"
Output:
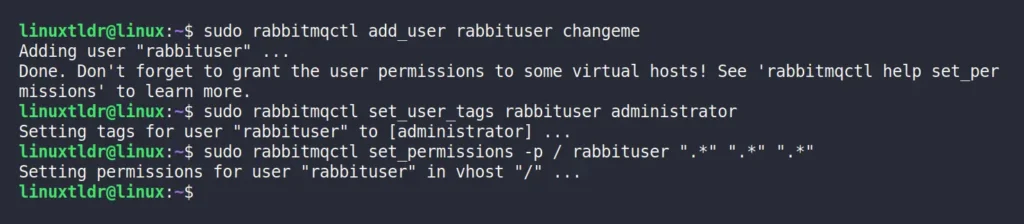
Once the administrator account is created, we can use the following credentials to log in:
- Usename: rabbituser
- Password: changeme
Install RabbitMQ Management Plugin
RabbitMQ offers a set of community-contributed plugins to extend its existing features. We are particularly interested in the “rabbitmq_management” plugin, which provides access to a web interface that simplifies the monitoring and configuration of RabbitMQ.
To enable this plugin, run the following command:
$ sudo rabbitmq-plugins enable rabbitmq_managementThis will enable the other required plugins, such as “rabbitmq_management,” “rabbitmq_management_agent,” and “rabbitmq_web_dispatch” that together enable the RabbitMQ management interface.

Access RabbitMQ Management Dashboard
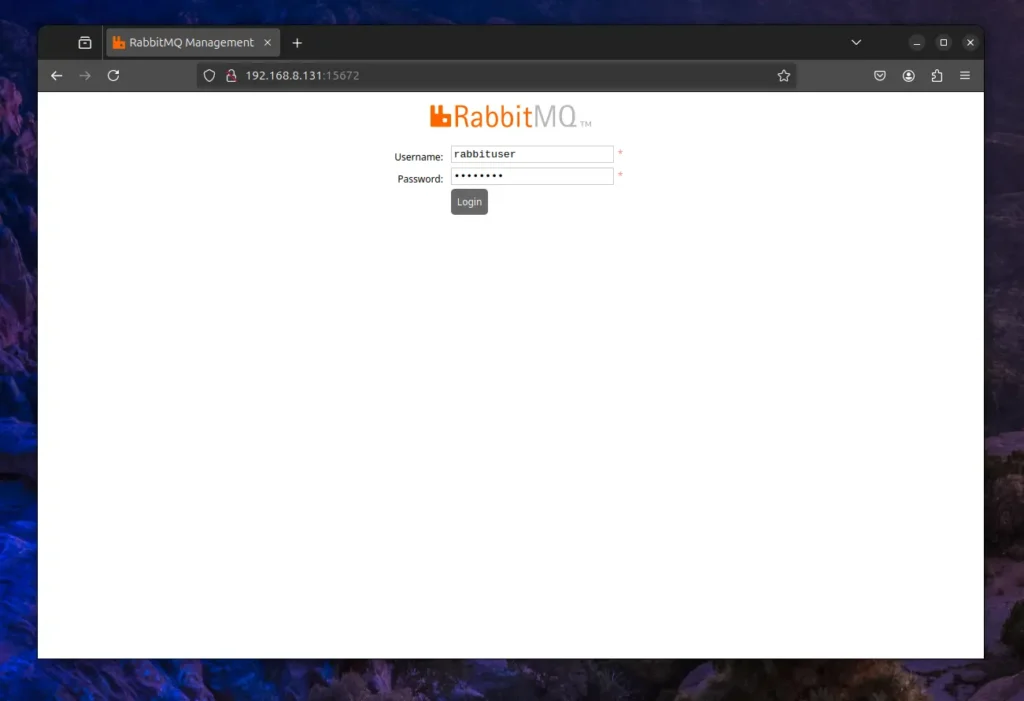
Finally, to access the RabbitMQ web interface, open your preferred browser and navigate to your internal IP address, followed by the 15672 port (like this: http://ip-address:15672). On your first visit, you will be redirected to the login page, where you can use the previously created administrator credentials to login.
Once the authentication is successful, you will be redirected to the RabbitMQ dashboard, which will appear like this:
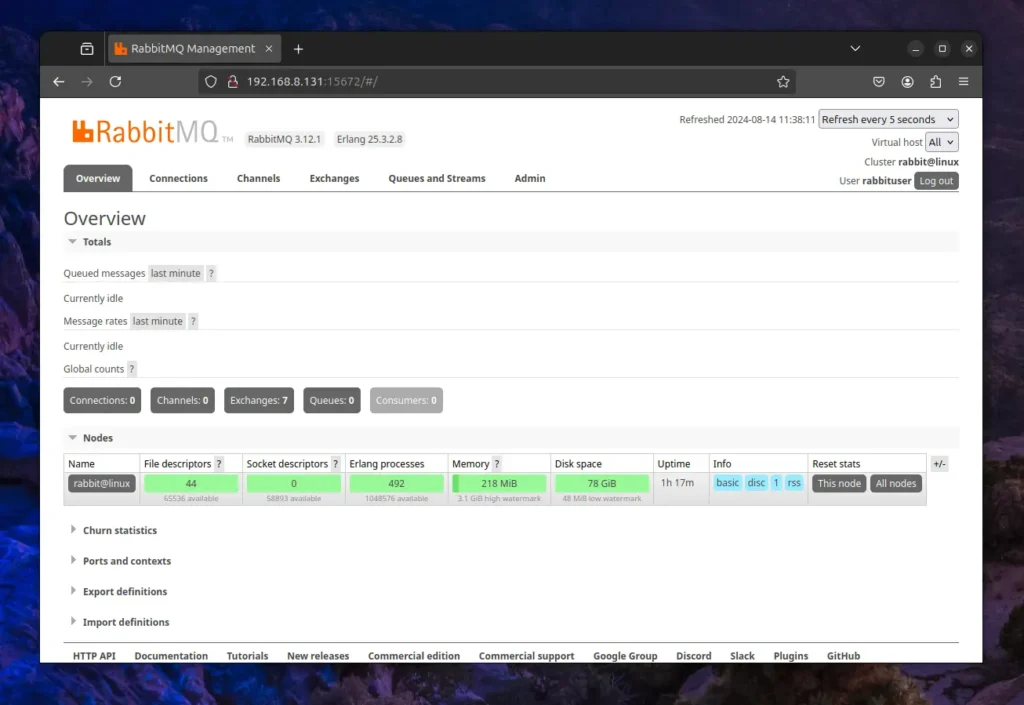
That’s it! You have successfully installed and configured RabbitMQ on your Linux system.
How to Uninstall RabbitMQ on Linux
To remove RabbitMQ from your Linux system, first ensure that you remove the Cloudsmith Mirror repository if it was used for installation. For Debian, Ubuntu, Linux Mint, and other related distributions, use the following command:
$ rm /etc/apt/sources.list.d/rabbitmq-rabbitmq-erlang.list
$ apt-get clean
$ rm -rf /var/lib/apt/lists/*
$ apt update
For Red Hat, Fedora, CentOS, and other related distributions, use this command:
$ rm /etc/yum.repos.d/rabbitmq-rabbitmq-erlang.repo
$ rm /etc/yum.repos.d/rabbitmq-rabbitmq-erlang-source.repo
Once the repository is removed, you can proceed to remove the RabbitMQ Server package using the appropriate command for your Linux distribution:
# On Debian, Ubuntu, Linux Mint, or Kali Linux
$ sudo apt uninstall rabbitmq-server

# On Red Hat, Fedora, CentOS, or AlmaLinux
$ sudo dnf uninstall rabbitmq-server
Wrap Up
In this article, you’ve learned how to install and configure the RabbitMQ server on major Linux distributions, create an administrator account, set up the management dashboard, and access the dashboard via a browser.
If you have any questions or queries related to the article, do let us know in the comment section.
Till then, peace!


