
As you all know, Linux is famous for its multiple variants in the name of distributions, each offering unique software repositories, package managers, desktop environments, release cycles, stability, and much more.
The well-known Linux distributions are Debian, Ubuntu, RedHat, Fedora, and Arch, with the major difference between them being their target audience. For example, some distributions are tailored for desktop systems, some for server systems, and others for technophiles, and so forth.
If your current system runs on Ubuntu and you want to utilize a tool or package manager from another system like RedHat, you either need to set up and use a virtual machine or dual-boot it, which is precisely the issue that tools like DistroBox solve.
What is DistroBox?
DistroBox is a command-line program that allows you to run multiple Linux distributions within the terminal and run graphical applications from those distributions on the host system as if they were native applications.
It uses container-based technologies like Docker or Podman (whichever you prefer) to build a container using the Linux distribution of your choice, tightly integrating it with the host to enable sharing of the user’s HOME directory, external storage, USB devices, and graphical apps (X11/Wayland), as well as audio.
This approach of using multiple Linux distributions at once has its own advantages, some of which are discussed in the next section.
Advantages of DistroBox
The following is a list of the advantages of using DistroBox.
- Create a test environment for making changes without affecting your host distribution.
- Test a program or application on multiple Linux distributions.
- Try out the latest Linux distribution features as they arrive.
- Experience the new desktop environment (DE) before it officially arrives.
- Access distribution-specific programs or applications natively on your host distribution.
How to Install DistroBox on Linux
The first thing you have to do is make sure either Docker or Podman (recommended) is installed on your host distribution. Then, if your current distribution is one from the below list, then DistroBox is already packaged in it, and you can install it using your default package manager.
- Alpine Linux 3.19
- Arch Linux (AUR)
- Debian 13
- Fedora 37, 38, and 39
- Gentoo
- Kali Linux Rolling
- openSUSE Tumbleweed
- Raspbian Testing
- Ubuntu 24.04
If your distribution is not on the list, then you can run the following command to install DistroBox:
$ curl -s https://raw.githubusercontent.com/89luca89/distrobox/main/install | sudo shThe curl command above will download the DistroBox installation script and execute it with superuser privileges. If you’re uncomfortable running an unknown script with superuser privileges, you can use the following command to install it:
$ curl -s https://raw.githubusercontent.com/89luca89/distrobox/main/install | sh -s -- --prefix ~/.localOnce the installation is complete, you can move on to the next section, learning usage.
Usage of DistroBox
In this section, our primary focus is on creating new DistroBox instances, ways to access CLI and GUI tools and applications inside and outside the container, and listing, updating, and removing DistroBox instances. So, let’s begin with…
Creating DistroBox Instances with a Specific Name and Hostname
The DistroBox container (a complete operating system in itself) can easily be created using the DistroBox command-line program. For example, if you issue the following command without any options, it will ask you to pull the default Fedora 39 image.
$ distrobox createOutput:

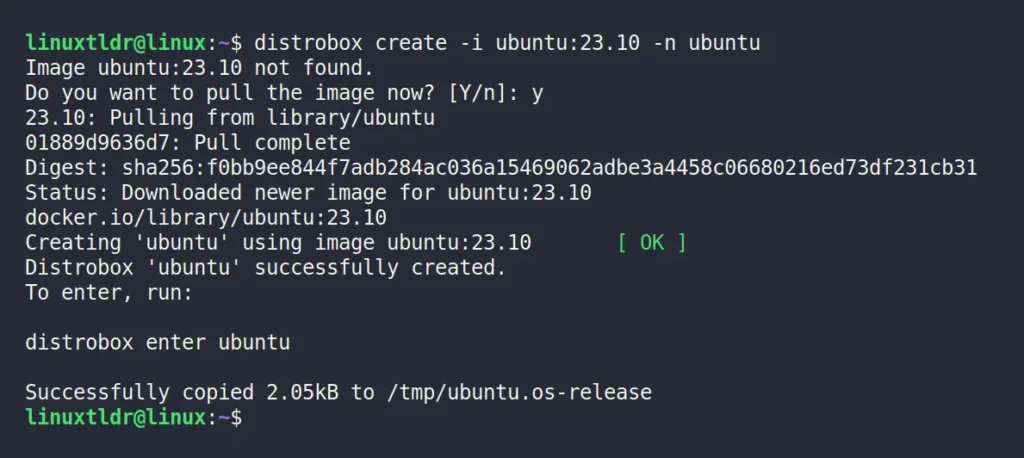
If you press the “y” key, it will start pulling the image from the registry. However, if you want to pull and use a specific Linux distribution, such as Ubuntu 23.10, then run.
--nvidia” option.$ distrobox create -i ubuntu:23.10 -n ubuntuWhereas,
- The “
-i” or “--image” option will specify the container name (the OS name, such as “Ubuntu“) along with its version (e.g., “23.10“), separated by a colon. - The “
-n” or “--name” option will be used to give a memorable name to your container that can later be used to access it.
Output:
(Optional) To have a different hostname for your DistroBox container, you can use the “--hostname” option with a name parameter that will be used as the hostname.
$ distrobox create -i ubuntu:23.10 -n ubuntu --hostname distroboxOnce your container is created and you enter into it (explained in the next step), you will find that the hostname is the one you specified while creating the container.

Accessing a Command Prompt from a DistroBox Container
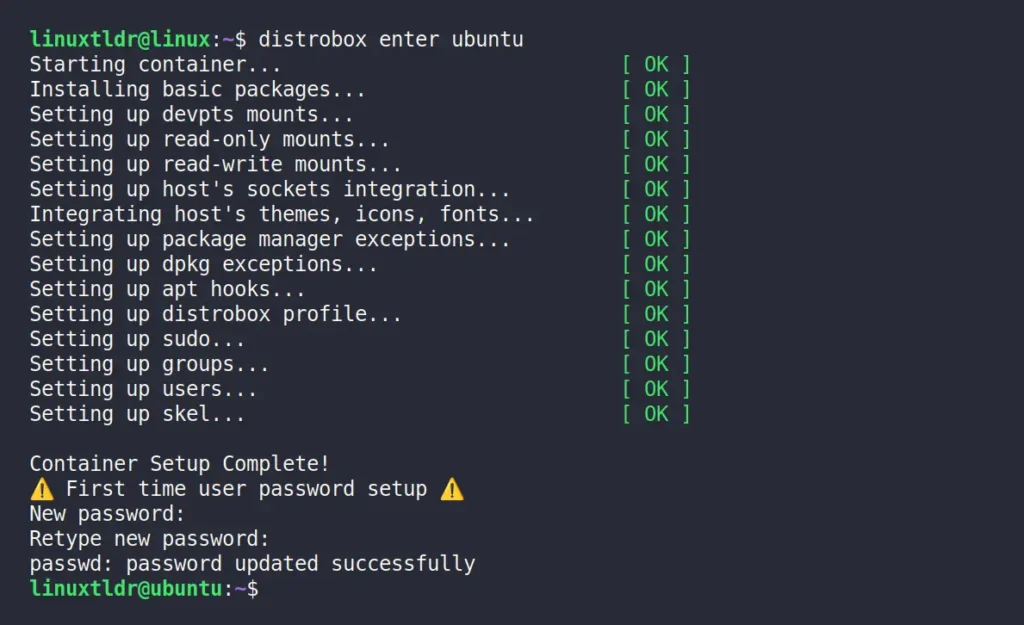
Once the image is pulled, you can enter in your container by using the container name. For example, in our previous example, we pulled an “Ubuntu 23.10” image and named it “ubuntu“, which can be used with the following command to access that container.
$ distrobox enter ubuntuOutput:

When you enter the first time, it will take some time only once to download the necessary files, configure the container, set up a new user password, and upon completion, you will be in your DistroBox container.
To demonstrate that we are within the DistroBox container, I’ve displayed the versions of both the host and the DistroBox container below.
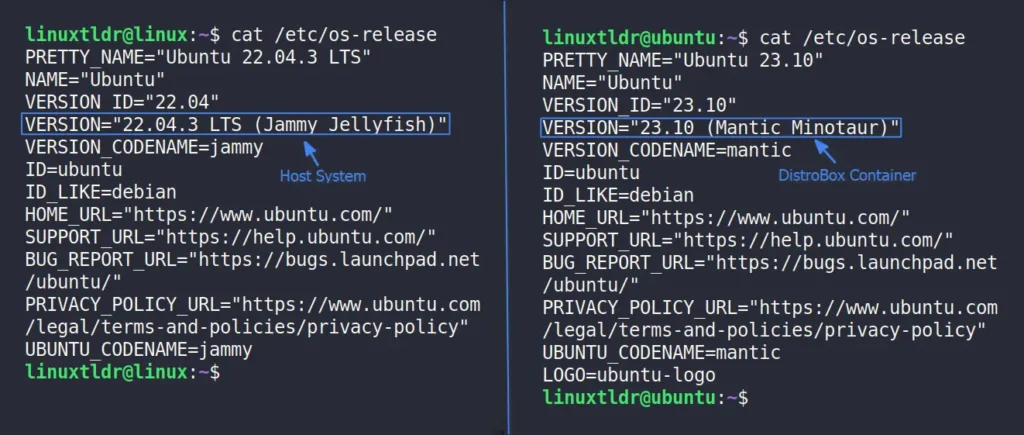
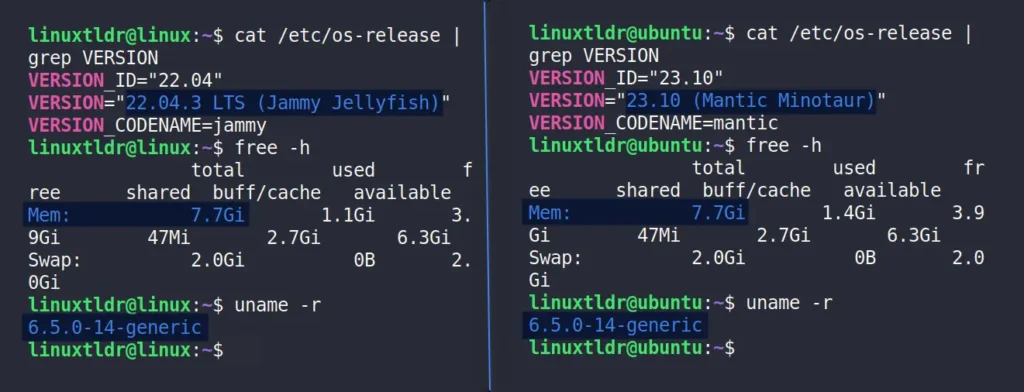
One more thing to note is that your host distribution and DistroBox container share the same hardware and even the kernel, as can be seen in the following picture.
Installing a Non-Native Distro Package with DistroBox
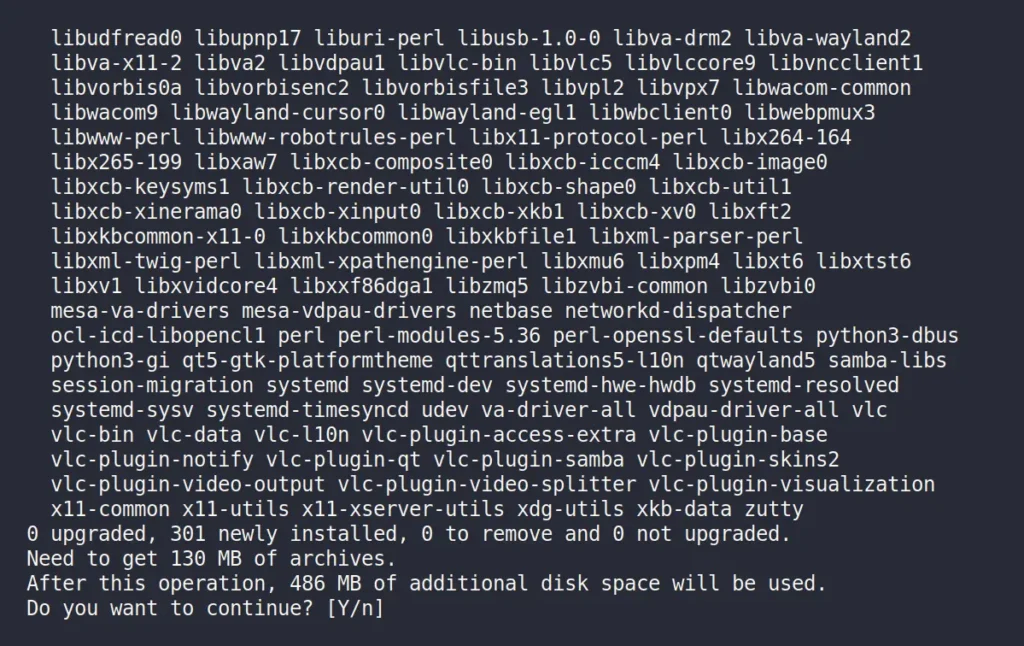
Once inside the DistroBox container, you can begin installing your favorite programs and applications using the default package manager specific to the Linux distribution running inside the DistroBox container.
$ sudo apt install vlcOutput:
Creating a Host App Launcher for a DistroBox App
Once the installation of your favorite application is completed, whether it’s CLI or GUI, you can access it by executing its command or application name inside your DistroBox container terminal.
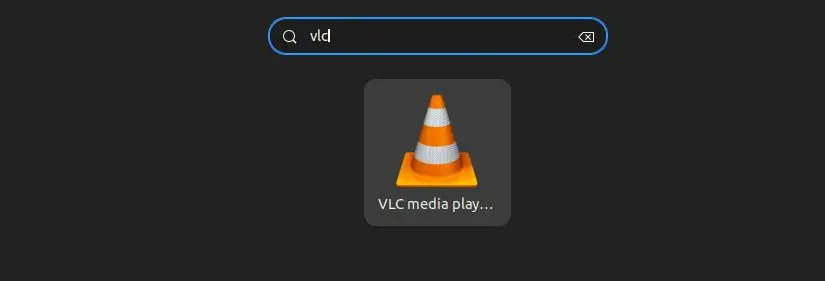
Otherwise, if it’s a GUI application and you want to access it as a native program on your host distribution, then run the following command inside your DistroBox container.
vlc” with the program you have installed and want to access on the host distribution.$ distrobox-export --app vlcOutput:

Now, the exported application will be accessible from the host distribution application menu.
This way, you can easily export numerous apps or binaries to your host system, and if you forget to keep track of them, simply run the following command to view the list of all exported apps and binaries.
$ distrobox-export --list-apps
$ distrobox-export --list-binaries
Output:

In the future, if you wish to remove the exported application from the host distribution, run the following command within the DistroBox container:
$ distrobox-export --delete --app vlcOutput:

Listing DistroBox Instances
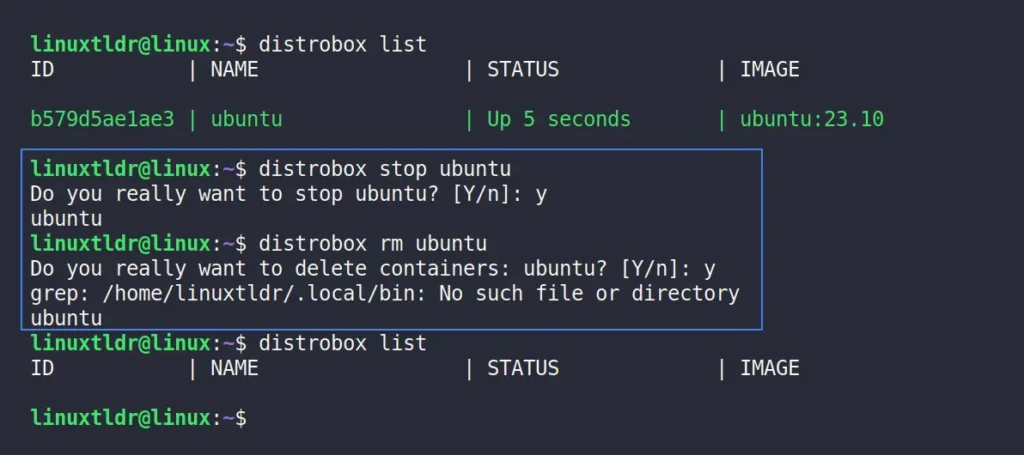
If you are running multiple DistroBox instances, you can monitor their status by running the following command:
$ distrobox listOutput:

Stop and Remove DistroBox Instances
To stop the running DistroBox container, specify its name with the following command:
$ distrobox stop ubuntuAnd later, to remove the container image, run.
$ distrobox rm ubuntuOutput:
How to Remove DistroBox from Linux
Finally, this article would be incomplete without detailing the steps for removing DistroBox. Therefore, if you have installed it from your distribution repositories, you can use your default package manager to uninstall it.
However, if you have installed it using the command mentioned in this article, then proceed to run the following command if DistroBox has been installed with superuser privileges.
$ curl -s https://raw.githubusercontent.com/89luca89/distrobox/main/uninstall | sudo shOr run the following command if you have installed DistroBox without superuser privileges.
$ curl -s https://raw.githubusercontent.com/89luca89/distrobox/main/uninstall | sh -s -- --prefix ~/.localFinal Word
As you can see, DistroBox is simple to learn, fun to use, and definitely helpful in certain scenarios. I’ve been using it for a while to test new features of upcoming distributions, and to be honest, I love it.
If you have any questions or queries related to the topic, then do let me know in the comment section.
Till then, peace!


