
Are you struggling between the sluggishness of Docker (or Podman) CLI and the heaviness of Portainer? Then Dockge might be the best fit for you, as it is specially crafted for a user who only needs to manage containers or compose files for their Homelab using a web interface.
What is Dockge?
The Dockge (with its first four initials belonging to “Docker” and “ge” inspired by Twitch emotes) is a free, open-source, simple, and beautiful container or compose file management front-end web interface.
It can assist in managing your existing container or compose projects, setting up new container or compose projects, interacting with running containers via an interactive terminal, and providing agent support for managing multiple Docker hosts in a single Web UI.
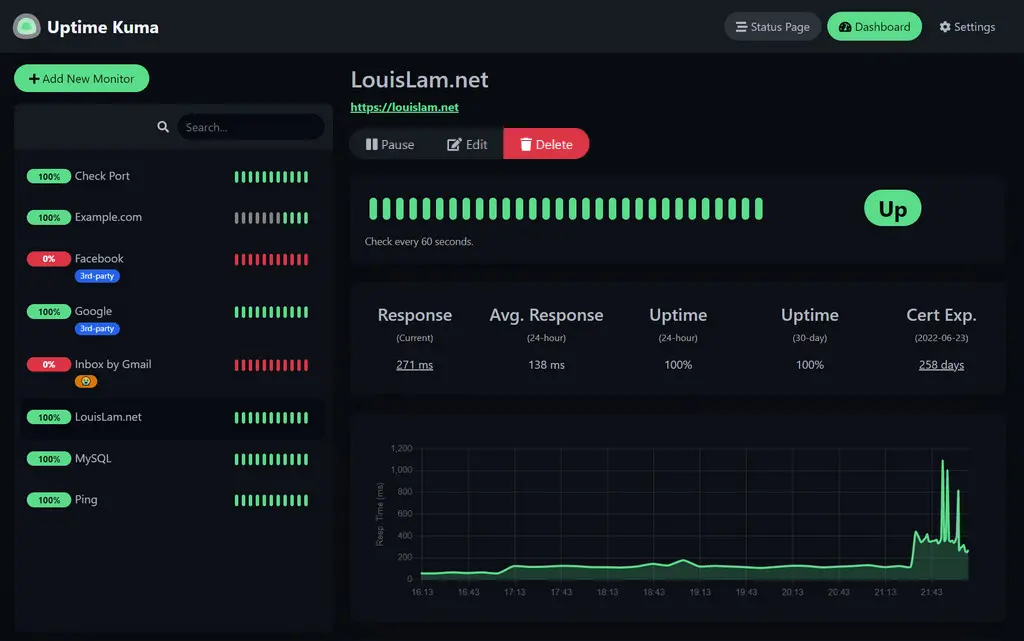
The project head is the same guy who previously developed the popular Uptime Kuma, and the web UI of Dockge also resembles it, as you can see from the following picture.
So, if your work revolves only around containers or compose files, or if you prefer to use Podman for creating containers, then Dockge could be a good replacement for your existing CLI tool or Portainer.
In this article, you will learn more about its usage, how to install and set up Dockge on your Linux system, and how to use it to manage your containers or Docker Compose projects.
Tutorial Details
| Description | Dockge |
| Difficulty Level | Low |
| Root or Sudo Privileges | No |
| OS Compatibility | Ubuntu, Manjaro, Fedora, etc. |
| Prerequisites | Docker or Podman |
| Internet Required | Yes (for installation) |
Features of Dockge
Dockge offers a range of features that make it a popular choice for Homelab lovers, including:
- Free, open-source, easy-to-use, with a fancy UI.
- Create, edit, start, stop, restart, or delete containers or compose files.
- Access the running containers’ via an interactive web terminal.
- Manage multiple stacks from different Docker hosts with a single interface.
- Easily convert single Docker commands into a Compose layout.
- All Compose files are stored in your assigned locations on your host system.
How to Install and Setup Dockge on Linux
The Dockge installation is accomplished by running a compose file in Docker or Podman, which later provides you with a Web interface for managing your other Docker or Podman containers.
As of now, all operating systems supporting Docker, Docker Compose, or Podman, such as Ubuntu, Debian, Raspbian, RedHat, Fedora, CentOS, Arch, Manjaro, etc., will allow you to use Dockge.
So, if you’re using the supported operating system and already have Docker, Docker Compose, or Podman installed and configured, that’s great; otherwise, please refer to our separate article on Docker and Docker Compose or Podman installation.
Now, once you are ready, run the following command to create a “Dockge” directory in your home directory where all your containers’ related files and data managed by Dockge itself will be stored.
$ mkdir -p /home/<username>/DockgeTo set up Dockge, you need to obtain its compose file, which you can interactively generate from here. This also allows you to specify the custom port and stack path for Dockge through the following interactive interface:
/home/<username>/Dockge“).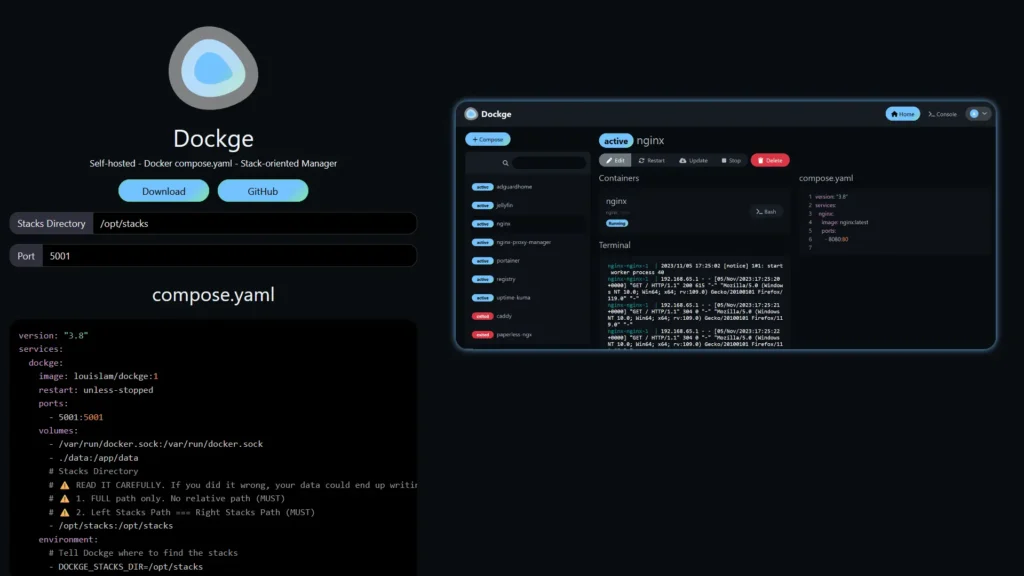
Apart from using the Dockge compose generator, you can directly run the following curl command in the “/home/<username>/Dockge” directory to download the Dockge premade compose file.
$ cd /home/<username>/Dockge
$ curl "https://dockge.kuma.pet/compose.yaml?port=5001&stacksPath=/home/<username>/Dockge" --output compose.yaml
Finally, to run the Dockge server, execute the following command:
$ Start the server
$ docker compose up -d

#OR

#If you are using docker-compose V1 or Podman
$ docker-compose up -d
How to Use Dockge
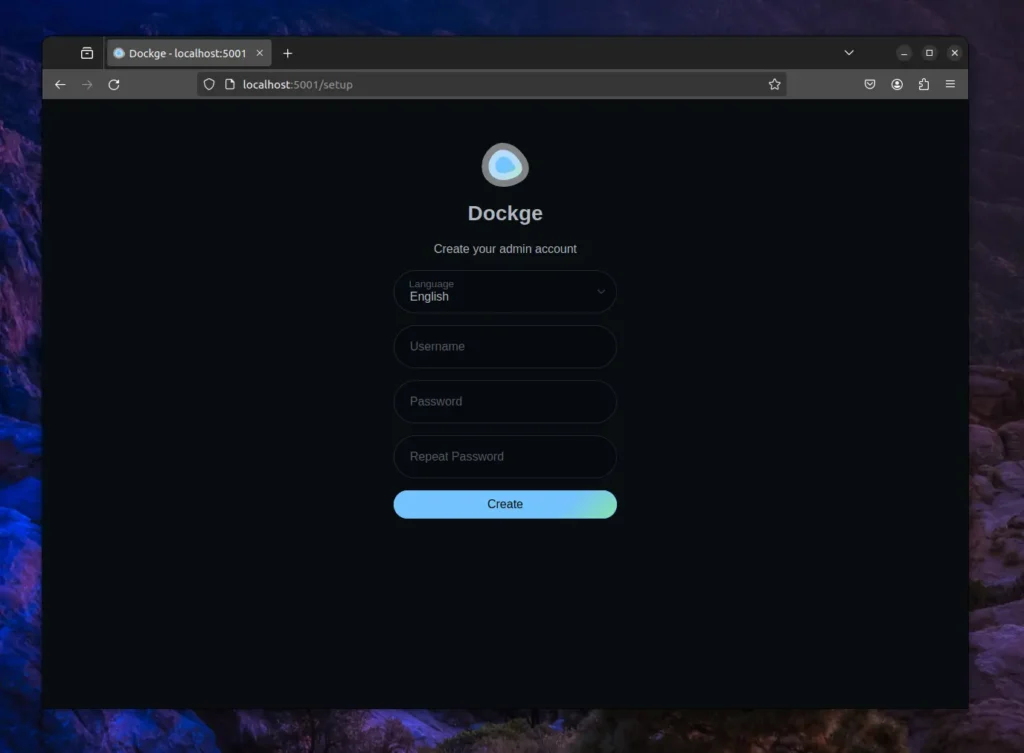
Once the Dockge server is started, you can open your browser and visit “http://ip-address:5001” to access the Dockge dashboard. Upon first access, it will prompt you to create an account by specifying the username, password, and repeat password. Provide the required information and click on the “Create” button.
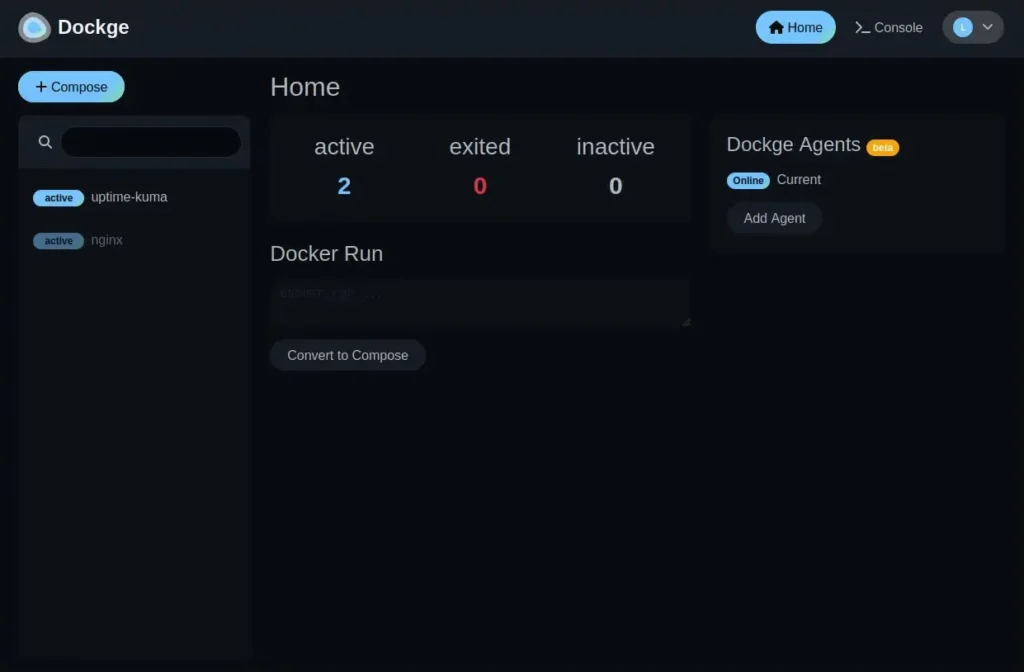
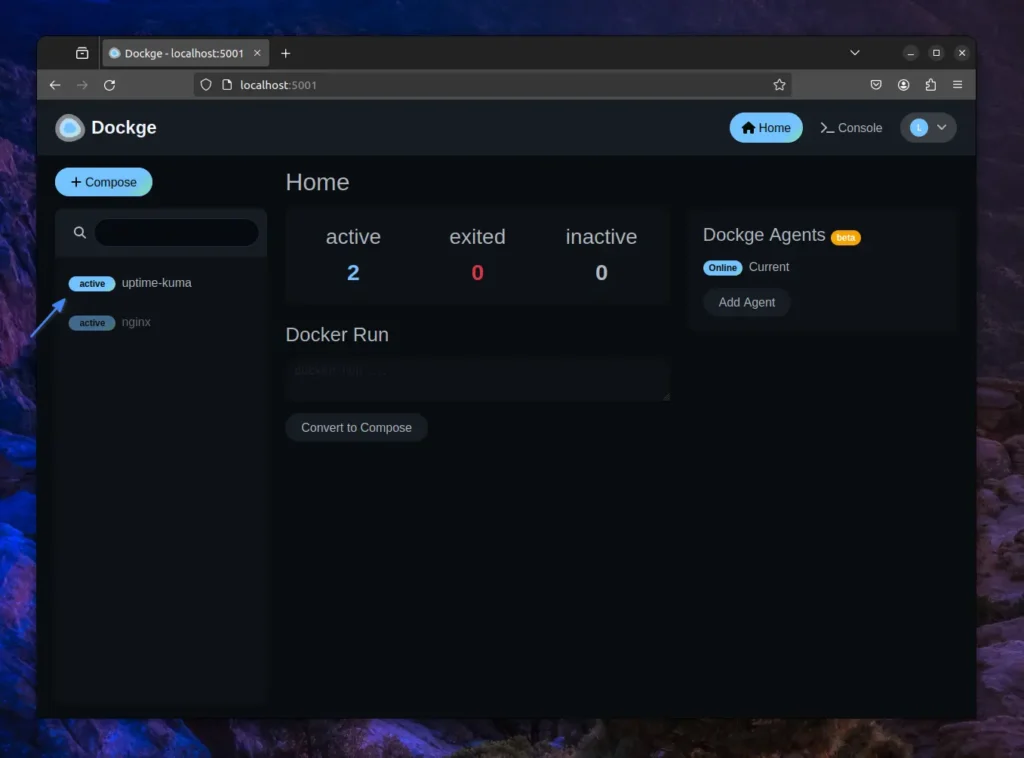
After creating your account, you’ll be directed to the Dockge dashboard, which is divided into two sections: on the left, you’ll find a list of active, exited, and inactive containers (in my case, “Nginx” is active), and on the right, you’ll see the container status represented by numerical values.
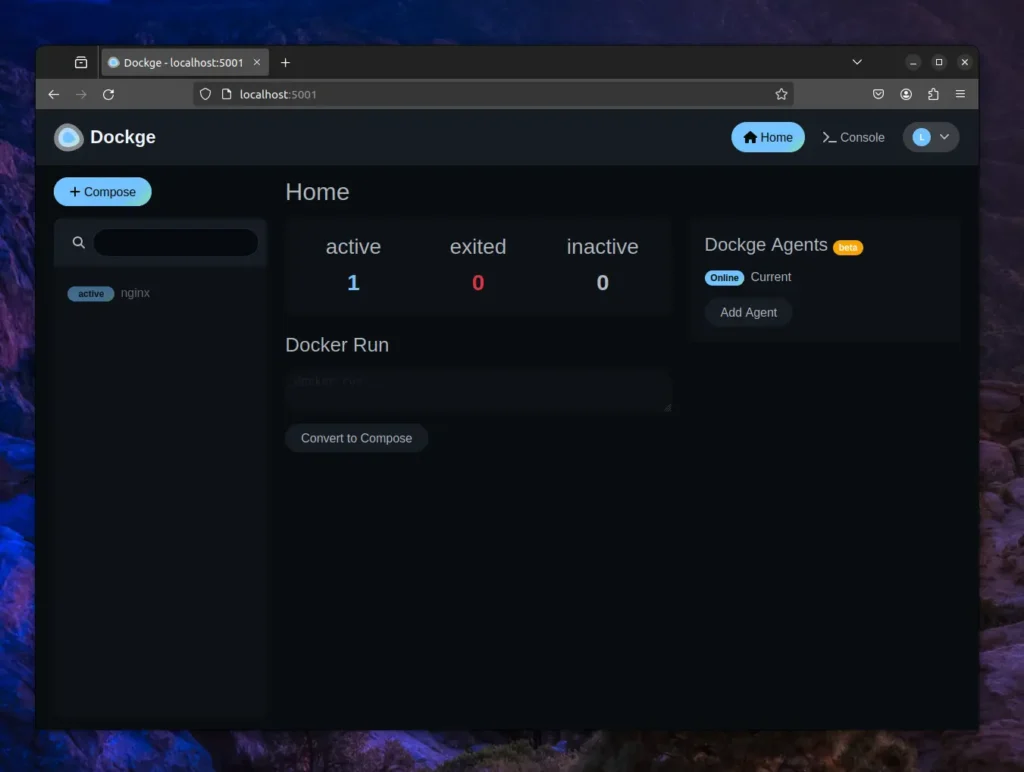
To create a container, you can either click on the “Compose” button on the top left container (if you already have a compose template) or type the “docker run ...” command under the “Docker Run” field and click on “Convert to Compose” (if you have a Docker command rather than a compose file).
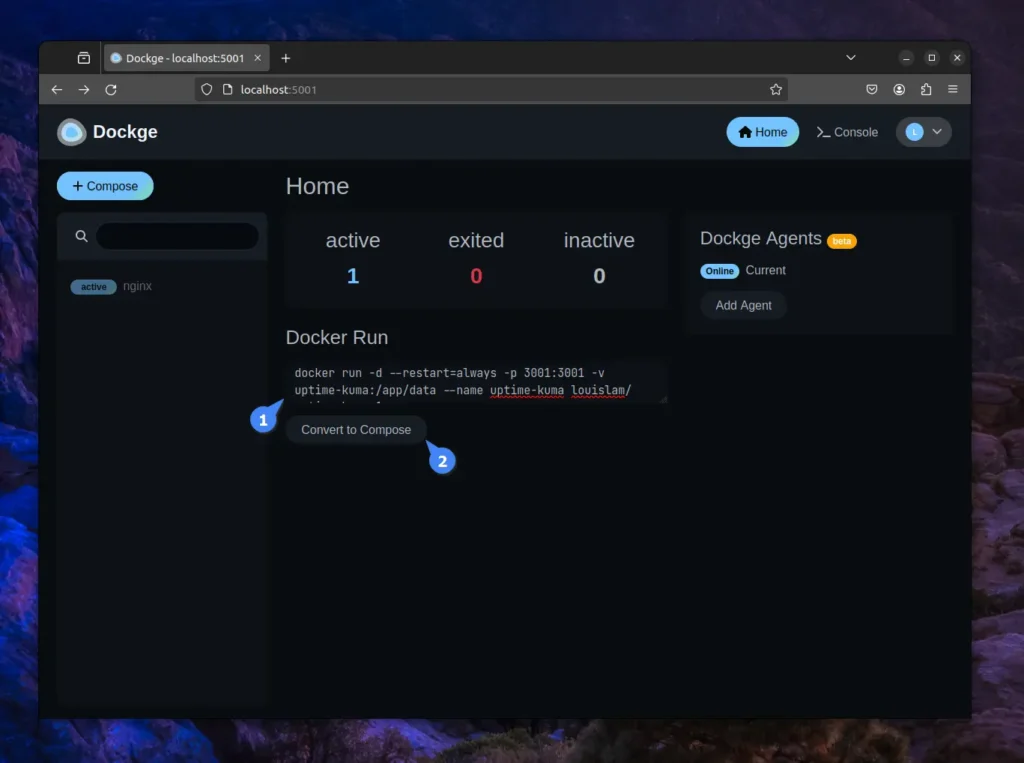
For example, I have an Uptime Kuma “docker run ...” command instead of a compose file, so I’ll copy and paste the command under the “Docker Run” field and click on the “Convert to Compose” button.
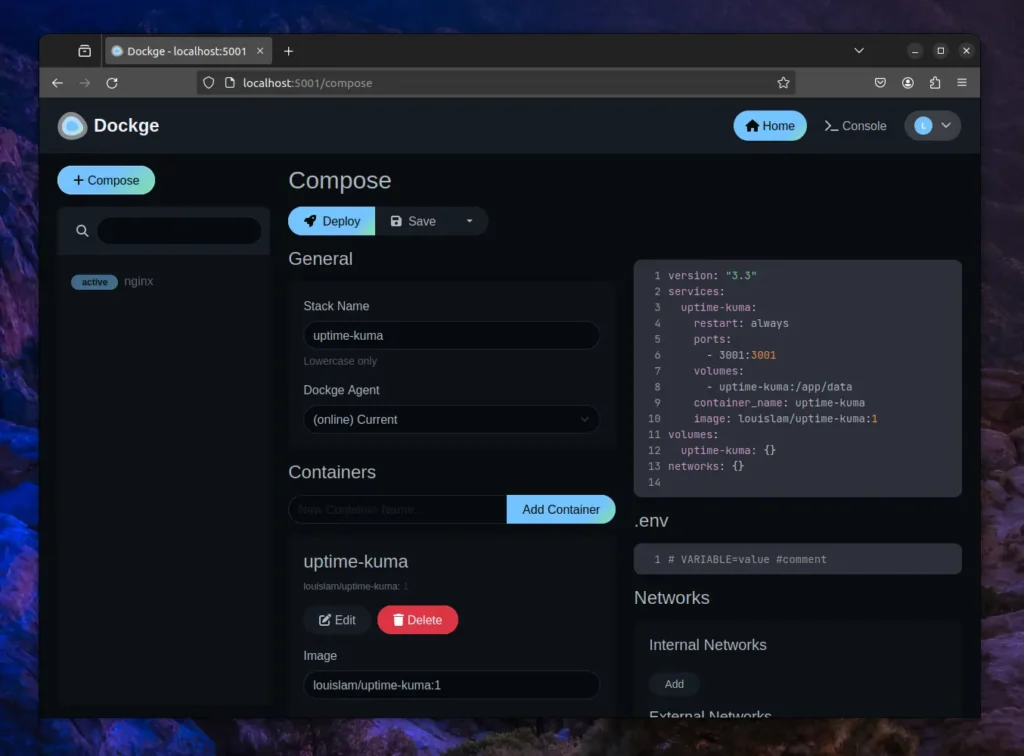
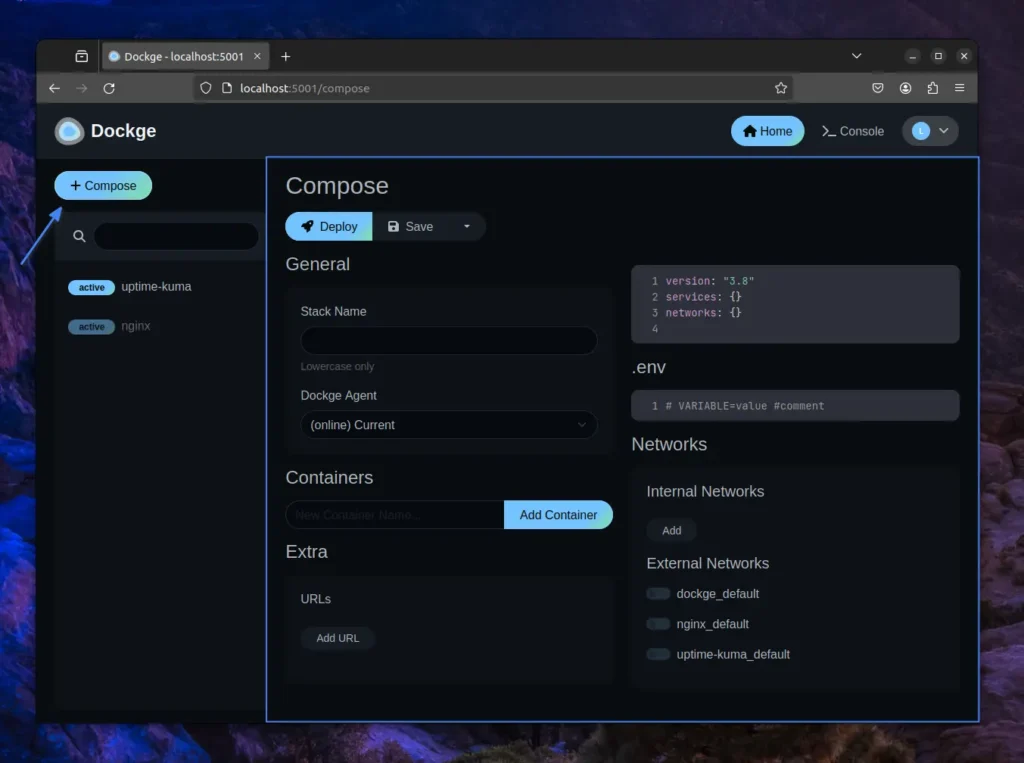
You will be redirected to the “Compose” page, where your provided Docker command will be converted to a Compose template. On the right side and under the Compose template, you have the option to manage environment variables, internal networks, and external networks.
In the middle, you can manage the Compose template and container, such as by adding a Stack Name to the Compose or editing the image, ports, volumes, restart policy, environment variables, and internal networks of the container.
When you are ready to start, click on the “Deploy” button to begin the image download process (if it doesn’t exist) and initiate the container.
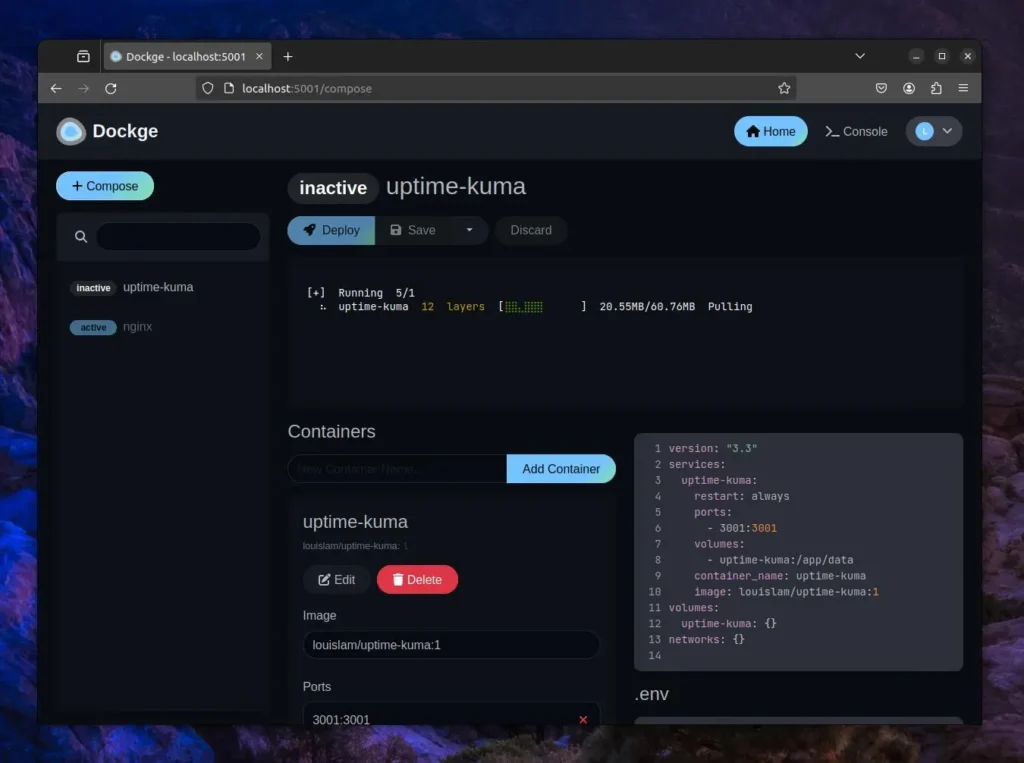
Once the container is ready, you can find it in the left-side bar with “active” status.
If you have a compose file instead of the “docker run ...” command and wish to use it for running containers from Dockge, you can click on the “Compose” button at the top left corner.
In the Compose dashboard, you can input the Compose information, including the stack name, containers (after specifying the name and clicking “Add container“, you will be able to input other details of the container, such as image, ports, volumes, restart policy, environment variables, networks, container dependency), env, and network details.
Once your container is initiated, you can further edit to add new containers, environments, and external networks, restart the container, update the container, stop, and enter the shell prompt of the container.
Final Word
Dockge is a pretty handy tool for managing Docker compose files and containers using a slick web interface. I find it interesting, as most things become easier to manage from a frontend standpoint. However, I would like to know your viewpoint on this, so please let me know in the comment section.
Till then, peace!


Thanks for this information.