
Portainer is an amazing open-source container management platform that simplifies the deployment, management, and monitoring of containerized applications.
It provides a user-friendly web-based interface (desktop clients are not available) that makes it easier for users to interact with container technologies like Docker or Kubernetes.
As a DevOps engineer, I always install it as my first and favorite tool right after Docker on my Linux system to manage containers and container orchestration without requiring extensive command-line usage.
In this quickstart guide, you will learn how to install Portainer on your Linux system, including installation steps for WSL.
Tutorial Details
| Description | Portainer Server |
| Difficulty Level | Moderate |
| Root or Sudo Privileges | No |
| OS Compatibility | Ubuntu, Manjaro, Fedora, etc., or WSL |
| Prerequisites | Docker, Docker-Compose |
| Internet Required | Yes |
Difference Between Portainer Server and Portainer Agent
When using Portainer, terms like Portainer Server and Portainer Agent may come up, and explaining them is quite straightforward.
Consider this scenario: you have your main server for your primary tasks, along with several other servers dedicated to various specific tasks.
You utilize Docker on your main server for miscellaneous server management tasks and have Docker installed on your other servers for specific purposes, such as running a web server or Kubernetes.
Now, instead of separate installations of Portainer on each server with independent management in different Portainer web UIs, you can set up the Portainer Server on your main server and the Portainer Agent on your other server.
With this approach, you’ll have just one Portainer Server that serves as the web UI for your main server and all other servers where the Portainer Agent is installed.
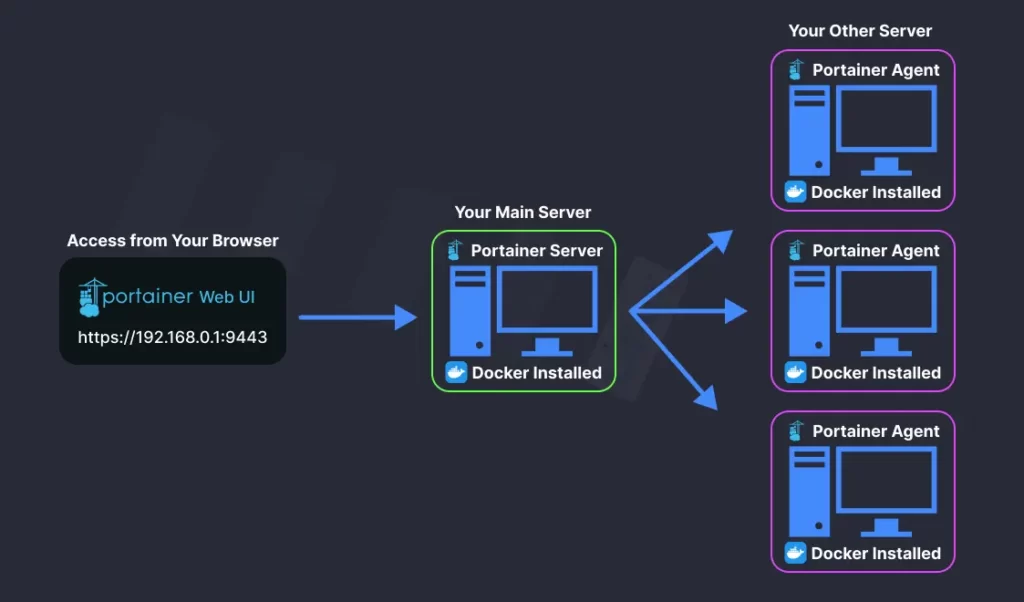
I hope you understood the difference between Portainer Server and Portainer Agent, and in this article we will discuss the installation of Portainer Server.
How to Install Portainer Server on Linux
Portainer isn’t a standalone application; rather, it’s just another Docker container that you can effortlessly install using your “docker” command.
It leverages the Docker socket for Docker container creation, management, and execution, with the socket’s location varying depending on the operating system. Consequently, different installation steps are needed for Portainer on Linux systems or WSL.
Creating a Volume for the Portainer Database
Start by creating the Docker volume that Portainer Server will use to store and persist its database across container restarts.
sudo‘ before the command.$ docker volume create portainer_dataInstalling Portainer Server with Docker on Linux Systems
After creating the Docker volume for Portainer, run this command exclusively on your Linux distribution to install the Portainer Server container:
-v portainer_data:/data‘ with ‘-v /home/linuxtldr/portainer/data/:/data‘.$ docker run -d -p 8000:8000 -p 9443:9443 --name portainer --restart=always -v /var/run/docker.sock:/var/run/docker.sock -v portainer_data:/data portainer/portainer-ce:latestInstalling Portainer Server with Docker on WSL
Once the Docker volume for Portainer is created, issue the following command exclusively on your Windows system with WSL to install the Portainer Server container:
$ docker run -d -p 8000:8000 -p 9443:9443 --name portainer --restart=always -v //var/run/docker.sock:/var/run/docker.sock -v portainer_data:/data portainer/portainer-ce:latestChecking the Status of the Portainer Server Container
Once you’ve installed the Portainer server container, you can execute this command to verify that it’s up and running on your system:
$ docker ps Output:

Usage of the Portainer Server
Portainer, for security reasons, uses port 9443 by default with a self-signed SSL certificate for added security. With this port, you can access the Portainer Web-UI interface using either your local IP or global IP.
Assuming you’ve installed it on your local system, you can access your Portainer Server instance by simply opening a web browser and navigating to “https://localhost:9443”.
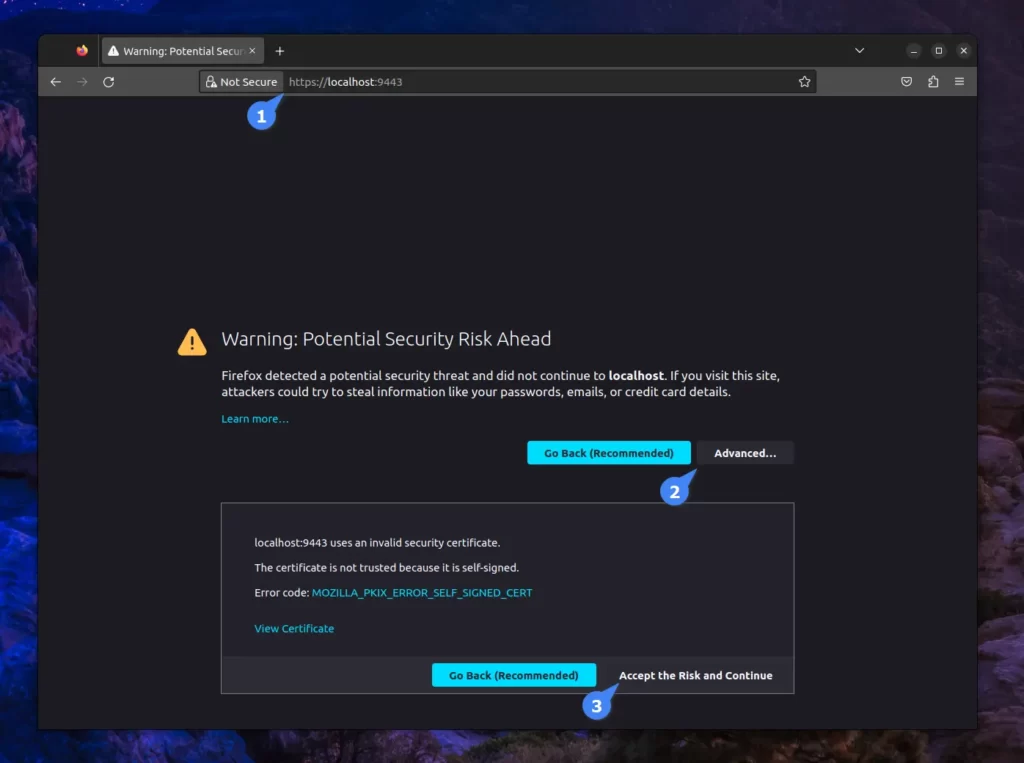
When accessing the Portainer Server instance, you might get the above warning message, which is due to the self-signed SSL certificate.
Simply click on “Advanced…” and then “Accept the Risk and Continue“, and then you will be taken to the following page.
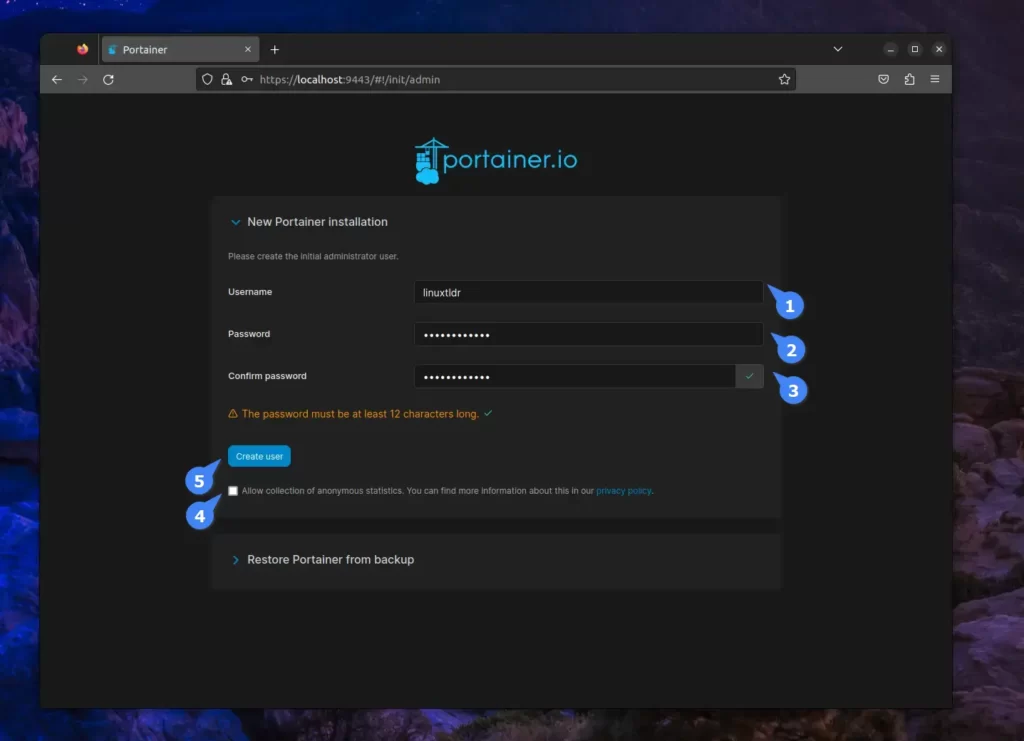
On the above page, you have to create an administrator user. The default username will be “admin“, but you can change it if you prefer. The password must be secure and at least 12 characters long.
You can also enable or disable connection statistics using the checkbox. I prefer to disable it, and then continue by clicking on the “Create user” button.
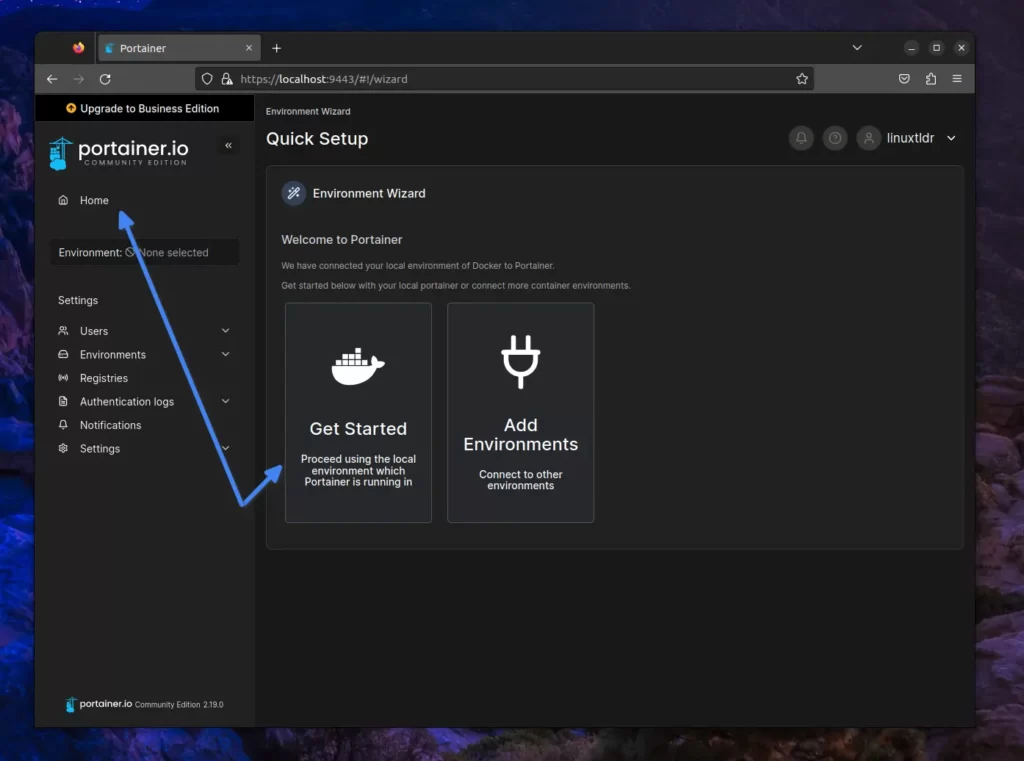
The Portainer automatically detects your local environment and sets it up for you. So, you can simply begin by clicking on either the “Get Started” or “Home” option.
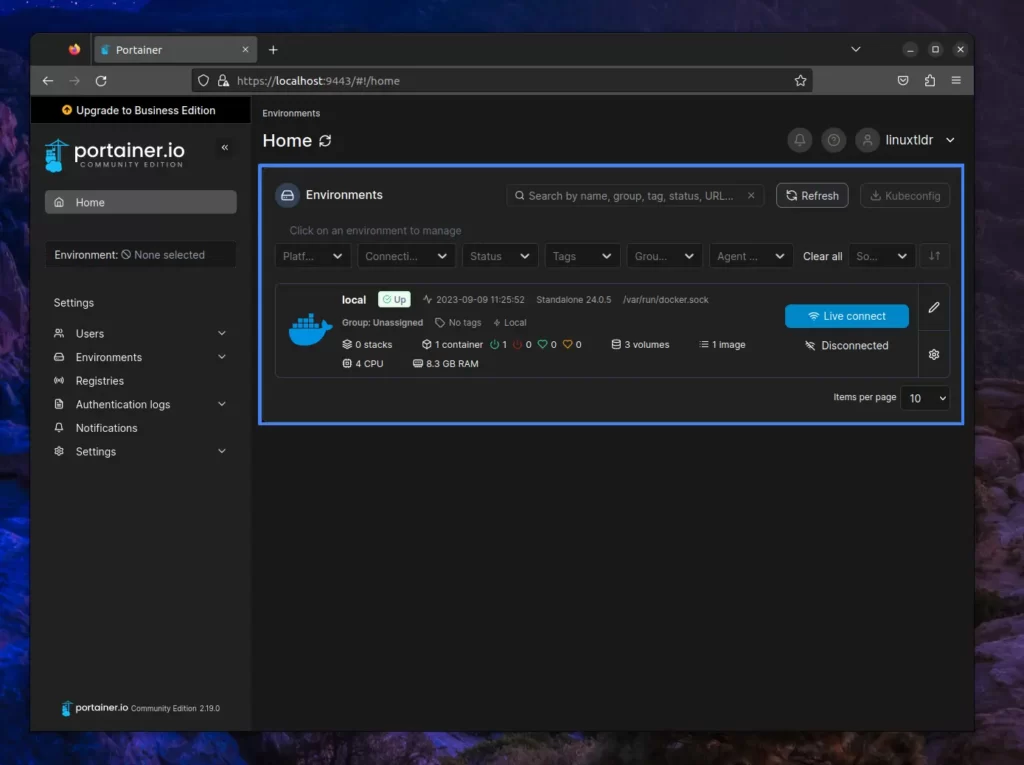
Here, you’ll find a list of all the environments added to your Portainer, whether through agents, APIs, sockets, or edge agents. The default one is “local“, which is automatically detected from your local environment.
To kickstart your Docker management journey with Portainer, just click on your “local” environment within the “Environments” section.
Final Word
I hope this article helped you with your journey on Portainer. If you have any questions or queries related to the article, do let us know in the comment section.
Till then, peace!


