
uv is a Rust-based Python installer and resolver designed to replace “pip“, “pip-tools“, and “virtualenv” commands, offering great 10-100x speed and advanced features like dependency version overrides and alternative resolution strategies.
It has already been tested at scale against the top 10,000 PyPI packages, supporting global cache for dependency deduplication, indirectly saving disk space, and offering best-in-class error messages with a conflict-tracking resolver.
I must definitely recommend you give it a try by reading this article, learning the installation steps, and a usage guide with practical examples.
Tutorial Details
| Description | uv: A Python Installer and Resolver |
| Difficulty Level | Low |
| Root or Sudo Privileges | No |
| OS Compatibility | Linux, Windows, and macOS |
| Prerequisites | – |
| Internet Required | Yes (for installation) |
How to Install uv on Linux, Windows, and macOS
The best thing about this tool is its availability for installation via Pip and Pipx. However, I would recommend installing it using the curl command in Linux, the irm command in Windows, and the brew command in macOS.
#For Linux and macOS.
$ curl -LsSf https://astral.sh/uv/install.sh | sh

#For Windows.
$ irm https://astral.sh/uv/install.ps1 | iex

#With Homebrew.
$ brew install uv

#With Pip.
$ pip install uv

#With Pipx.
$ pipx install uv
Once the installation is complete, make sure to restart your terminal session to apply the change, then run the following command to verify that it’s successfully installed and accessible via the terminal.
$ uv --versionOutput:

How to Use uv to Manage Python Packages
uv can be used in numerous ways to manage your Python packages, such as creating a virtual environment with uv, run.
$ uv venvOutput:

Once created to activate the virtual environment, run.
#On Linux and macOS
$ source .venv/bin/activate

#On Windows
$ .\.venv\Scripts\activate.ps1
Output:

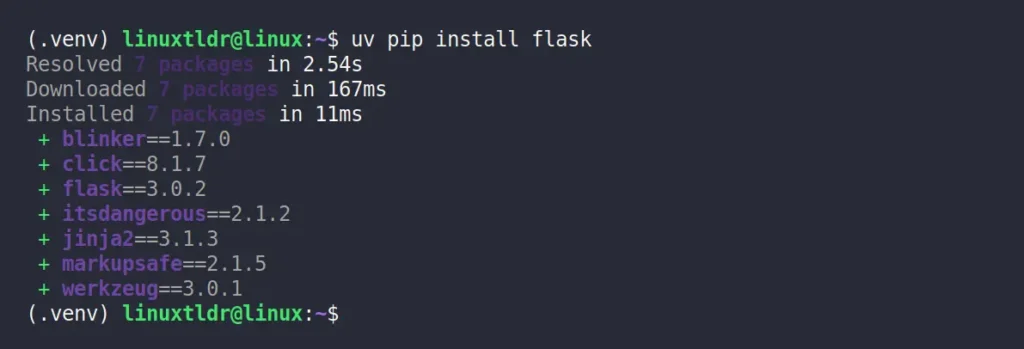
To install a package inside the virtual environment, you can run one of the following commands based on the situation.
#Install a single package (in this case, Flask).
$ uv pip install flask

#Install multiple packages from a "requirements.txt" file.
$ uv pip install -r requirements.txt

#Install the current project in editable mode.
$ uv pip install -e .

#Install the current project from disk.
$ uv pip install "package @ ."
Output:
Furthermore, you can use the rest of the “pip“, “pip-tools“, and “virtualenv” commands with uv by prefixing “uv” before each of these commands at the time of execution.
I’ll end this article here; you can dig deeper from the project page and note that certain Pip features, like “.egg” dependencies, editable installs for Git, and direct URL dependencies, are not supported.
If encountering any issues, raise a new request on the project issues page; additionally, consider checking out the release page to stay informed on the latest uv releases, which frequently introduce new features, bug fixes, and more.


