
Navigating files and directories in the terminal using ls and cd commands may seem efficient but can be unproductive, especially for those immersed in them all day.
How often do you hesitate or feel overwhelmed when browsing directories with numerous files, like “/bin“? Navigating through them can be tedious, requiring scrolling or multiple flags to narrow down your desired file or directory.
Linux geeks recommend tools like “Ranger” or “Exa” to efficiently navigate through files and directories via the terminal.
But today, we’ll explore my current favorite lightweight command-line tool named “walk” for navigating files and directories in Linux.
Tutorial Details
| Description | Walk – A Terminal Navigator |
| Difficulty Level | Low |
| Root or Sudo Privileges | No |
| OS Compatibility | Ubuntu, Manjaro, Fedora, etc. |
| Prerequisites | – |
| Internet Required | Yes |
What is Walk in Linux?
Walk is a minimalistic, lightweight terminal navigator developed by Anton Medvedev to accelerate your Linux filesystem navigation, replacing the traditional cd and ls commands.
An important highlight is the seamless navigation through files and directories to conduct fuzzy searches, preview file or directory content, make direct edits using Vim, or delete them.
Let’s now explore the installation process for this tool on your preferred Linux system.
How to Install Walk on Linux
The standout feature of this tool is its availability through multiple installation methods, offering you a wide array of options to suit your preferences.
Install this tool on your Linux system by executing one of the following commands:
$ brew install walk                                                                                                              #Using the homebrew
$ snap install walk                                                                                                              #Using the Snap
$ go install github.com/antonmedv/walk@latest                                                        #Using the Go
$ pkg_add walk                                                                                                                   #For OpenBSD
Alternatively, you can download and move the walk binary file into your bin directory. If you prefer this method, simply follow the steps below.
$ sudo wget https://github.com/antonmedv/walk/releases/download/v1.9.0/walk_linux_amd64 -O /usr/bin/walk
$ sudo chmod +x /usr/bin/walk
$ walk --version
After implementing any of the methods above for installation, continue by appending the following function to your shell configuration file:
| Shell Type | Walk Function | Configuration file |
|---|---|---|
| For Bash/Zsh | function lk { | Bash => “~/.bashrc” Zsh => “ ~/.zshrc“ |
| For Fish | function lk | “~/.config/fish/config.fish“ |
| For PowerShell | function lk() { | “~/.config/powershell/Microsoft.PowerShell_profile.ps1“ |
Once you’ve finished editing the functions in your shell configuration file, remember to reload or restart your terminal session to ensure that the changes take effect.
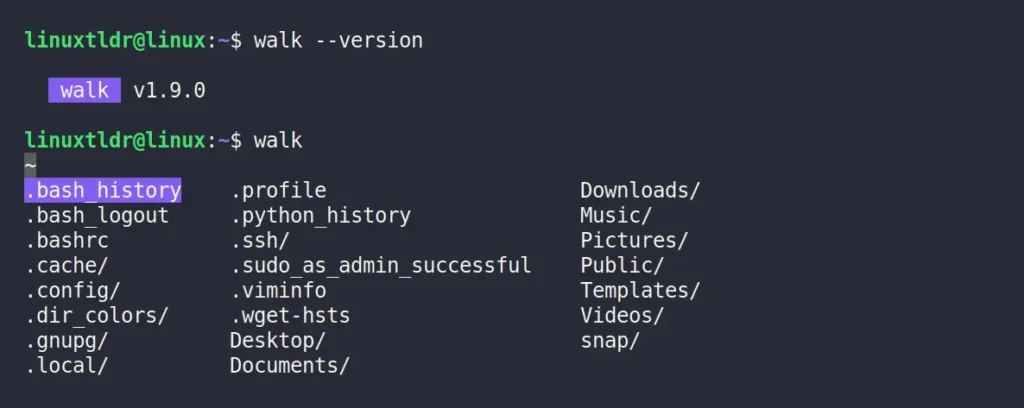
After completing those steps, you’re all set and can immediately execute the following command to check the version or initiate the walk prompt.
$ walk --version
$ walk
Output:
Enable Beautiful Icons via Nerd Fonts (optional)
Elevate your experience to the next level by displaying context-specific icons in the walk prompt based on the data type. To achieve this, begin by downloading one of the Nerd fonts (e.g., “DejaVuSansMono“).
$ wget https://github.com/ryanoasis/nerd-fonts/releases/download/v3.0.2/DejaVuSansMono.zipTo perform a user-specific installation, run:
$ mkdir -p ~/.local/share/fonts/
$ unzip DejaVuSansMono.zip -d ~/.local/share/fonts/DejaVuSansMono
$ fc-cache -f -v
To perform a system-level installation, run:
$ sudo unzip DejaVuSansMono.zip -d /usr/share/fonts/DejaVuSansMono
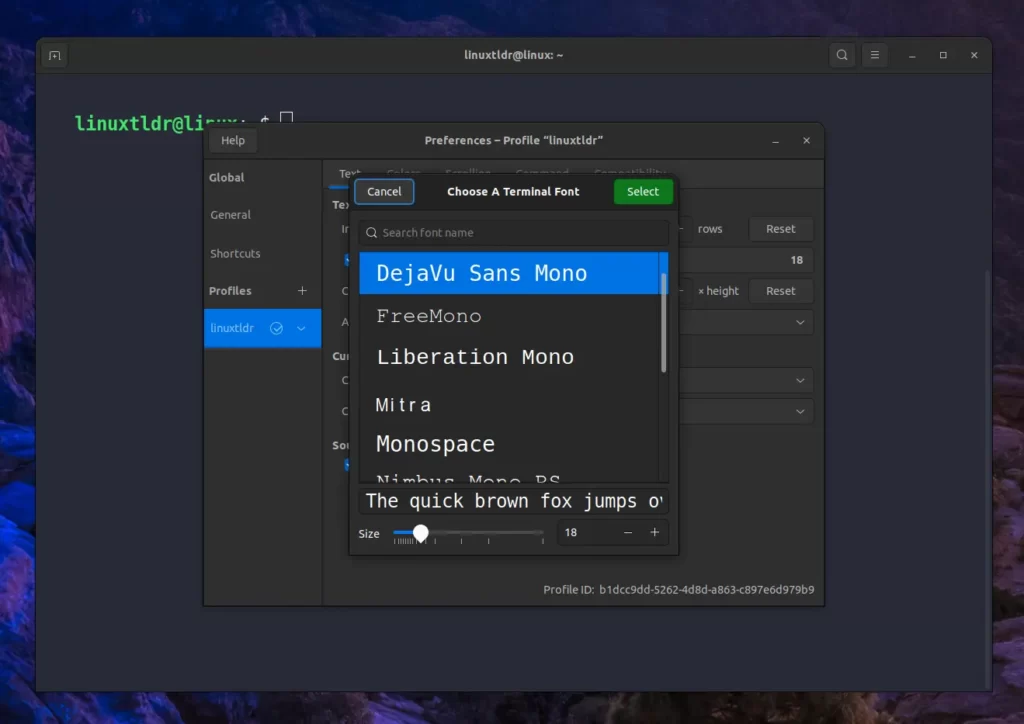
$ sudo fc-cache -f -vAfter completing the task, navigate to the settings and switch your terminal’s default font to “DejaVu Sans Mono“.
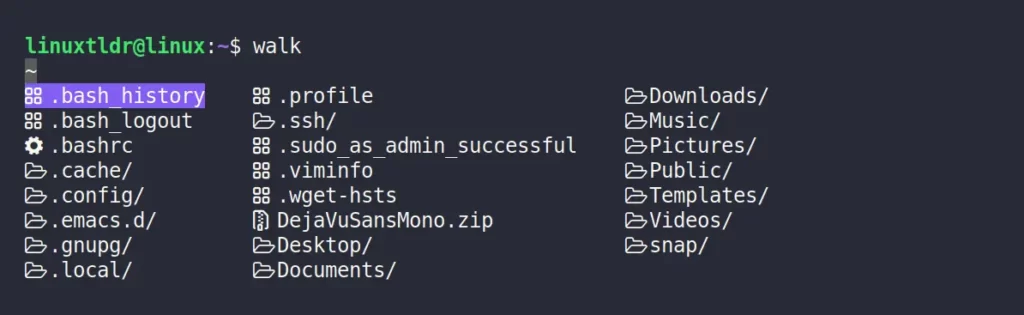
Your task is complete. To view the font on the go, simply include the “--icons” flag. For a smoother experience, consider creating an alias line in your shell configuration file to bypass the need for “--icons” every time.
alias walk="walk --icons"How to Use Walk on Linux
The usage of this command-line tool is remarkably straightforward—simply refer to the following keybindings for a quick grasp.
| Key binding | Usage |
|---|---|
| Arrow keys or hjkl | Navigate through items |
| Enter | Enter a directory |
| Backspace | Exit from a directory |
. (comma) | Toggle hidden files |
| Space | Preview file or directory content without opening |
| / | Perform a fuzzy search |
| dd | Delete a file or directory |
| Ctrl+C | Exit without changing the directory |
| Esc | Exit and change the directory |
Now, initiate the walk prompt by executing the following command:
$ walkOutput:
Now, the process of navigating, entering, and exiting from a file or directory is so self-explanatory that we can simply skip over it.
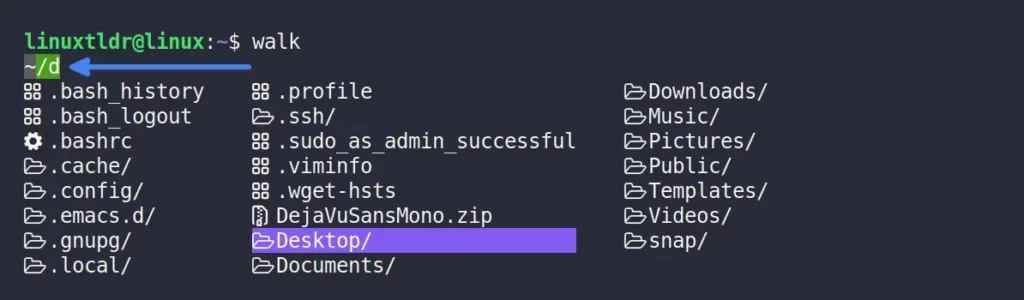
To easily perform a fuzzy search, just use the “/” key and start typing the name of the file or directory you’re searching for.
To effortlessly delete a file or directory, just select it and tap the “dd” key.
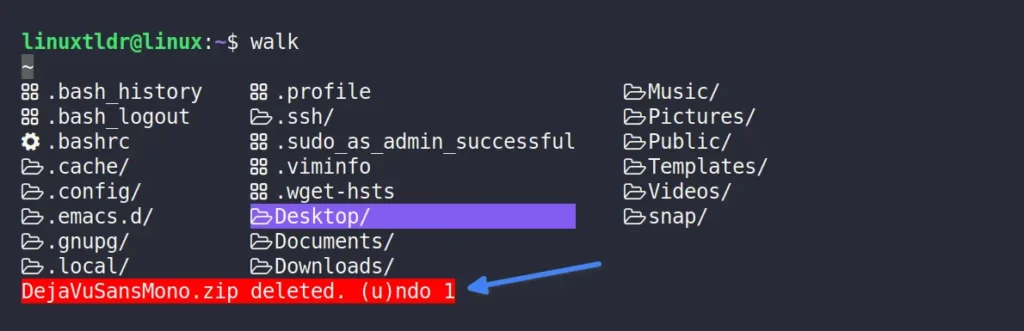
If you’ve accidentally deleted an important file or directory, simply press the “u” key within 5 seconds to swiftly undo the changes.
Most of the features are quite user-friendly, making it easy for anyone to operate. Now, let’s explore how to uninstall this tool if you didn’t find it to your liking.
How to Remove Walk from Linux
The removal process is as straightforward as the installation; simply execute one of the following commands, depending on the method you used for installation:
$ brew uninstall walk                                                                                                     #For homebrew
$ snap remove walk                                                                                                       #For Snap
$ rm /path/to/binary                                                                                                     #For Go
$ pkg_delete walk                                                                                                          #In OpenBSD
If you use the walk binary for the installation, then remove it from your bin directory.
$ sudo rm /usr/bin/walkFinal Word
If you find this tool interesting, or if you have any questions or queries related to this article, then feel free to ask them in the comment section.
Till then, peace!


Midnight Commander (mc) has like forever been the _original_ Terminal Navigator, and is easily available for the vast majority of Linux and *BSD distros. Cant sing the praises of mc high enough!