
Do you want to access your localhost over the internet (without static IP, without a router, without port forwarding) using the HTTPS protocol, remotely access your PC via SSH, or have you set up an FTP server on your system and want to access it for downloading and uploading files from anywhere?
This can all be achieved at once without needing static IP, router, or port forwarding on Linux, Windows, macOS, or Raspberry Pi by simply following the ten simple steps mentioned in this article.
Pre-requisite
The following are a few requirements that must be fulfilled in order for everything to work properly:
- System with active access to the internet.
- A running web server, SSH server, or FTP server on their default port.
- Cloudflare account with one purchased domain name that has subdomain access.
Access Localhost With a Domain Name Using Cloudflare Tunnels
To demonstrate how to reverse proxy with a dynamic IP using Cloudflare, I’ll use my Cloudflare account with my purchased domain name that I’ve already added and configured with nameserver, accessing my PC that has a Nginx server running at port 80 via my domain name.
So, let’s begin.
1. First, I’ll show you that the Nginx server is already running on my local PC on the default port 80.
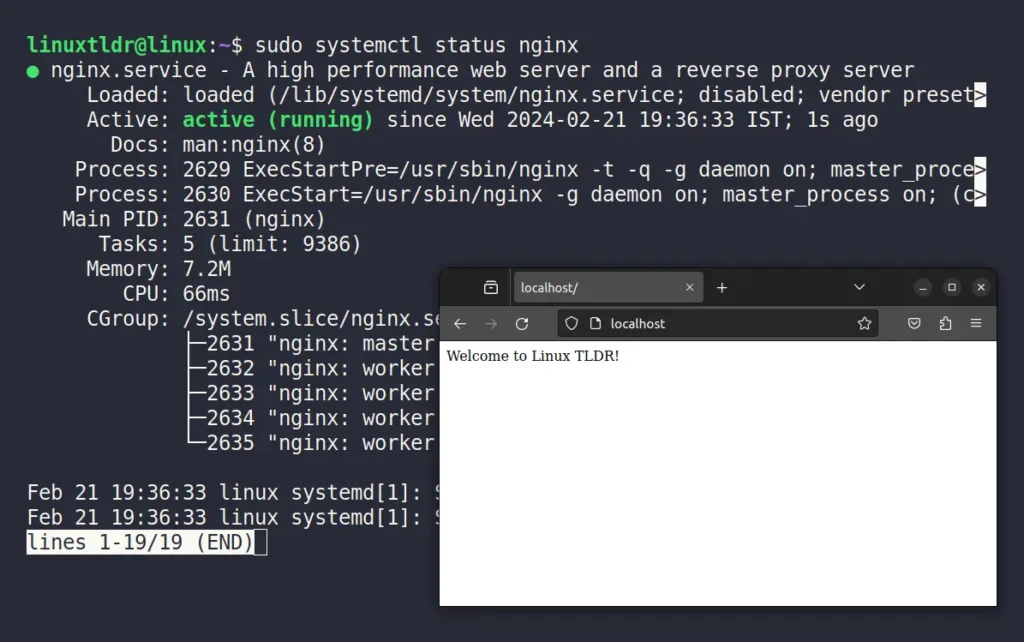
Now, I’ll show you how to access the above localhost page over the internet with a domain name using Cloudflare.
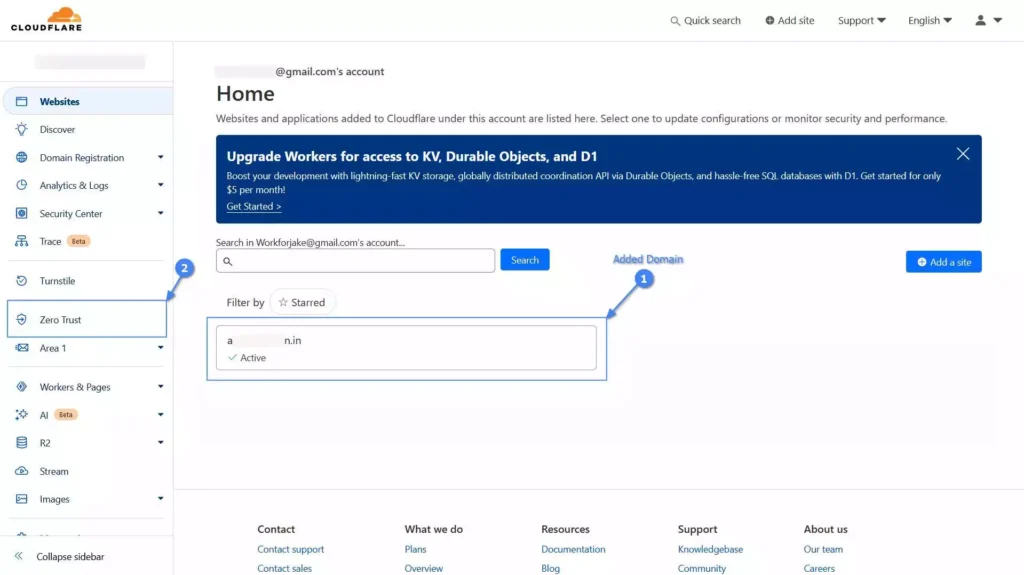
2. Login to your Cloudflare account, and you will then be redirected to the following page, where you can see I have one domain name added to my account. Therefore, you must also have at least one. Now, in the sidebar, click on the “Zero Trust” option.
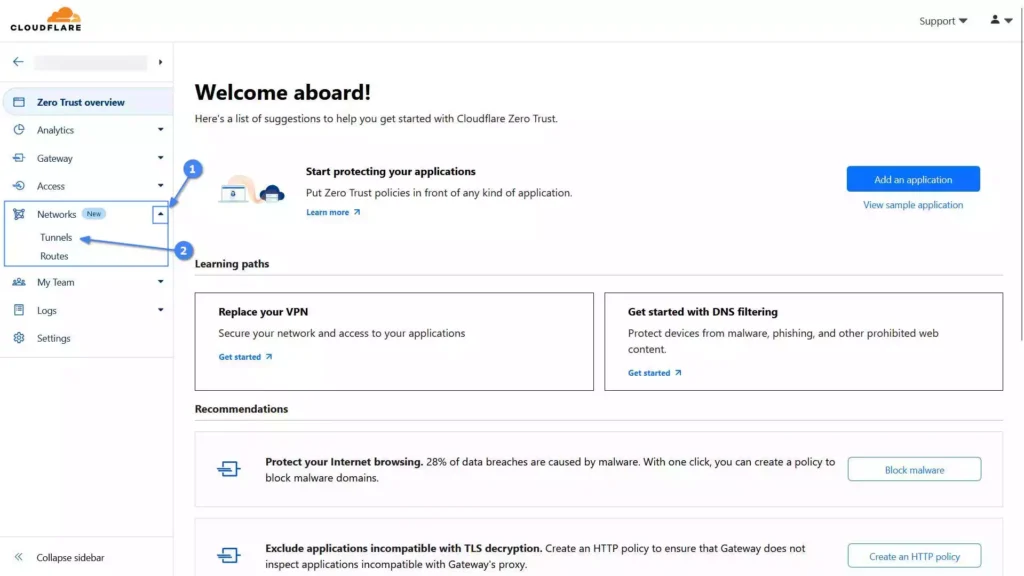
3. Now, you will be redirected to the following Zero Trust dashboard: Here, you must first click on the down arrow key next to “Networks“ and then click on the “Tunnels” option.
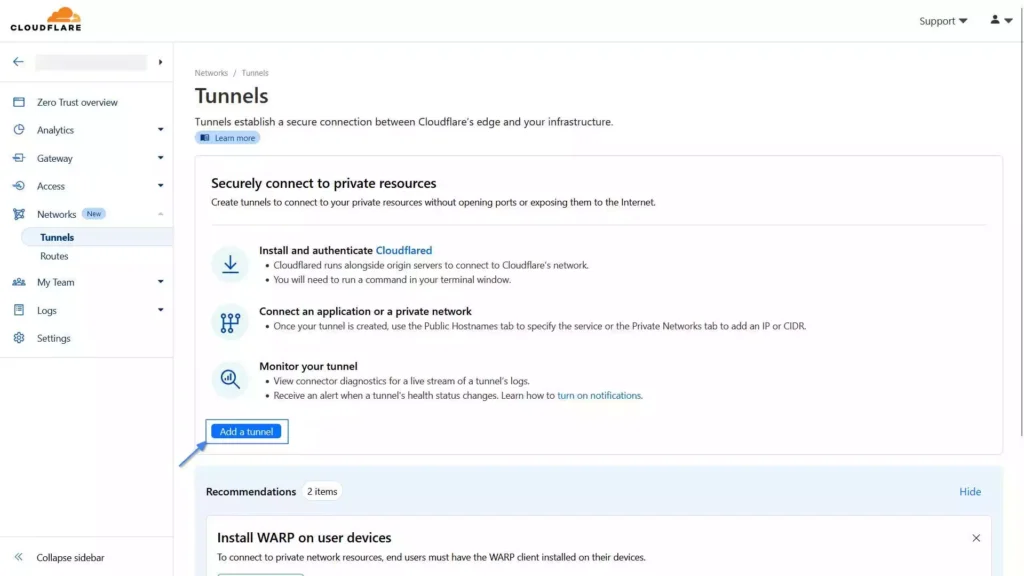
4. On the Tunnel page, click on the “Add a tunnel” button.
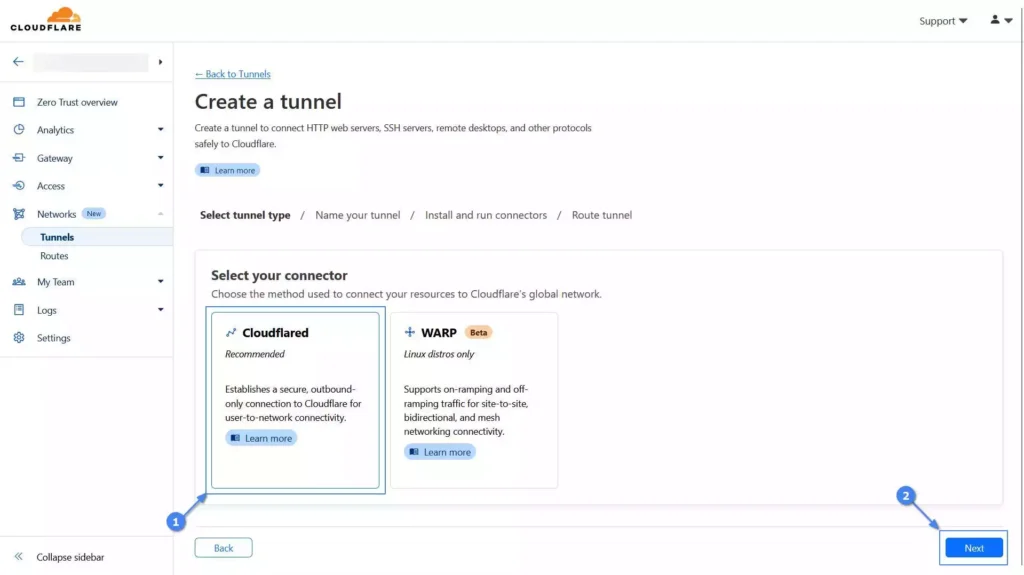
5. Select “Cloudflared” as the connector to link your resources (e.g., web server, SSH server, FTP server, etc.) to the Cloudflare global network, then click on the “Next” button.
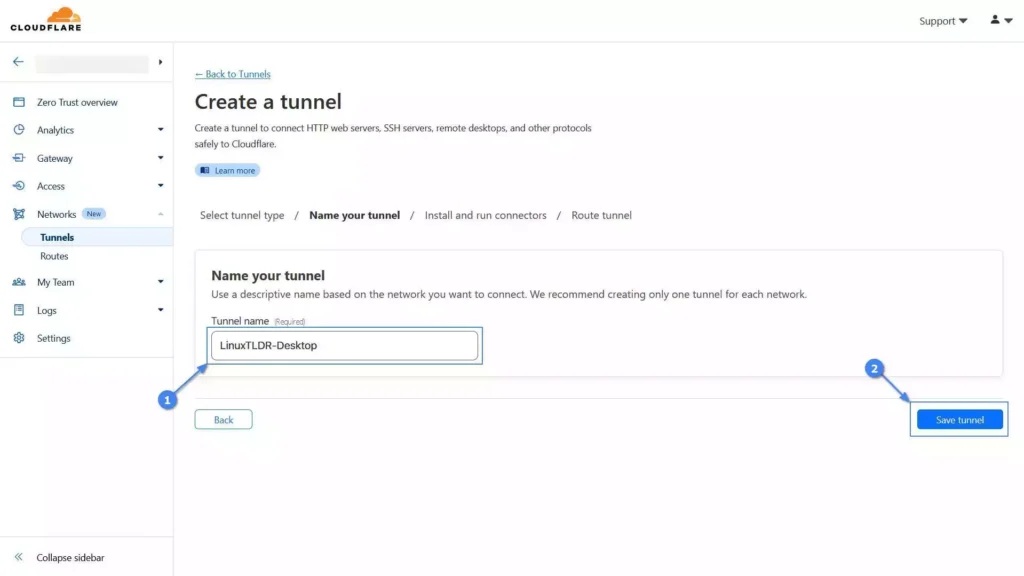
6. Name your tunnel, which will help you identify which system is linked to it in the future, and then click on the “Save Tunnel” button.
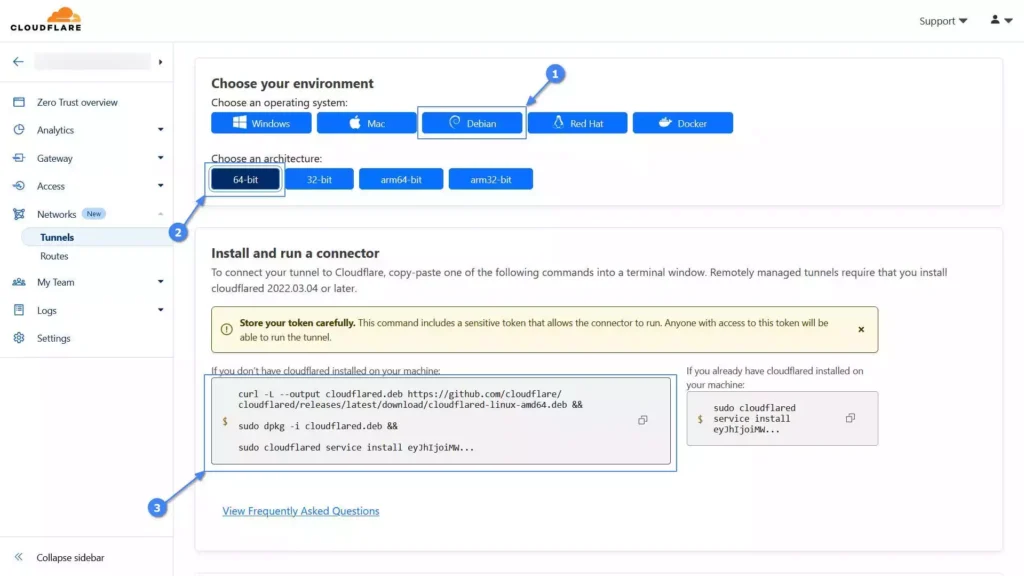
7. Choose the local system environment for the connector. For example, if you’re using an Ubuntu system operating on a 64-bit architecture, opt for “Debian” as the “operating system” and “64-bit” as the “architecture“, and then proceed to click and copy the provided command.
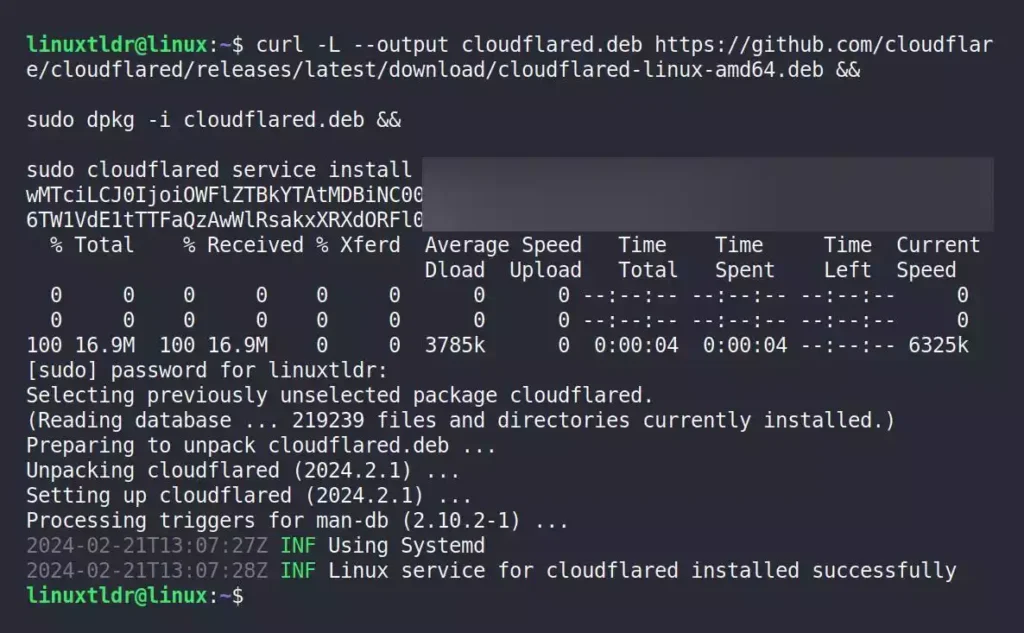
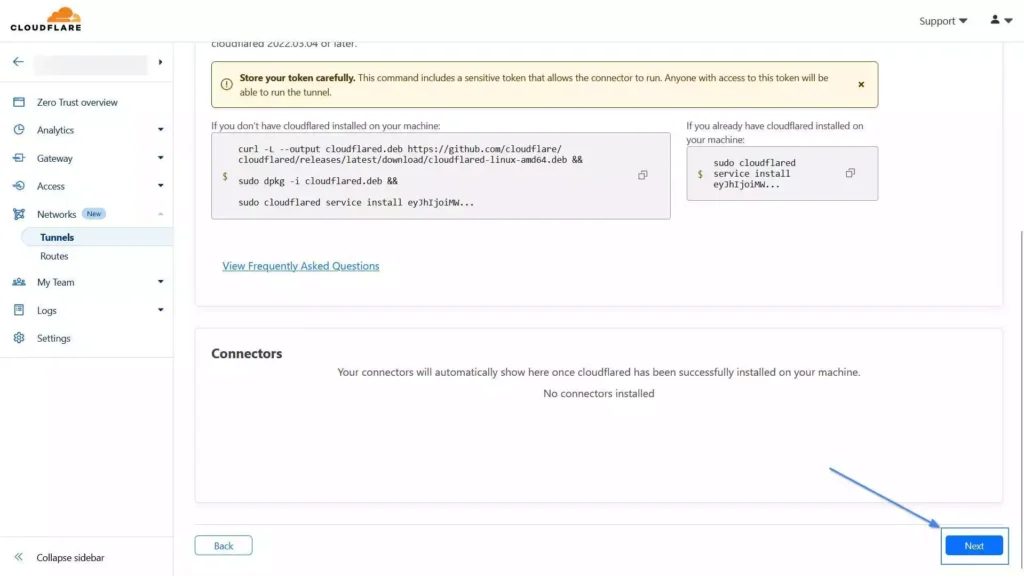
8. Open your terminal, paste, and execute the previously copied command to install and configure the Cloudflare service.
9. Once the installation is complete, return to your browser, scroll down, and click on the “Next” button.
10. It’s time to add the public hostname (the purchased domain in your Cloudflare account) to your tunnel and link the hostname to the Cloudflared service (installed in your system in step eight). For example, for the hostname subdomain, I’ll name it “linuxtldr“, select the domain in the “Domain” dropdown, and leave the “Path” field empty.
Then, under service, as I am running an Nginx server at port 80 on my system, I will select “HTTP” for “Type“, set the “URL” as “localhost“, and then click on the “Save Tunnel” button.

If, while adding the hostname, you encounter the following error:

Then make sure that the specified subdomain is neither already created nor reserved by any other record in the domain’s DNS records.
11. Once the hostname is successfully created, you will be redirected back to the “Tunnels” page, where you can view the status of the tunnel.
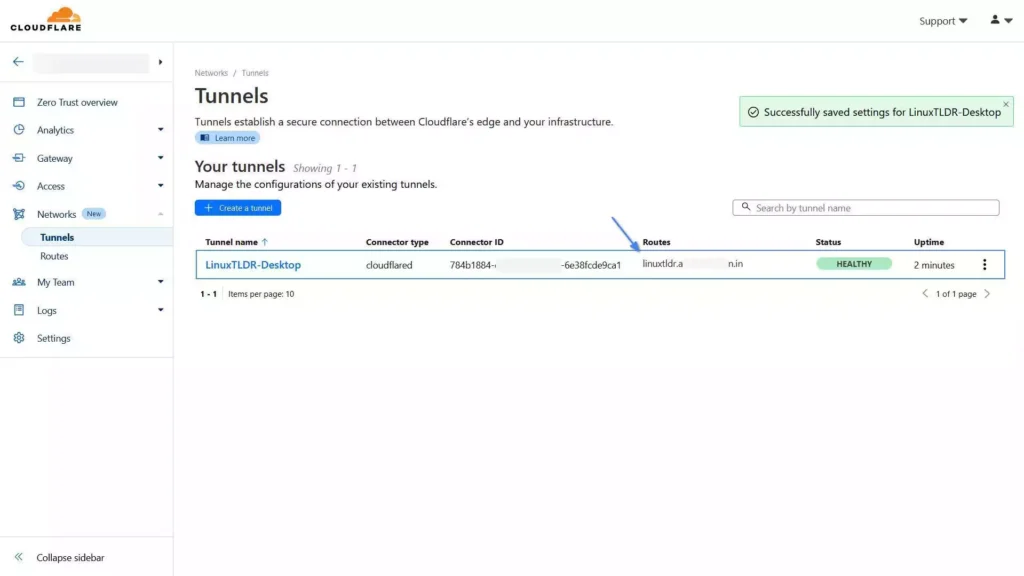
12. Once the tunnel status turns “HEALTHY“, open your browser and visit the domain you used as a hostname for the tunnel.
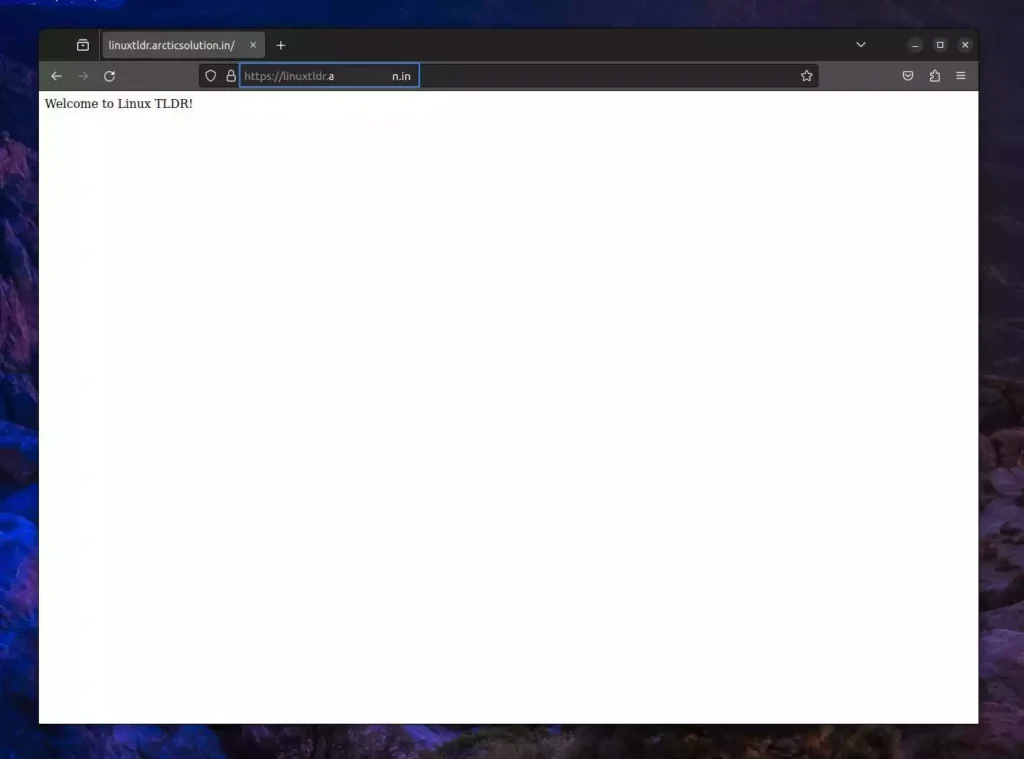
Tada!! You have successfully set up a Cloudflare tunnel on your local PC and can now access the web server over the internet via a domain name.
If you’re interested in learning more, do let me know in the comment section; there’s a lot more you can do with Cloudflare Tunnel.
Till then, peace!


