Today I’ll show you how easily and quickly you can create a desktop shortcut for an AppImage, file, script, or app on Linux. All methods mentioned here will work for all Linux distributions, whether it’s Debian, Ubuntu, Red Hat, Fedora, Arch, Manjaro, or others.
I focus on three popular methods for creating a desktop shortcut on Linux. However, if you ask for my suggestion, I would suggest following the first method as it’s simple and convenient for almost all Linux distributions; if you use Arch (BTW), go with the third method.
Method 1: Create Desktop Shortcut Using Menu Editor
Menu Editor is a GUI application used to create, edit, remove, and manage desktop shortcuts in Linux. It is quite popular, available in almost all major Linux distribution repositories, and can be quickly installed using their default package manager.
# On Debian, Ubuntu, Kali Linux, Linux Mint, Zorin OS, Pop!_OS, etc.
$ sudo apt install menulibre

# On Red Hat, Fedora, CentOS, Rocky Linux, AlmaLinux, etc.
$ sudo dnf install menulibre

# On Arch Linux, Manjaro, BlackArch, Garuda, etc.
$ sudo pacman -S menulibre
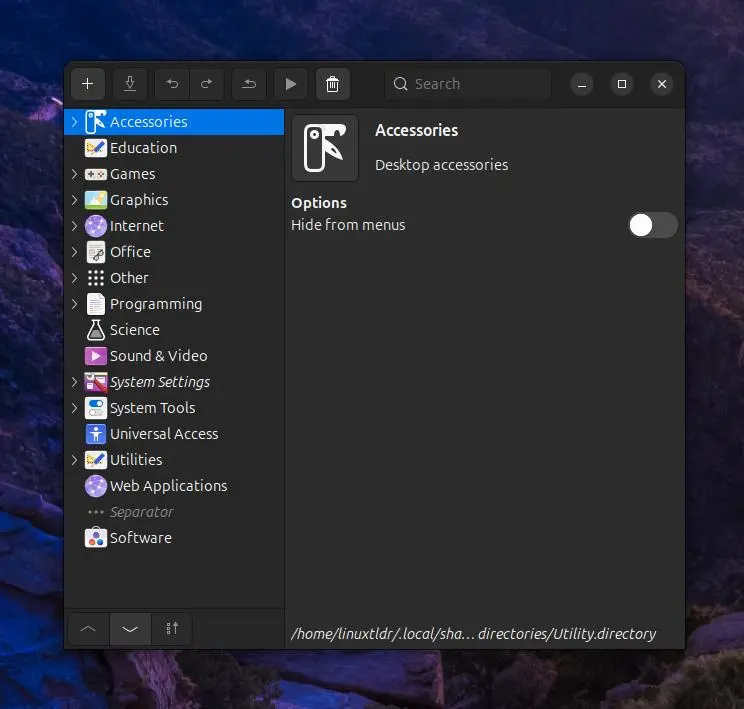
Once the installation is complete, you can find and launch it from the application menu. On first launch, you will see a window displaying all desktop shortcuts in the left sidebar and their customization options in the right sidebar.
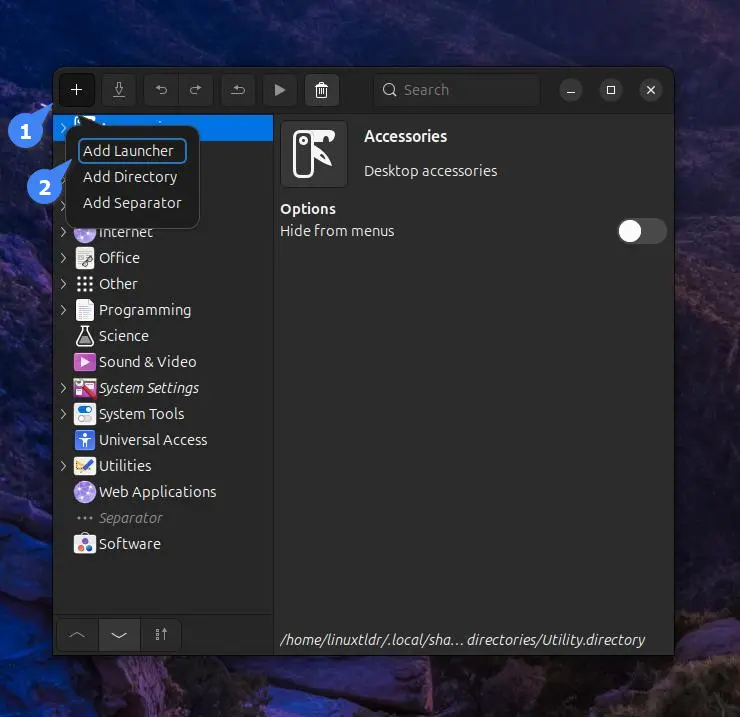
To create a desktop shortcut for your AppImage, file, script, or app, simply click the “+” (plus) button in the top left corner and select “Add Launcher” from the drop-down menu.
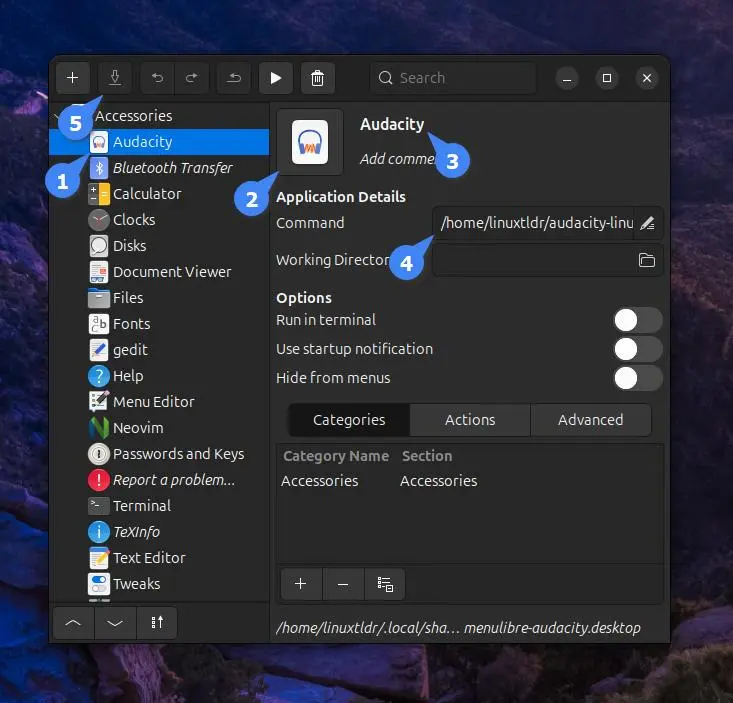
It will create a blank shortcut where you need to select the desktop icon, add a title to your shortcut, specify the path, and when you’re done, click the save button from the menu bar.
Once you’ve finished creating your desktop shortcut, you can close the Menu Editor and search for your application shortcut in the application menu by searching for its name.

Later, you can edit or delete the desktop shortcut from the Menu Editor.
Method 2: Create Desktop Shortcut Using AppImageLauncher
AppImageLauncher is an incredibly popular tool for creating desktop shortcuts for AppImage (incompatible with files, scripts, or other apps); regrettably, it’s somewhat outdated with no indication of future updates. However, at the time I wrote this article, I’d experimented with it and found it to function flawlessly.
The advantage of using it (over the other tool) to create desktop shortcuts for AppImages is that it maintains a directory where all your AppImages will be included, automatically updates the supported AppImages, and offers quick desktop integration options.
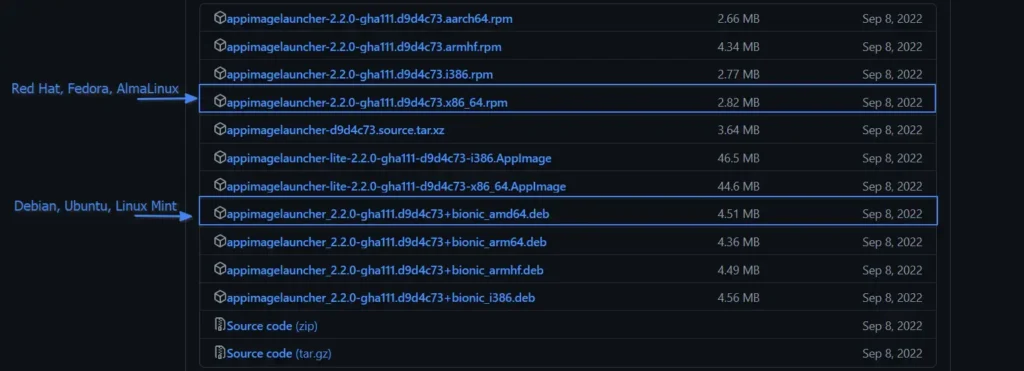
To install it on your Linux system, you should go to the project release page and grab the DEB file for Debian-based distributions like Ubuntu, Linux Mint, etc., or the RPM file for Red Hat-based distributions like Fedora, AlmaLinux, etc.
Once the file is downloaded, open your terminal, go to the downloads directory, and execute the appropriate commands according to your Linux distribution.
$ cd ~/Downloads/

# On Debian, Ubuntu, Kali Linux, Linux Mint, Zorin OS, Pop!_OS, etc.
$ sudo dpkg -i ./appimagelauncher_*_amd64.deb

# On Red Hat, Fedora, CentOS, Rocky Linux, AlmaLinux, etc.
$ sudo rpm -i ./appimagelauncher-*.x86_64.rpm
Output:

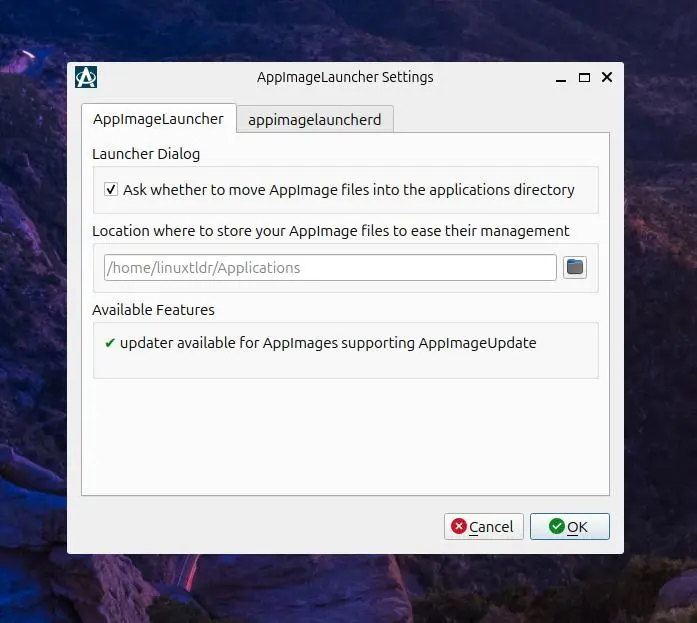
Once the installation is complete, you can launch it from the application menu, where you can interact with the following settings window. If you want to change the default AppImage location, disable auto-update, or prevent the AppImageLauncher from launching at boot, you can do so here; otherwise, simply click on the “Ok” button.
To create a desktop shortcut for your AppImage, open your file manager, navigate to the AppImage location, and double-click on it, after which the following AppImageLauncher prompt will appear.
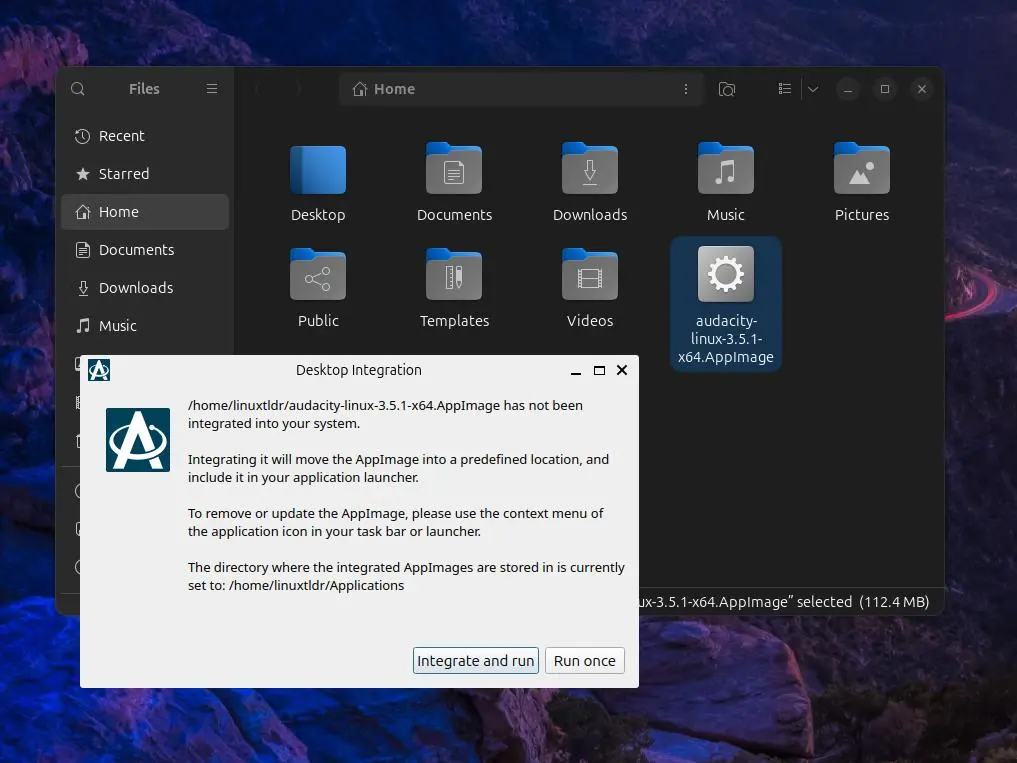
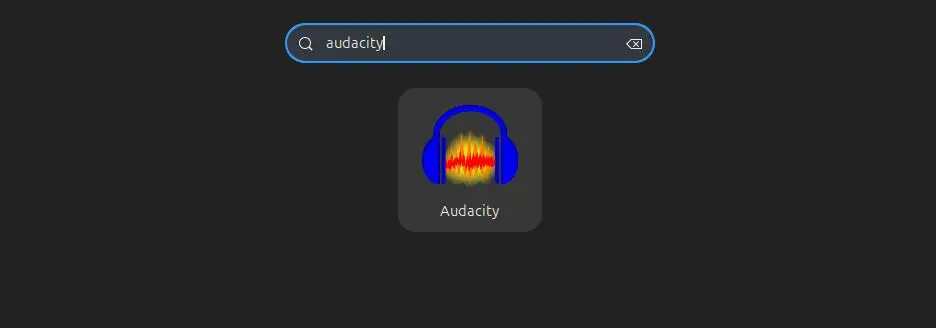
Here, you can either click “Integrate and run” to create a desktop shortcut or simply click “Run once” to launch your AppImage without creating a desktop shortcut. If you choose to integrate, the application will launch, and you’ll also discover its desktop icon in the application menu.
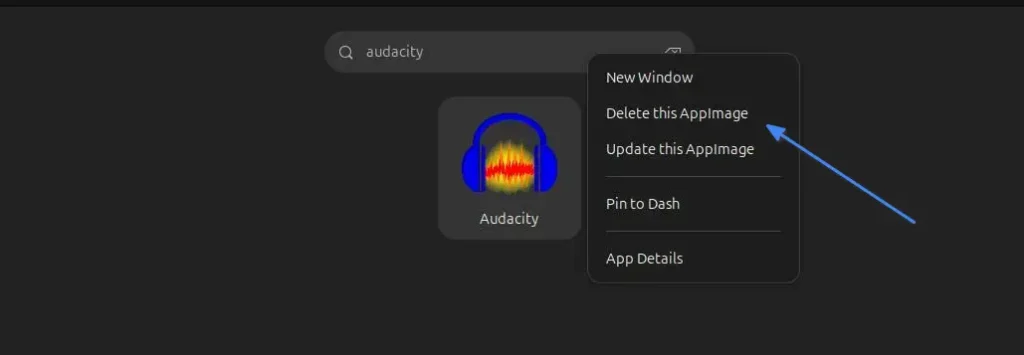
To remove the desktop shortcut, you can easily do so by right-clicking on it and choosing the delete option, which will open an AppImageLauncher dialog box for confirmation; just click “Ok“.
Method 3: Create Desktop Shortcut Using Text Editor
This method is geared towards users with decent experience in the Linux command-line and functionality, as it involves manually performing all the necessary tasks. That involves manually creating the “.desktop” file and placing it in the application folder where all the desktop shortcuts are stored. That’s it.
To start, choose your preferred text editor (either Nano or Vim) and create a desktop shortcut named after your application (for example, “Audacity“) in the “~/.local/share/applications/” path.
$ nano ~/.local/share/applications/audacity.desktop

# OR

$ vim ~/.local/share/applications/audacity.desktop
Copy-paste the following desktop shortcut template and ensure to replace the highlighted fields (in green) with your specific desktop title, file path, and icon path.
[Desktop Entry]
Type=Application
Name=MyApp
Exec=/path/to/file
Icon=/path/to/icon
When done, save and close the file, then execute the following command to refresh the desktop database, ensuring the system acknowledges the new desktop entry.
$ update-desktop-database ~/.local/share/applications/You can now search the desktop shortcut for your application in the application menu.

Don’t judge me, I felt too lazy to provide the icon path and don’t know how I forgot to change the title. Well, in your case, just ensure to provide every nit of detail, and in the future, if you want to delete the desktop shortcut, simply remove the file created in the “applications” directory.
Final Word
All methods mentioned in this article are the sole means to create a desktop shortcut for your AppImage, file, script, or apps. The first and last methods can function for all file types, while the second is exclusive to AppImages.
If I forgot to mention any tool capable of doing this task, or if you have any questions or queries related to the topic, please let me know in the comment section.
Till then, peace!


Or you can use automatic integration with appimage-integrator. Check it out https://github.com/apapamarkou/appimage-integrator