
The “fsck” command (which stands for “file system check“) is a Linux command-line utility used to check and repair the integrity of a file system on storage devices like HDDs or SSDs.
Nowadays, Linux filesystems support journaling, which eliminates the need for fsck. However, there are certain situations where files can still become corrupted. Such are…
- Power outage
- Hardware failures
- Improper shutdowns (major cause)
This article will guide you through the use of the fsck command to effectively repair errors on your Linux file systems.
Tutorial Details
| Description | Fsck (File System Check) |
| Difficulty Level | Moderate |
| Root or Sudo Privileges | Yes |
| OS Compatibility | Ubuntu, Manjaro, Fedora, etc. |
| Prerequisites | – |
| Internet Required | No |
Fsck Command and Options
As previously mentioned in this article, the “fsck” command is used to check and repair the integrity of a Linux file system.
Notably, Fsck acts as a “front-end” for various file system specific checkers, such as fsck.vfat, fsck.ext2, fsck.ext4, and more.
Running the following command reveals all available file system checkers utilized by fsck on your running Linux system.
$ which fsck
$ ls -l /usr/sbin/fsck*
Output:
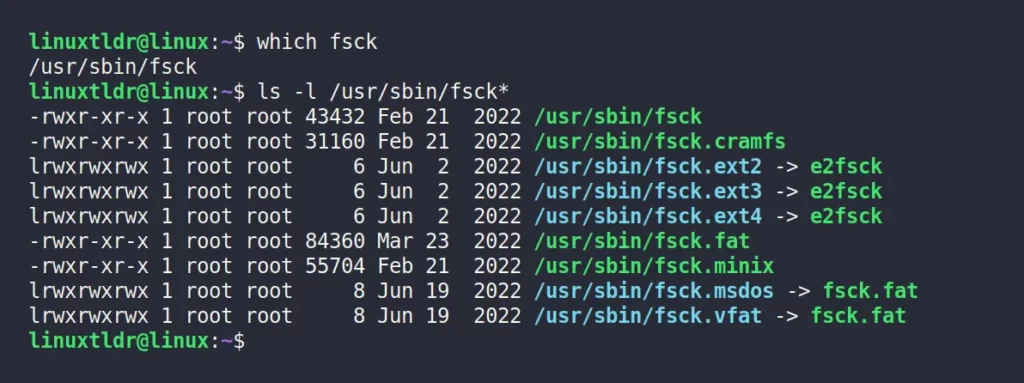
My system is currently running on Ubuntu with an ext4 partition, so when I execute the “fsck” command, it utilizes the fsck.ext4 (as a hard link) file checker.
If you’re using a system with a different partition, there’s no need to specify the file checker directly. Instead, utilize fsck, which will automatically select the most suitable file checker based on your system.
The installation process for fsck is omitted as it’s preloaded in all Linux distributions. Thus, I recommend you explore the following key options that enhance command usage:
| Options | Usage |
|---|---|
-A | Perform filesystem checks and repairs for all entries listed in “/etc/fstab“. |
-C | Show the progress bar. |
-l | During the checks and repairs, lock the filesystem to prevent access by any other program. |
-M | Avoid checking and repairing mounted filesystems. |
-N | Display the possible changes without applying them. |
-P | Parallelly inspect all filesystems, including the root. |
-R | Skip the root filesystem; this option is only beneficial when used with “-A“. |
-r | Report statistics for every device that has been examined. |
-T | Hide the title. |
-t | Specify Linux filesystem types exclusively for checking with comma-separated lists. |
-V | Provide a comprehensive description of the ongoing activities. |
Let’s check out the usage of this command and how you can check for and repair problems revolving around your Linux file systems.
How to Use fsck to Repair Linux File System Errors
Before proceeding, it’s important to note that file systems must be unmounted before utilizing the “fsck” command for inspecting and repairing them.
As for the additional file systems apart from the root, which can be easily unmounted and repaired while the system is running, repairing the root file system—the foundation of the operating system—requires a distinct approach.
Stay with this article until the end to discover how to check and repair both additional and root file systems effectively. Starting with…
Repair the Additional Linux File Systems
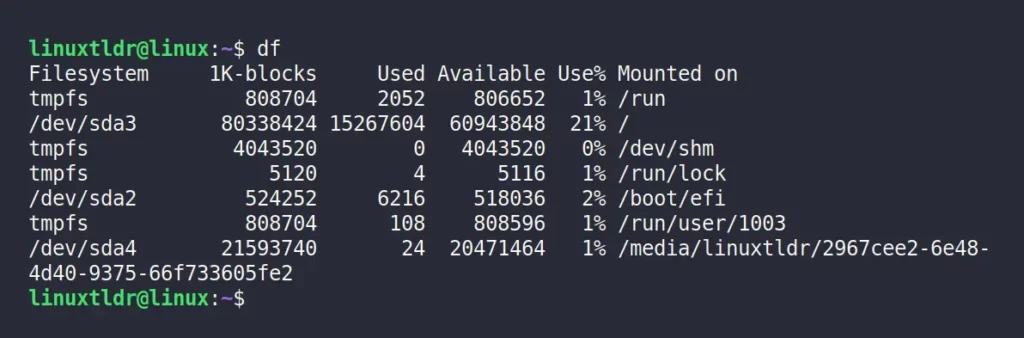
To successfully execute fsck, first identify the partition and ensure it’s unmounted. To list all available file systems on your system, use the following two df or lsblk commands:
$ df

#OR

$ lsblk
Output:
Before repairing any mounted devices in “/mnt” check them using the ls command.
Suppose you intend to run fsck on the “/dev/sda4” partition, which is presently mounted. What happened next? Let’s find out.
$ sudo fsck /dev/sda4Output:
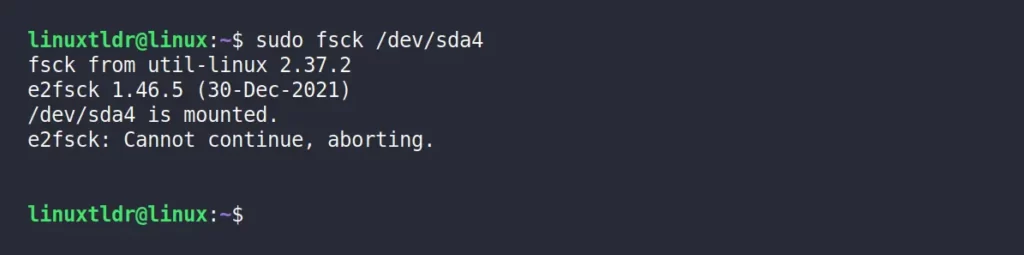
As you can see from the above picture, the process to repair “/dev/sda4” has been aborted since it’s currently mounted.
To perform checks and repairs, first unmount the partition.
$ umount /dev/sda4Then perform the check and repair using the “fsck” command:
-p” for enabling automatic repairs and “-y” for applying fixes to identified filesystem issues.$ sudo fsck /dev/sda4Output:

Whenever you perform the checks and repairs using the “fsck” command, it will return an exit status code that can be checked using “echo $?“.
Here are some fsck exit codes straight from the manual:
0– No errors1– File system errors corrected2– System reboot is required4– File system errors left uncorrected8– Operational error16– Usage or syntax error32– User-requested fsck cancellation128– Shared library error
This exit code is helpful to determine the status of fsck once the process has been completed.
Repair the Linux Root File System
To perform checks and repairs on the Linux root partition using the “fsck” command can be done in four different ways:
- Enforce fsck during system startup.
- Run fsck in rescue mode.
- Fsck Check Using the tune2fs Command.
- Boot into a live CD environment (skipped as it’s self-explanatory).
Let’s begin with…
Enforce fsck During System Startup
To ensure fsck runs on the root partition during the next system boot, just create a file named “forcefsck” in the root directory, which signals the system to run fsck during the next boot.
$ sudo touch /forcefsckDuring the upcoming bootup, a fsck will be performed. Ensure to account for potential downtime, especially if this action is being executed on a server.
Once the system is booted, ensure the “forcefsck” file is deleted from the root partition to prevent continuous fsck checks on every boot.
Run fsck in Rescue Mode
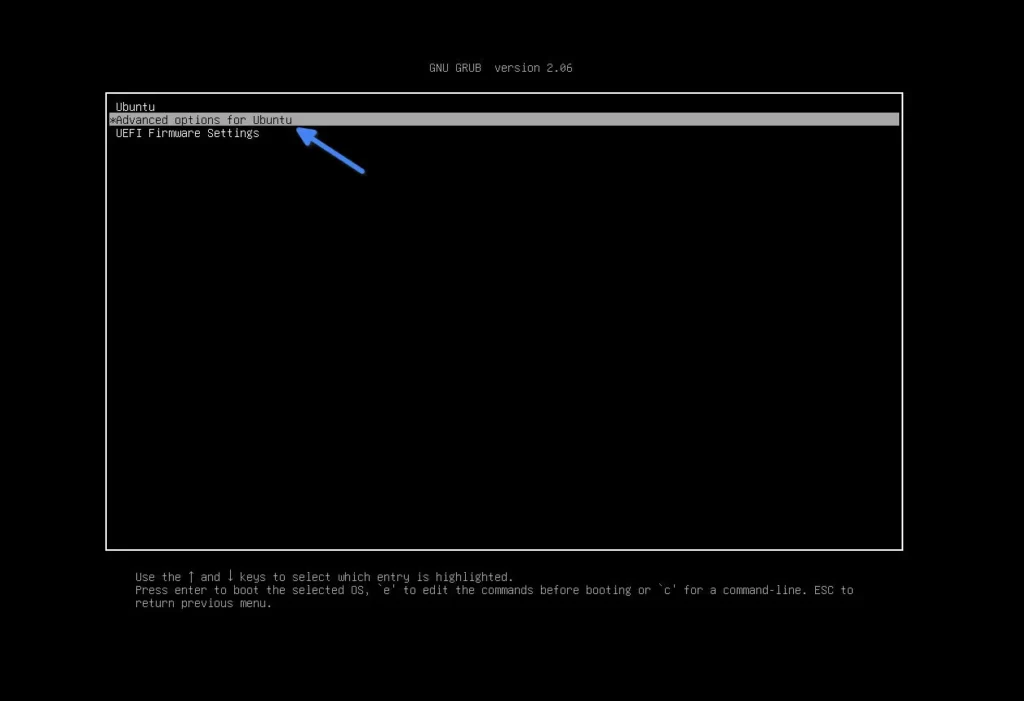
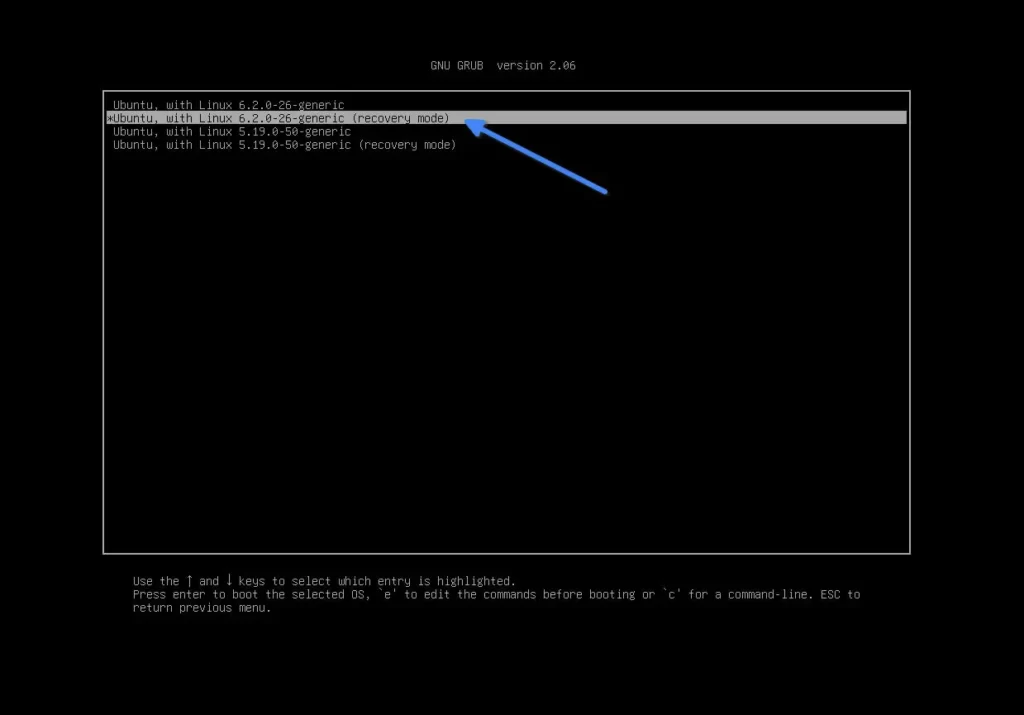
Running fsck in rescue mode is a straightforward process. Simply reboot your system, hold down the “SWIFT” key if necessary to access the GRUB menu, and then choose “Advanced Options for Ubuntu“.
Then choose “recovery mode” with the latest kernel.
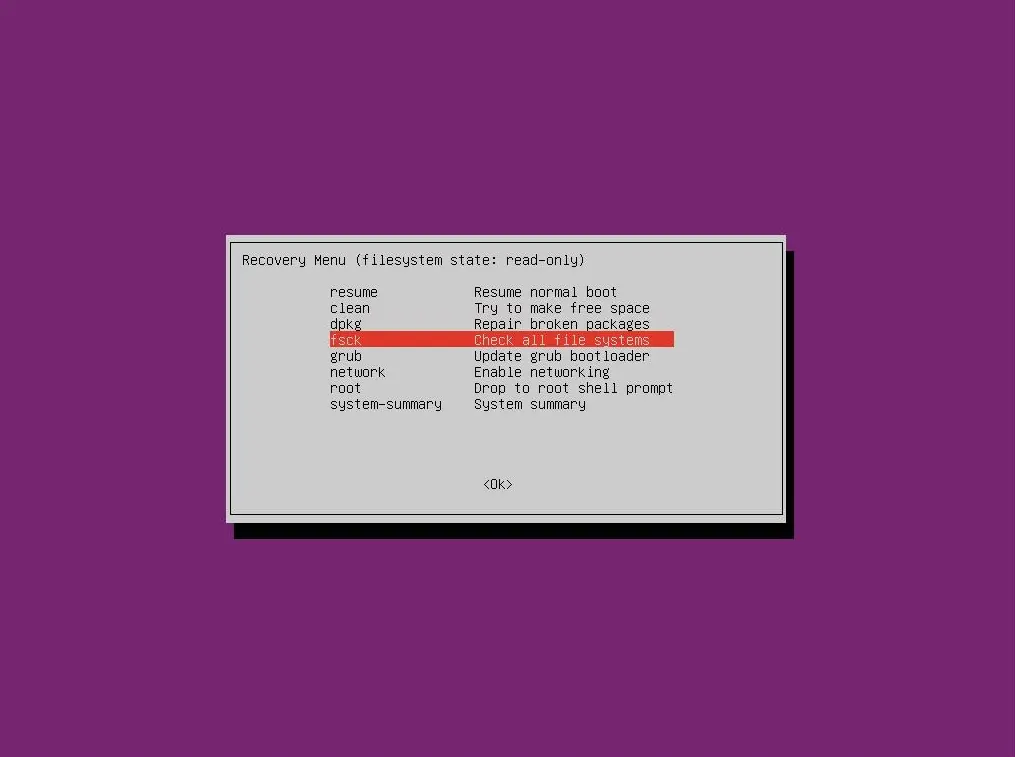
Now, select “fsck” from the provided list.
When prompted, grant remount permissions for root and other file systems listed in “/etc/fstab” by choosing “yes“.
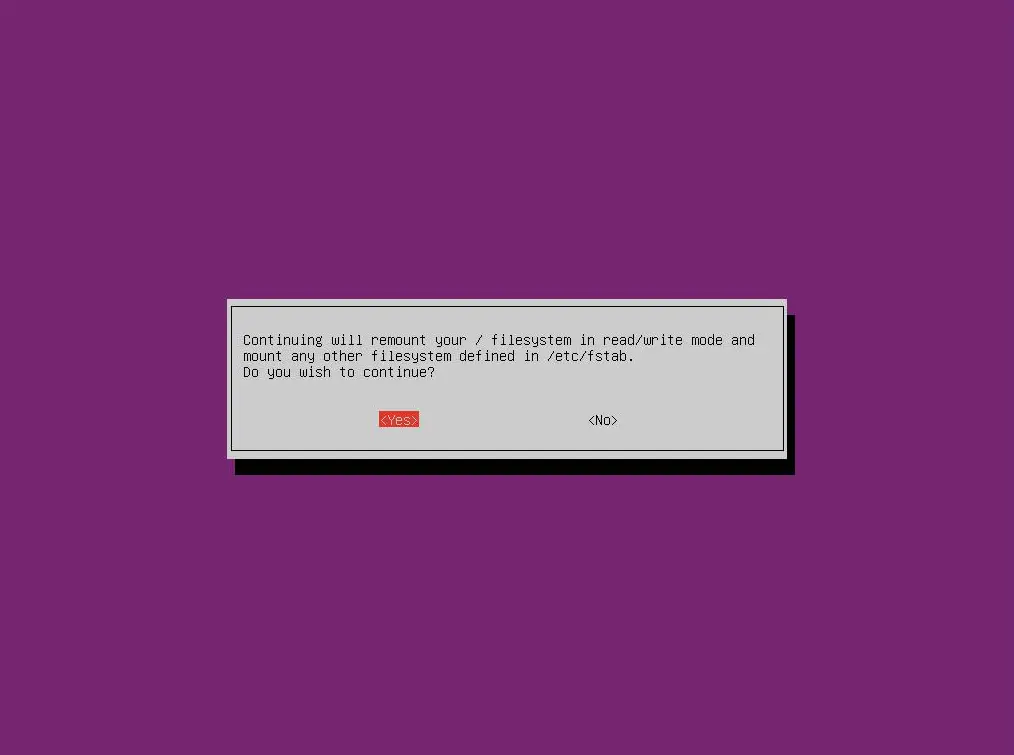
And that’s all it takes to begin the fsck on your Linux root file system.
Fsck Check Using the tune2fs Command
Modern Linux systems come with the tune2fs tool, allowing you to enable automatic fsck checks using the “-c n” flag. This ensures that fsck runs every “n” boot for the Linux root partition.
/dev/sda3” represents the root partition in my system, while in your case, you can identify it using either the “df” or “lsblk” commands.$ sudo tune2fs -c 1 /dev/sda3Output:

After executing this command, fsck will check only during the first boot that follows.
Alternatively, you can even run fsck once a week or month by specifying the interval using the “-i” flag, as shown.
$ sudo tune2fs -i 1w /dev/sda3                                                                                       #Run fsck once a week
$ sudo tune2fs -i 1m /dev/sda3                                                                                       #Run fsck once a month
To determine the last partition check or its future schedule, execute the command below, specifying the partition path.
$ sudo tune2fs -l /dev/sda3 | egrep -i 'check|mount'Output:
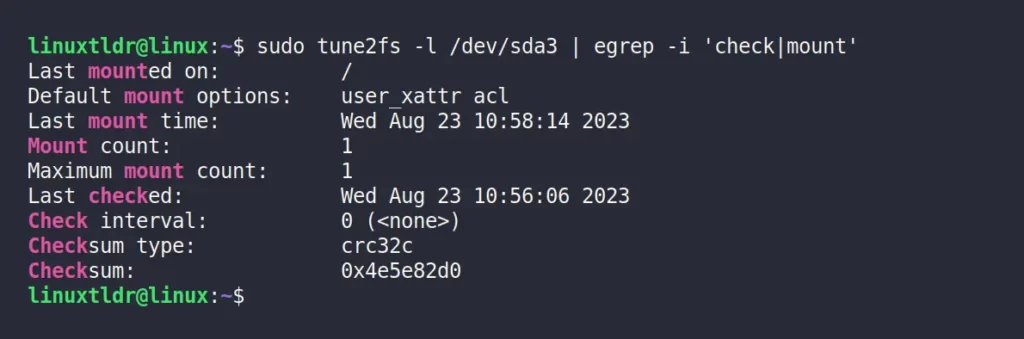
- The “
Maximum mount count” represents the number of mounts that prompt an automatic fsck filesystem check. - The “
Check interval” represents the duration between two filesystem checks.
That’s all for now!
Final Word
I hope you find this article useful, as performing checks and repairs on Linux root file systems offers multiple ways. The most recommended one is using the tune2fs tool, as it is more user-friendly.
Now, if you have any questions or queries related to this article, feel free to ask them in the comment section.
Till then, peace!


