
The Fish is a modern (friendly interactive shell) program identical to its allies, like Bash and Zsh, but with sprinkles on top. What does that mean?
You already know about the Bash shell (because it’s the default login shell for most Linux distros) and the Zsh shell (don’t know about it, check out our detailed guide article).
Both shells are amazing, but one lacks a feature (referring to Bash) and the other requires manual configuration (referring to ZSH); taking advantage of that gap, Fish Shell arises.
Tutorial Details
| Description | Fish (Friendly Interactive Shell) |
| Difficulty Level | Moderate |
| Root or Sudo Privileges | Yes |
| OS Compatibility | Ubuntu, Manjaro, Fedora, etc. |
| Prerequisites | chsh, curl |
| Internet Required | Yes |
A Short Story of Fish Shell
Fish is a user-friendly UNIX/Linux shell program that focuses on providing most of the known features by default without requiring any manual configuration.
The default features are followed by:
- Autosuggestion
- Tab Completion
- Syntax highlighting
- Alluring UI
- Easy Scripting
- Web-based Configuration
For other shells, either they provide you with the selective features or they require manual installation and configuration that is not included.
That’s enough for the introduction; let’s move on to the installation part.
Installing Fish Shell on the Linux System
The Fish shell is included in most Linux repositories, and you can install it using their default package manager.
Choose one of the following commands with respect to your Linux system:
$ sudo apt install fish                                                  #On Debian, Ubuntu, Pop!_OS, or Linux Mint
$ sudo dnf install fish                                                  #On Fedora, AlmaLinux, RHEL, or Rocky Linux
$ sudo zypper install fish                                            #On OpenSUSE
$ sudo pacman -S fish                                                #On Arch, Manjaro, or EndeavourOS
$ guix package -i fish                                                  #On Guix
$ brew install fish                                                         #Using Homebrew package manager
Verify the program existence by executing the following command:
$ fish -vOutput:

Changing the Default Shell
Now, it’s time to switch your existing shell to Fish Shell using the chsh command.
$ chsh -s $(which fish)It will ask for the current user’s password while changing it, as shown.

Log out and then log back in to apply the changes, and you will be greeted with the following welcome screen when you open your terminal:

Knocking Down a Greeting Message in a Fish Shell
The problem is that whenever you launch the terminal, you will be greeted with the greeting message, which is totally annoying for anyone.
To knock it down, open your Fish shell configuration file by using the Vim or Nano editors.
$ nano ~/.config/fish/config.fish

#OR

$ vim ~/.config/fish/config.fish
Add the following line at the end of the configuration file:
set fish_greetingSave and close the file, and open a new terminal session to notice the changes.

Configuring the Fish using the Web UI
The Fish shell comes with web UI configuration to manage your terminal colors, prompt design, setting custom aliases, listing command history, and keybinding.
Execute the following command to launch the Fish web UI configuration window:
$ fish_configOutput:

Today, the scope of the article is not to show you the configuration step; you can easily manage to do it by yourself, so let’s move on to the next topic.
Installing and Configuring the Starship
Fish Shell comes with tons of modern predefined prompts, including Starship (also available for Bash and Zsh), the one and only most popular and favorite prompt for Fish.
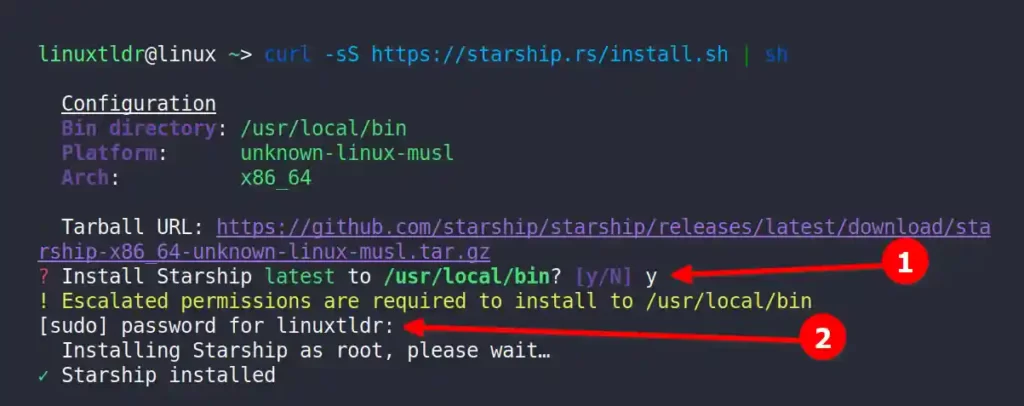
Execute the following command to install the starship by using the curl command:
$ curl -sS https://starship.rs/install.sh | shDuring installation, it will ask for your choice of yes or no for installing “Starship latest” to the “/usr/local/bin” directory.
Press “Y” to confirm and pass your existing user account password, as shown.
Lastly, execute the following command to modify the Fish configuration file with Starship:
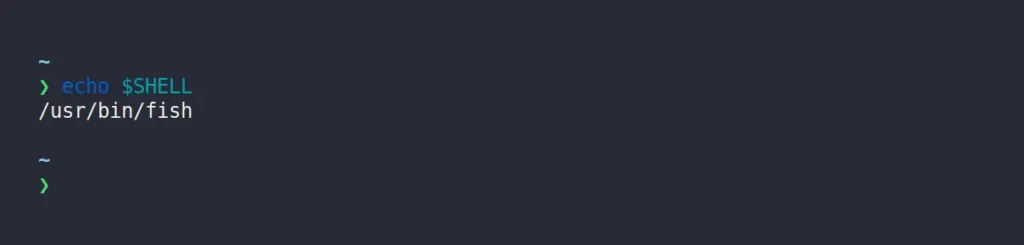
$ echo "starship init fish | source" >> ~/.config/fish/config.fishOpen a new terminal session, and you will be presented with the following prompt:
Uninstalling Fish Shell
If you didn’t like the Fish shell for any reason, then the removal steps are pretty straightforward; start by changing the default shell back to the Bash shell using the following command:
$ chsh -s /bin/bashThen execute one of the following commands, depending on your system type, to uninstall Fish:
$ sudo apt remove fish                                                  #On Debian, Ubuntu, Pop!_OS, or Linux Mint
$ sudo dnf remove fish                                                  #On Fedora, AlmaLinux, RHEL, or Rocky Linux
$ sudo zypper remove fish                                            #On OpenSUSE
$ sudo pacman -R fish                                                   #On Arch, Manjaro, or EndeavourOS
$ guix package -r fish                                                     #On Guix
$ brew uninstall fish                                                        #Using Homebrew package manager
Lastly, execute the following command to remove all directories and files used for Fish shell:
$ rm -Rf /usr/local/etc/fish /usr/local/share/fish ~/.config/fish
$ cd /usr/local/bin
$ rm -f fish fish_indent
That’s all for now.
If you have any suggestions that should be included in this article, we are waiting for your message in the comment section.


