
NeoVim is a modern command-line text editor designed to improve and modernize the original Vim editor by addressing some limitations and introducing new features.
It provides support for asynchronous plugins, the Language Server Protocol, a built-in terminal emulator, built-in package management, and a more powerful API that was lacking in Vim.
Its codebase is more maintainable and extensible, providing a new plugin architecture and API that opens up the gate for other projects like LunarVim, which is the cherry on top of NeoVim.
In this beginner’s guide, I’ll assist in installing the latest version of NeoVim on your preferred Linux distribution and provide some tips for navigating its usage.
Tutorial Details
| Description | NeoVim |
| Difficulty Level | Low |
| Root or Sudo Privileges | Yes (for installation) |
| OS Compatibility | Ubuntu, Manjaro, Fedora, etc. |
| Prerequisites | – |
| Internet Required | Yes (for installation) |
How to Install NeoVim on Linux
NeoVim can be installed in multiple ways, but not all of them will provide you with the latest version. So, I’ll guide you through each available method and advise you on which one to choose based on your requirements.
Installing NeoVim via the Package Manager
The easiest and most recommended option for beginners is to install NeoVim via the default package manager. However, it installs an older version of NeoVim due to infrequent updates of packages in the repository, particularly in Debian and Ubuntu.
So, when you’re ready, open your terminal and execute the following command to install NeoVim from your default package manager:
$ sudo apt install neovim                                                                 #For Debian, Ubuntu, Linux Mint, etc.
$ sudo dnf install neovim                                                                 #For RHEL, Fedora, Alma Linux, etc.
$ sudo pacman -S neovim                                                               #For Arch, Manjaro, EndeavourOS, etc.
After completing the installation, you can execute the following command to verify the accessibility of the command, including checking the current version.
$ nvim -vOutput:
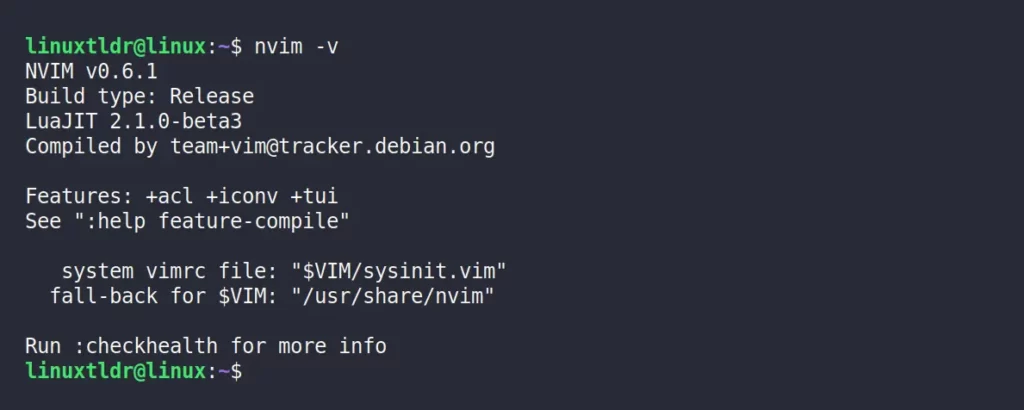
As you can see while writing this article, the latest version of NeoVim is v0.9.4, but the default package manager has installed the older NeoVim v0.6.1 on Debian and Ubuntu.
For RHEL-based distros like Fedora and Arch-based distros like Manjaro, the latest version of NeoVim was installed from the package manager; thus, this method is suitable for them.
Installing NeoVim via the NeoVim LaunchPad PPA on Ubuntu
This method is only tested for Ubuntu (Debian is untested), allowing you to install either the latest stable version of NeoVim or the unstable (nightly build) version of NeoVim via the Neovim LaunchPAD PPA.
When you’re ready, launch your terminal and execute one of the following commands based on your requirement to import either the stable or unstable NeoVim PPA.
#Import stable version of NeoVim PPA
$ sudo add-apt-repository ppa:neovim-ppa/stable -y

#Import unstable version of NeoVim PPA
$ sudo add-apt-repository ppa:neovim-ppa/unstable -y
Once you are done, update your system repository to reflect the changes.
$ sudo apt updateFinally, proceed to install your preferred NeoVim version based on the imported PPA (I opted for stable):
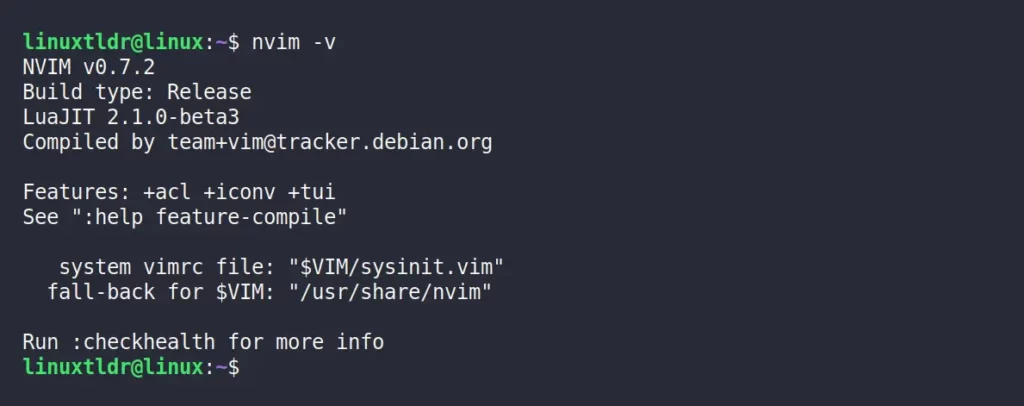
$ sudo apt install neovimWhen you’re done, check the installed version of NeoVim by executing:
$ nvim -vOutput:
Installing NeoVim via Snap or Flaptak
This is personally my favorite method to install the latest version of NeoVim, only in situations where I intend to use it in its raw form without wanting any plugins later (as it becomes a little trickier then).
So, if your system is installed and configured with Snap or Flatpak, execute the appropriate command based on your preferences to install the latest version of NeoVim on your Linux system.
$ sudo snap install nvim --classic #Installing NeoVim via Snap
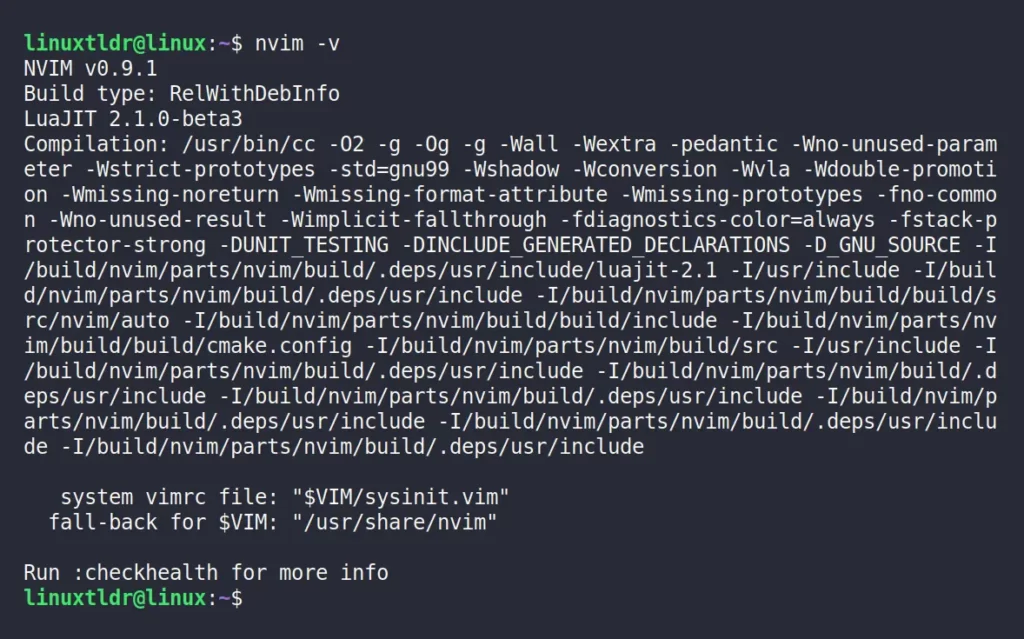
$ flatpak install flathub io.neovim.nvim #Installing NeoVim via FlatpakWhen you are done, you can run the following command to check the NeoVim version.
$ nvim -vOutput of NeoVim installed via Snap:
How to Launch and Use NeoVim on Linux
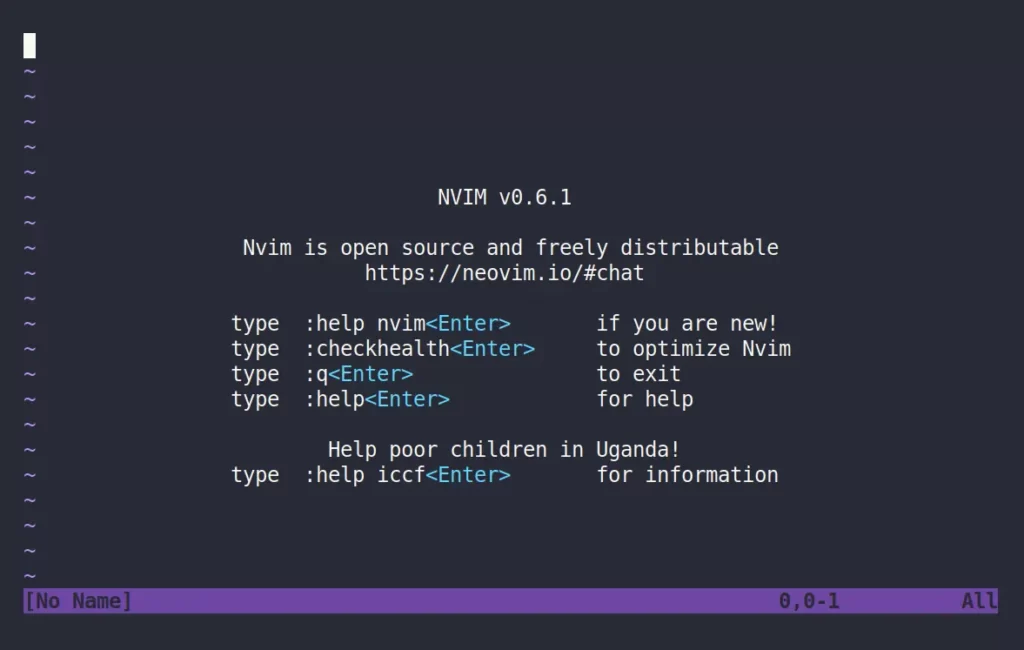
Once the installation is finished, you can launch NeoVim by executing the following command or through the application menu.
$ nvimOr

When you launch it for the first time, you will interact with the following NeoVim screen.
As this article is not dedicated to showcasing the complete usage of NeoVim, I’ll cover the most basic and important aspects that a beginner should know.
So, in NeoVim, there are basically three types of modes that you should keep in mind, followed by
- Normal Mode: Allows access to navigating and manipulating text, such as deleting, copying, and pasting.
- Insert Mode: Here is where you input and edit text.
- Visual Mode: In this mode, you can highlight and manipulate text, such as copying and deleting.
Now, to keep around, you can check out the following most important NeoVim commands (which are also the same for Vanilla Vim).
- Enter Normal Mode: “
Esc” or “Ctrl + [“ - Enter Insert Mode: “
i“ - Enter Visual Mode: “
v“ - Enter Command-Line Mode: “
:“ - Open File: “
:e filename“ - Undo: “
u“ - Redo: “
Ctrl + r“ - Cut: “
d“ - Copy: “
y“ - Paste: “
p“ - Save: “
:w“ - Save and Quit: “
:wq“ - Quit without Saving: “
:q!“ - Open Help: “
:help“
For a comprehensive list of NeoVim commands, please check out this link.
How to Update NeoVim in Linux
If you’ve installed NeoVim using the default package manager (including the PPA for Ubuntu), simply update your system to automatically update your NeoVim installation.
$ sudo apt update && sudo apt upgrade -y                                         #For Debian, Ubuntu, Linux Mint, etc.
$ sudo dnf update                                                                                     #For RHEL, Fedora, Alma Linux, etc.
$ sudo pacman -Syyu                                                                               #For Arch, Manjaro, EndeavourOS, etc.
If the installation is done via Snap or Flatpak, then execute one of the appropriate commands:
$ sudo snap refresh nvim                                                                        #Updating NeoVim via Snap
$ flatpak update io.neovim.nvim                                                            #Updating NeoVim via Flatpak
That’s it! I strongly suggest keeping your NeoVim installation up-to-date to benefit from the latest features and improvements.
How to Remove NeoVim from Linux
If you have installed NeoVim from your default package manager, then proceed with one of the following commands:
$ sudo apt remove neovim                                                                 #For Debian, Ubuntu, Linux Mint, etc.
$ sudo dnf remove neovim                                                                 #For RHEL, Fedora, Alma Linux, etc.
$ sudo pacman -R neovim                                                                  #For Arch, Manjaro, EndeavourOS, etc.
If you opted for the NeoVim LaunchPAD PPA on Ubuntu, remove it using one of the following commands before executing “sudo apt remove neovim” command.
#Removing stable version of NeoVim PPA
$ sudo add-apt-repository --remove ppa:neovim-ppa/stable -y

#Removing unstable version of NeoVim PPA
$ sudo add-apt-repository --remove ppa:neovim-ppa/unstable -y
Lastly, if you went for the NeoVim Snap or Flatpak package, then execute:
$ sudo snap remove neovim                                                               #Removing NeoVim via Snap
$ flatpak remove io.neovim.nvim                                                       #Removing NeoVim via Flatpak
Final Word
I hope you find this article useful. If you have any questions or queries related to the article, feel free to tell us via the comment section.
Till then, peace!


For an ultimate guide I would expect an installation via TAR file.