If you’re familiar with Scratch, then you’re already acquainted with TurboWarp, as it’s nothing more than a client for Scratch in Linux, offering additional benefits such as a compiler for faster project execution, a dark mode, an extensive library of extensions, and much more.
For those unaware of Scratch or who have never heard of it, Scratch is a block-based visual programming language for kids that can be practiced online via their official site or offline using software like TurboWarp.
A few months ago, we wrote an article on Scratux (another Scratch client), which received a good response. However, Scratux felt a little outdated, and at that time, I was also unaware of TurboWarp, which is pretty neat and based on the latest Scratch version.
In this article, I’ll provide the features of TurboWarp, its installation steps on Linux (it’s also available for Windows and macOS), and how to use it as a beginner with practical examples.
Tutorial Details
| Description | TurboWarp: A Scratch Client for Linux |
| Difficulty Level | Low |
| Root or Sudo Privileges | No |
| OS Compatibility | Ubuntu, Manjaro, Fedora, etc. |
| Prerequisites | – |
| Internet Required | Yes |
Features of TurboWarp
The following is a list of features offered by TurboWarp:
- TurboWarp operates entirely offline.
- Run projects up to 80x to 100x faster than other Scratch clients.
- Consume less memory and energy when left idle.
- Offers light and dark mode options.
- Integrates native file systems and file explorers.
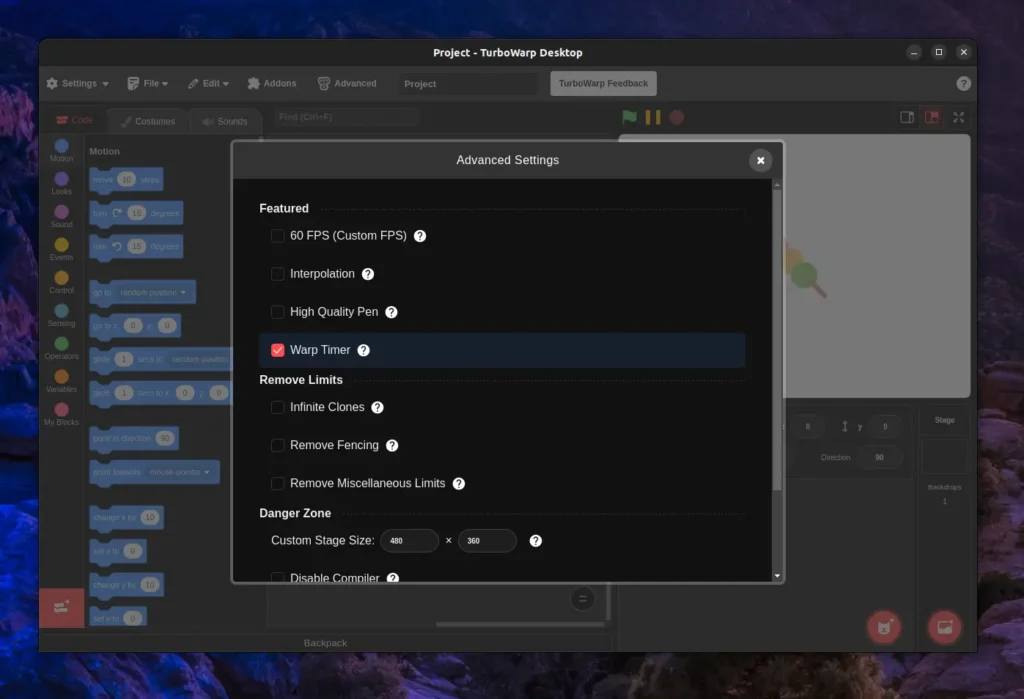
- It supports customization features such as switching to 60 FPS, a high-quality pen, infinite clones, and interpolation.
- Allows customization of the stage size from the default 480×360 to other preferred dimensions.
- You can reuse scripts, sounds, costumes, and sprites using the backpack feature.
- Additionally, more functionality can be added via TurboWarp extensions, such as the creation of 3D graphics, custom blocks, physics simulations, and more.
How to Install TurboWarp on Linux
TurboWarp is available for nearly all platforms, including Linux, Windows, and macOS. However, on Linux, there are multiple ways to install it, but it’s recommended to install via Flatpak. Nonetheless, I’ve provided all the steps so you can choose the one you prefer the most.
Installing TurboWarp via Flatpak
If Flatpak is installed and configured on your Linux system, then you can quickly install TurboWarp using the following command:
$ flatpak install flathub org.turbowarp.TurboWarpThe TurboWarp Flatpak version only has access to projects in your home directory. To allow access to other folders, specify their path in the following command:
$ flatpak override org.turbowarp.TurboWarp --filesystem=/path/to/folder/Installing TurboWarp via Snap
If Snap is installed on your Linux system and you prefer it over Flatpak, then run the following command to install the TurboWarp desktop app.
$ sudo snap install turbowarp-desktopThe TurboWarp Snap version has restrictions on accessing your camera, microphone, gamepads, or removable drives. To fix this, run these commands:
$ snap connect turbowarp-desktop:camera
$ snap connect turbowarp-desktop:audio-record
$ snap connect turbowarp-desktop:joystick
$ snap connect turbowarp-desktop:removable-media
Apparently, the snap version also has a restriction on setting the file opener for sb3, sb2, or sb files without interfering with other file types. To fix this, run these commands:
$ wget https://desktop.turbowarp.org/snap-mime.xml -qO- | sudo tee /usr/share/mime/packages/turbowarp-desktop-snap.xml > /dev/null
$ sudo update-mime-database /usr/share/mime
Installing TurboWarp on Debian, Ubuntu, Raspberry Pi OS, and Linux Mint via Repo
If you’re using a Debian, Ubuntu, Raspberry Pi OS, or Linux Mint distribution, you can add the TurboWarp repository and then later install it via APT package manager.
$ wget https://desktop.turbowarp.org/release-signing-key.gpg -qO- | gpg --dearmor | sudo tee /usr/share/keyrings/turbowarp.gpg > /dev/null
$ echo "deb [arch=$(dpkg --print-architecture) signed-by=/usr/share/keyrings/turbowarp.gpg] https://releases.turbowarp.org/deb stable main" | sudo tee /etc/apt/sources.list.d/turbowarp.list
$ sudo apt update && sudo apt install turbowarp-desktop
Installing TurboWarp on Arch via AUR Package
Users using Arch-based distributions such as Manjaro or EndeavourOS can easily install TurboWarp via AUR helpers like Yay.
$ yay -S turbowarp-desktop-binUsing TurboWarp as an AppImage
If you dislike installing an application when its portable version is available, you might be happy to know that TurboWarp is also available as an AppImage, allowing you to use it without installing it on your Linux system.
Just head over to the project release page, download the TurboWarp AppImage for Linux AMD64, navigate to the location, and execute the following command to give it executable permission and run it like a shell script.
$ chmod +x TurboWarp-linux-arm64-*.AppImage
$ ./TurboWarp-linux-arm64-*.AppImage
How to Use TurboWarp
Once the installation is complete, you can search for and launch it from the application menu.

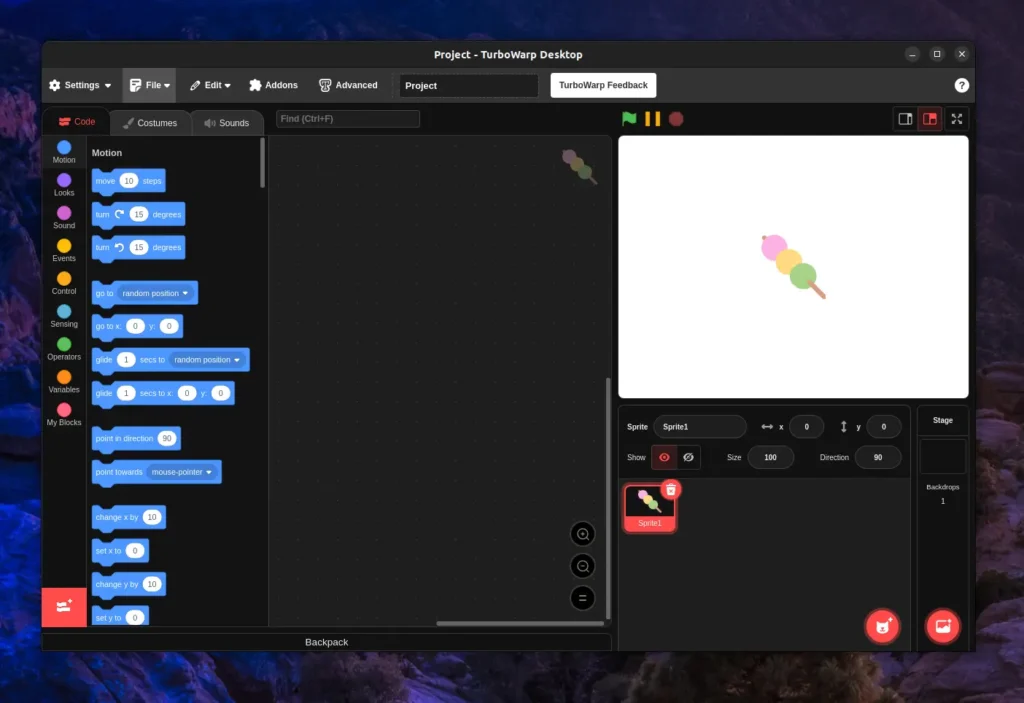
Once launched, you’ll interact with a following window, which will feel familiar if you’ve used Scratch before, as it’s almost identical in terms of UI but with additional enhancements.
If it’s unfamiliar, let me briefly explain. At the top, you have options like settings, file, edit, addons, and advanced. The main window is split into three sections: the left for adding code, costumes, and sounds; the middle for defining code structure; and the right for previewing/output.

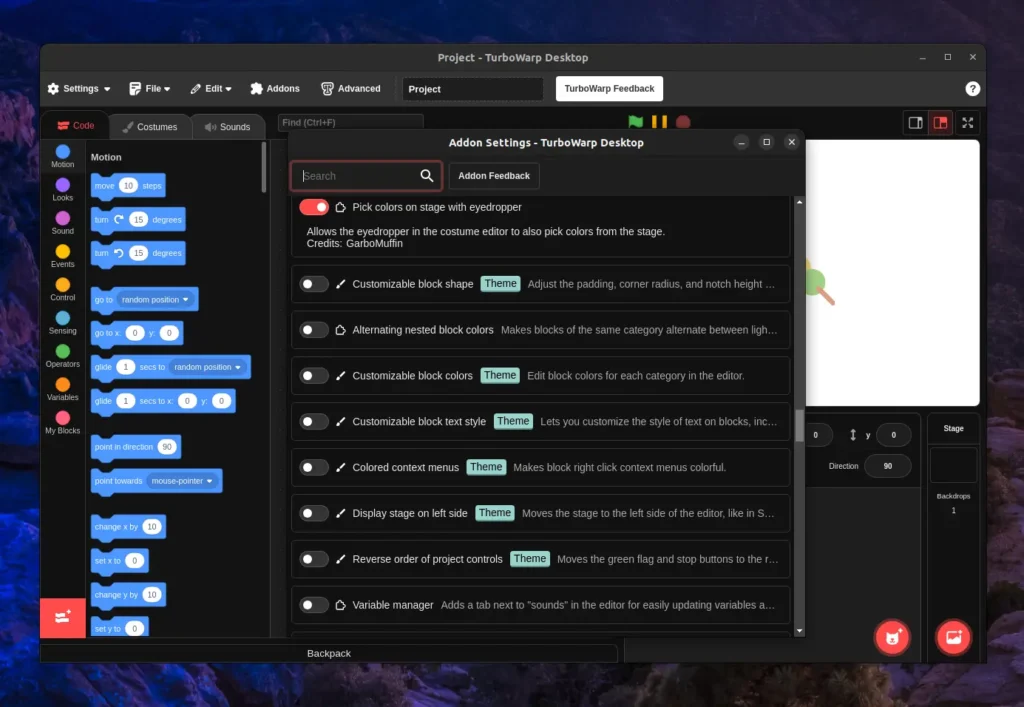
I highly recommend checking out the “Addons” tab for various useful extensions, including a customizable menu bar, cat blocks, a compact editor, a project video recorder, an editor with sound effects, and more.

The advanced settings discussed in the features section of this article—60 FPS, interpolation, high-quality pen, infinite close, custom stage size—can be managed from the “Advanced” tab.

Now, I’ll leave it to you to explore further and share with me the features that surprised you or that you loved the most.
How to Remove TurboWarp from Linux
To remove TurboWarp from your system, execute one of the following commands, depending on your installation method:
So, if you have installed it via Snap or Flatpak, then run.
#For Flatpak
$ flatpak uninstall org.turbowarp.TurboWarp

#For Snap
$ sudo snap remove turbowarp-desktop
If installed via APT on a Debian or Ubuntu-based distribution, then run.
$ sudo apt --purge remove turbowarp-desktopIf you don’t plan to install it later, remove the repository and signing key.
$ sudo rm /etc/apt/sources.list.d/turbowarp.list
$ sudo rm /usr/share/keyrings/turbowarp.gpg
If you have installed it from AUR in your Arch-based distribution, then run.
$ sudo pacman -R turbowarp-desktop-binLastly, the TurboWarp AppImage can be easily removed with a simple delete.
Final Word
TurboWarp is quite an amazing tool compared to other alternatives; I’d like to hear your opinion on this, along with your questions and queries in the comment section.
Till then, peace!


