
The locate command is used to quickly search for files or directories within the indexes in the database file known as updatedb.
It is identical to the find command, except it will search in the database file, which is much faster than find’s method of searching rigorously throughout the entire system.
The updatedb database is set to automatically update in 24 hours using cron jobs when you install this program, but if you make any changes, it will not be able to locate them until cron jobs or you manually request the database update.
Tutorial Details
| Description | locate |
| Difficulty Level | Low |
| Root or Sudo Privileges | Yes |
| OS Compatibility | Ubuntu, Manjaro, Fedora, etc. |
| Prerequisites | locate, updatedb |
| Internet Required | Yes (for installation) |
How to Install locate in Linux
If the command is missing from your distribution, execute one of the following commands to install it.
$ sudo apt install mlocate -y                                       #For Ubuntu, Pop!_OS, etc
$ sudo yum install mlocate -y                                      #For Fedora, AlmaLinux, etc
Syntax of the locate Command
The locate command takes two arguments, one being the option and the other being the pattern.
$ locate [OPTION] [PATTERN]The following is the list of valid options:
| Options | Description |
|---|---|
-0, --null | It will use ASCII NUL as a separator instead of newline. |
-A, --all | It will only print the names that match the entire pattern. |
-b, --basename | It will look for the final component (also known as the basename) for a match. |
-c, --count | It will print the total number of matches instead of their names. |
-d, --database [DBPATH] | Instead of using the default database path to search, assign your custom database path to search for names. |
-e, --existing | Only print out names that currently exist (instead of names that existed when the database was created). |
-E, --non-existing | Only print out names that currently do not exist (instead of names that existed when the database was created). |
-i, --ignore-case | Ignore case sensitivity for both the pattern and the file names. |
-l N, --limit=N | Limit the number of searches assigned to this flag. |
-L, --follow | If you are searching for files with “the -e or -E options”, it will ignore the broken symbolic links. |
--max-database-age D | A database that has not been updated for more than 8 days will show you a warning message, but you can replace the X days with a custom value using this flag. |
-P, -H, --nofollow | The opposite of -L, --follow options. |
-r, --regex [REGEXP] | Used for searching a basic regular expression [REGEXP]. |
-S, --statistics | Print various statistics about each database to standard output instead of searching for files. |
-w, --wholename | Match the whole name of the file as listed in the database. |
| -h, –help | Display the help section. |
Manually Updating the Database
The updatedb database is set to automatically update within 24 hours using cron jobs, but you can manually update the database after every file change using the following command.
$ sudo updatedbSearching for a Filename
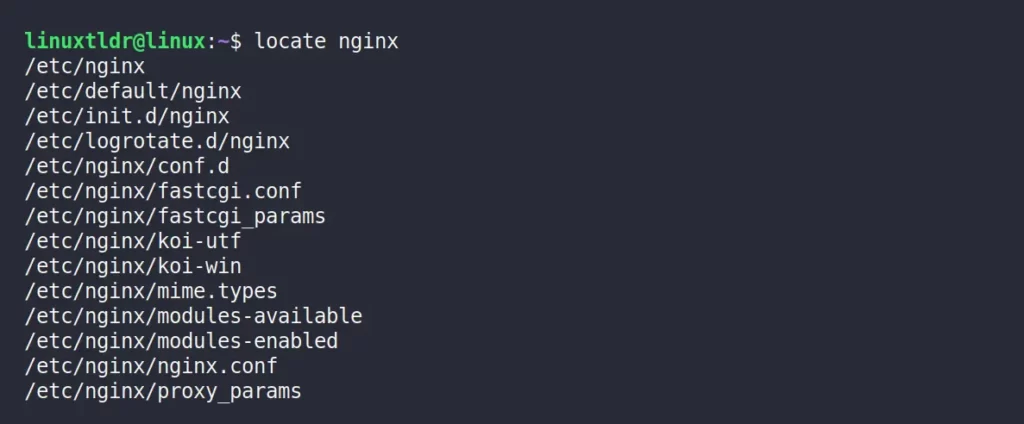
The easiest way to search for any file is to assign its name as an argument to the locate command to search in the database.
$ locate nginxThe above command will print the absolute path with the Nginx pattern in the filename.
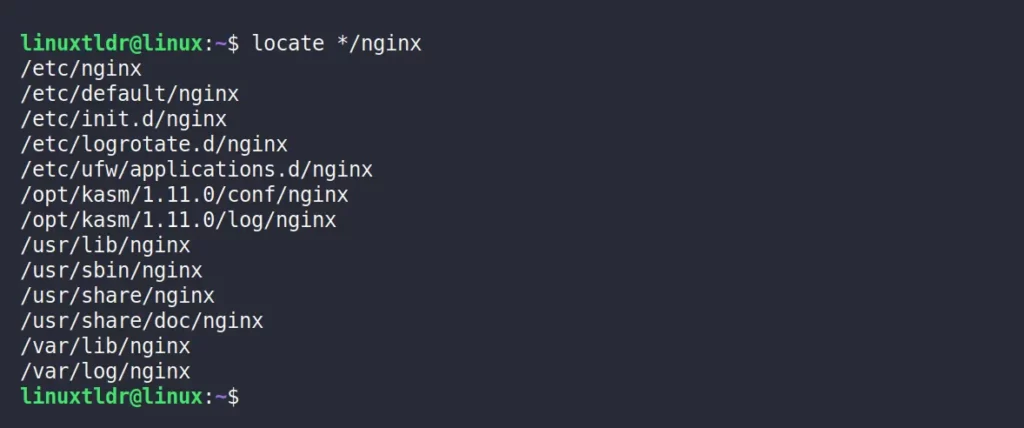
Searching for the Exact Filename
The following command will print the absolute path ending with the Nginx pattern.
$ locate */nginxOutput:
Limiting the Number of Searches
By default, the locate command will print the absolute path for all the matched filenames, but you can limit the search result to a specific number using the “-l” or “--limit” flag.
$ locate -l 5 nginxOutput:

Display the Number of File Occurrences
Use the “-c” or “--count” flag to print the total number of matches instead of their name.
$ locate -c nginxOutput:

The following command will print the total number of matches for the exact matched filename.
$ locate -c */nginxOutput:

The following command will print the total number of matches for the specific file type (ex: “txt” or “jpg“).
$ locate -c "*.txt"
$ locate -c "*.jpg"
Output:

Ignore Case Sensitivity
By default, the locate command will search for the file using case-sensitivity, meaning “file.txt” and “File.txt” are not the same.
However, you can ignore the case-sensitivity using the “-i” or “--ignore-case” flag, which will include “file.txt” and “File.txt” while searching.
For example, I’ve created multiple “.txt” files with different case-sensitivity in my home directory and issued “sudo updatedb” to update database, as shown.
$ ls -l *.txtOutput:

If you search for these files using “file.txt” as an argument without any flags, it will only output one result with the exact matching pattern.
$ locate ~/*file.txt*Output:

But if you use the “-i” or “--ignore-case” flag, it will print all the files without considering the case-sensitivity.
$ locate -i ~/*FILE.txt*Output:

Searching Only for Existing Files
If you have deleted a file between the automatic database update set in cron jobs (ex: “24 hours”), your files might still appear in the output because the database still has the file record.
For example, I’ve updated the updatedb database after creating the “file.txt” file as shown.
$ ls file.txt
$ locate ~/file.txt
Output:

For instance, if the file is deleted without refreshing the updatedb database, it will still appear in the output when searched.
$ rm file.txt
$ locate ~/file.txt
Output:

To ignore the deleted files that come up in the search, use the “-e” or “--existing” flag.
$ locate -e ~/file.txtOutput:

Choose a Different Updatedb Location
By default, the locate command will use the default database located at the “/var/cache/locate/locatedb” path.
However, you can specify a custom database path using the “LOCATE_PATH” environmental variable or by using the “-d” or “--database” flag with the database path.
$ locate -d ~/database.db ~/file.txtAnd here comes the end of this article.
If you have any questions or queries, feel free to ask them in the comment section.


