
“g” is a free and open-source cross-platform alternative to the ls command, offering more advanced features than any other alternative, such as what “exa” can provide.
g” because it’s written in Go, and “g” is simply easy to remember.It offers various ways to customize output, multiple ways to layout the output, integrated support for Git, advanced sorting mechanisms, fuzzy path matching, and hyperlink support.
The “g” command option is very user-friendly, and the way I use it is by creating a custom “g” command with different options according to my requirements and creating an alias for it to later use it directly without retyping.
I cannot stress enough how excellent this tool is at fulfilling its purpose. Discover it yourself by reading the entire article to understand its features, installation steps, and usage guide.
Tutorial Details
| Description | g: An Alternative to the ls Command |
| Difficulty Level | Low |
| Root or Sudo Privileges | No |
| OS Compatibility | Linux, Windows, and macOS |
| Prerequisites | – |
| Internet Required | Yes (for installation) |
Features of g Tool
The following is a list of features that the “g” tool offers you:
- Customize output by adding icons or colors to specific file types.
- Select from grid, across, byline, zero, comma, table, JSON, Markdown, and tree layouts.
- Directly view the file git-status/repo-status/repo-branch in your listings.
- Enjoy highly customizable sorting options such as version-sort.
- Available for Linux, Windows, and MacOS.
- Benefit from fuzzy path matching similar to zoxide and fzf.
- Open files/directories in the file explorer with just one click.
How to Install g Tool on Linux
The “g” tool can be installed in multiple ways; the one I recommend the most is by using the brew command in Linux or macOS.
$ brew install g-lsIf you prefer to install via Go, then run.
$ go install -ldflags="-s -w" github.com/Equationzhao/g@latestIf you prefer installing via the “.deb” file on Debian and Ubuntu-based distributions, head to the release page, download the latest “.deb” file for Linux x86 architecture, navigate to the location, and execute the following command for installation.
$ sudo dpkg -i ./g_*_amd64.deb Users using an Arch-based distribution such as Manjaro and EndeavourOS can effortlessly install it using an AUR helper like Yay.
$ yay -S g-lsLastly, on Windows systems, you can install via the Scoop package manager.
$ scoop install https://raw.githubusercontent.com/Equationzhao/g/master/scoop/g.jsonHow to Use g Tool
The “g” command-line usage is pretty straightforward; for example, executing the command without any options gets the following output:
$ gOutput:

To customize output by adding an icon, use the “--icons” option with the “g” command.
$ g --iconsOutput:
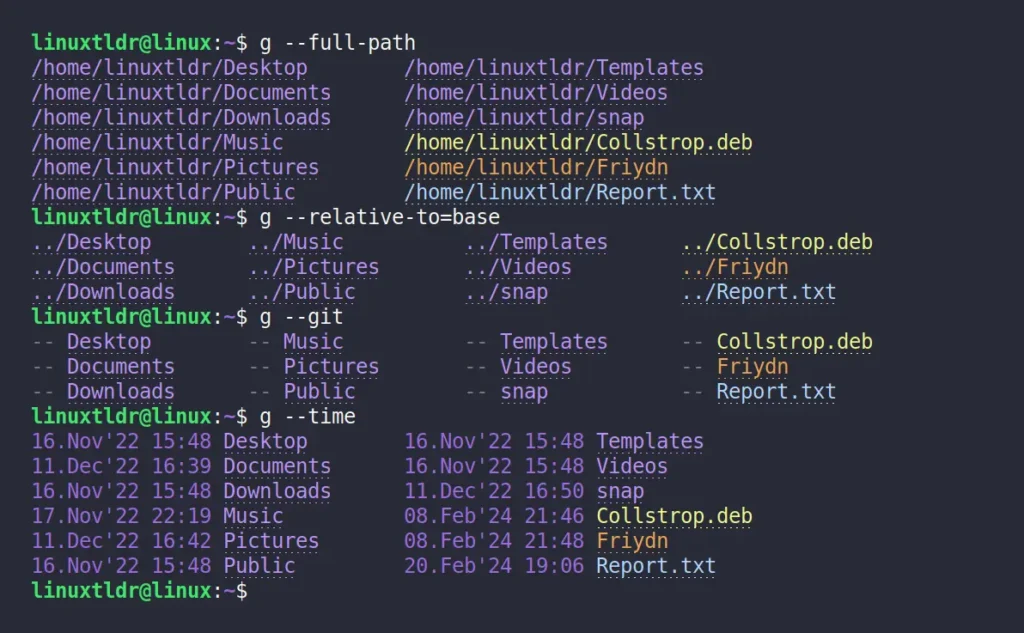
To display the output with absolute path, relative path, git status, or time, you can use the corresponding options: “--full-path“, “--relative-to=base“, “--git“, and “--time“.
$ g --full-path
$ g --relative-to=base
$ g --git
$ g --time
Output:
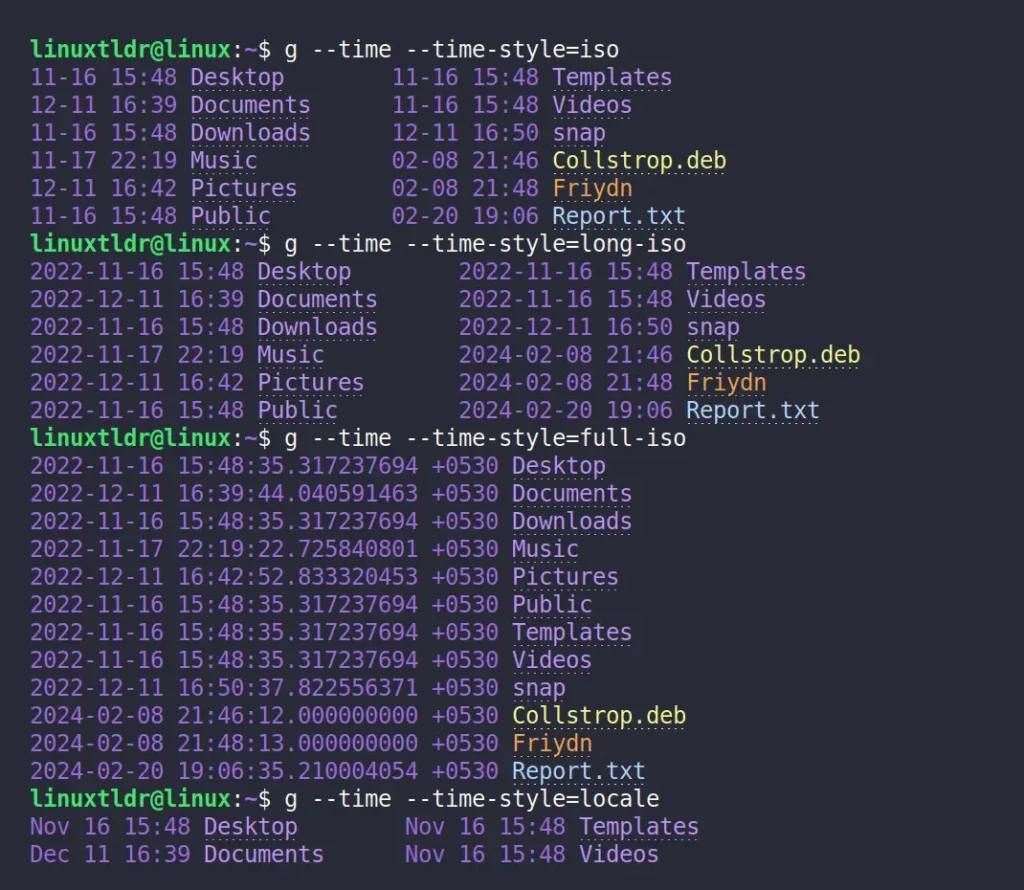
The default displaying style for time is “Day.Month'Year Hour:Minute” (16.Nov’22 15:48), but it can be changed using the following style with the “--time-style” option.
- iso
- long-iso
- full-iso
- locale
$ g --time --time-style=iso
$ g --time --time-style=long-iso
$ g --time --time-style=full-iso
$ g --time --time-style=locale
Output:
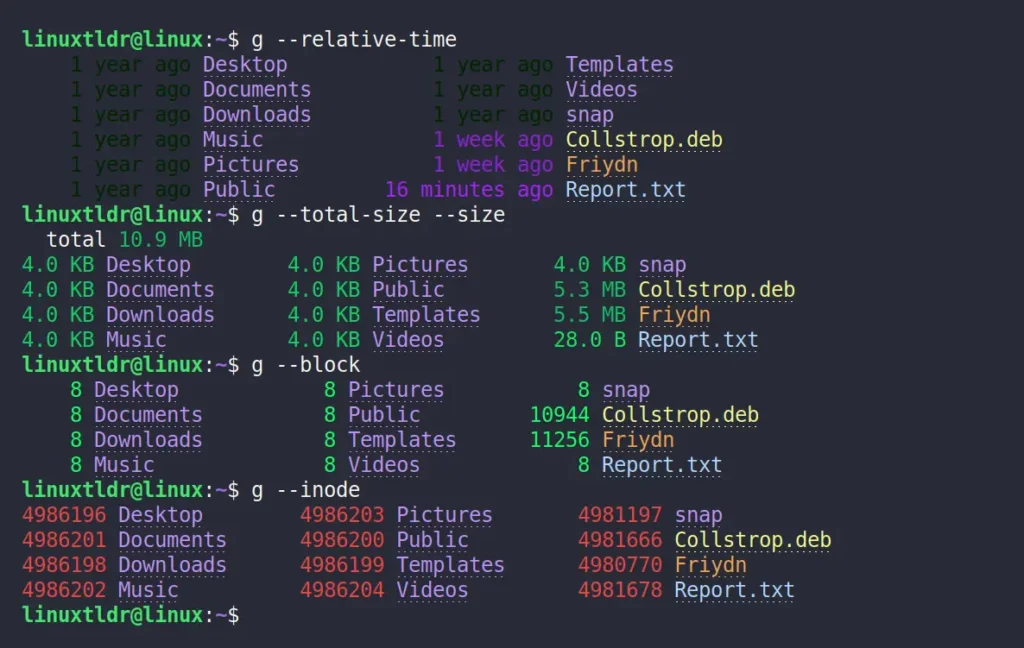
To print relative time, size, total size, block, and inode in the output, use the corresponding options: “--relative-time“, “--total-size --size“, “--block“, and “--inode“.
$ g --relative-time
$ g --total-size --size
$ g --block
$ g --inode
Output:
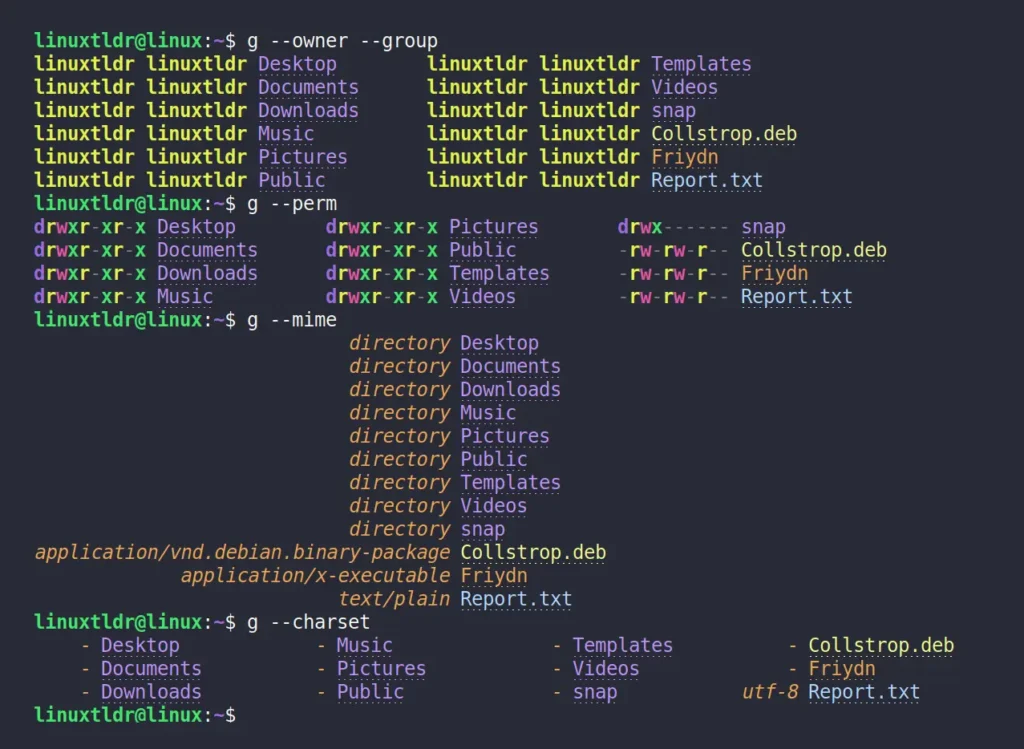
For displaying the owner and group names, files and directories permissions, mime type, and charset, use the corresponding options: “--owner --group“, “--perm“, “--mime“, and “--charset“.
$ g --owner --group
$ g --perm
$ g --mime
$ g --charset
Output:
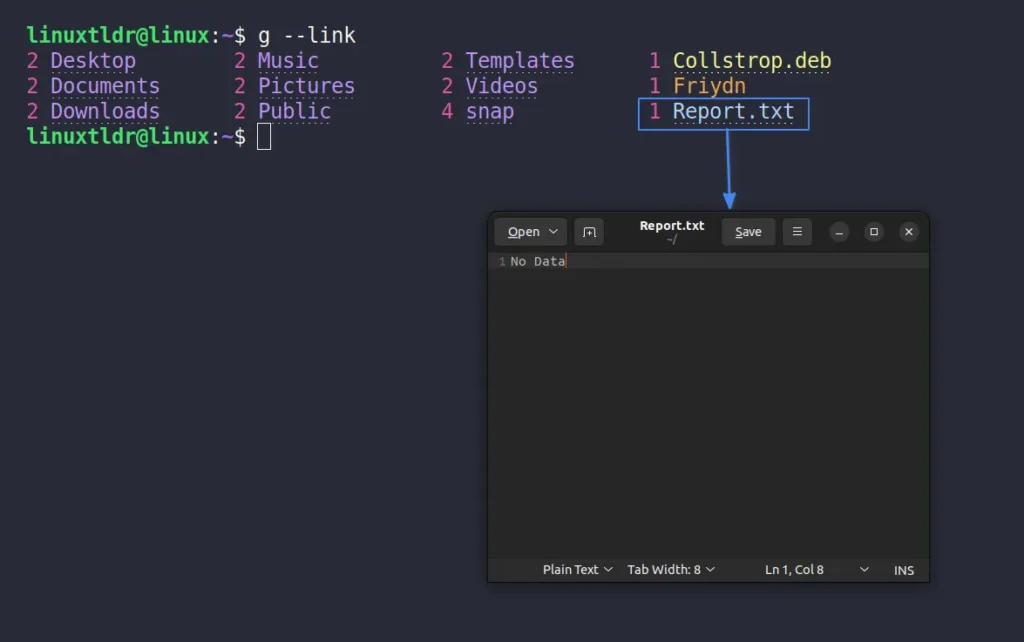
To add links to files and directories so that when you click on them by holding the “Ctrl” key in your terminal, they will open in their default launcher, use the “--link” option.
$ g --linkOutput:
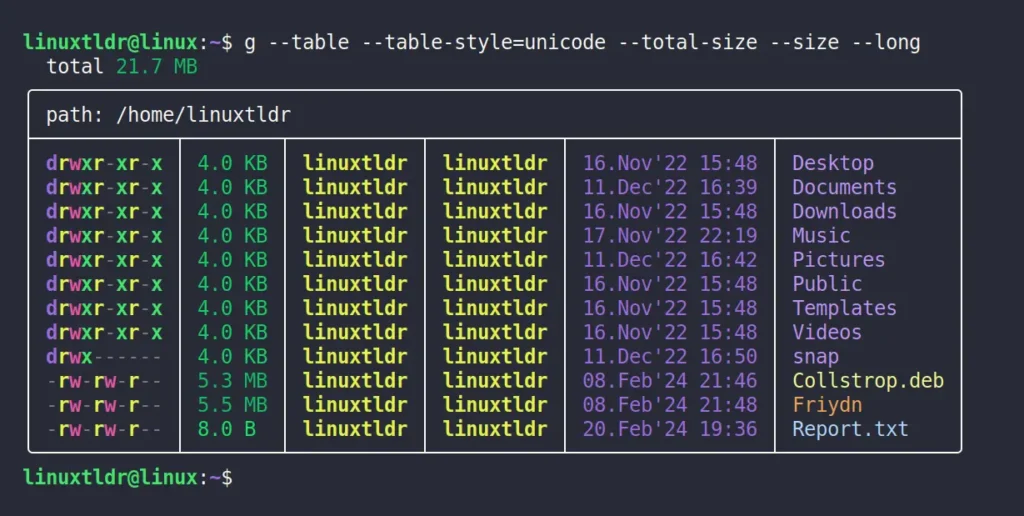
Lastly, if you are wondering which command I’ve kept as an alias, then it is the following one:
$ g --table --table-style=unicode --total-size --size --longOutput:
There are tons of options that you can use with the “g” command. To get a glimpse of them, use the “g --help” command. You may feel overwhelmed by the long list of options, so it’s best to first check out its official documentation.
At last, if you have any questions or queries related to the topic, then do let me know in the comment section.
Till then, peace!


