
The Grunt JavaScript Task Runner could become a resourceful utility in your development as it can automate a wide variety of repetitive tasks such as compilation, autoprefixing, minification, concatenation, linting, and many more.
Its installation and configuration are quite simple; all you need to do is install it on your system, create a configuration file, specify your settings, and then use the “grunt” command to run one or all of the tasks specified in the configuration file.
I’ve known about it for a while but always hesitated to understand it properly, as looking at the configuration file in the tutorial gave me shivers. However, after taking a deep breath and going through it, I realized it was actually quite simple, and no blog had clearly explained it.
After learning how to use it and write the configuration file, I’ve been regularly using it in my Node.js project to automate tasks such as Sass compilation, autoprefixing, and minification for my web application, which I’ll also show you how to do in this article.
Now, note that I won’t be able to comprehend all the things it can do, but once you read the whole article, you can check out the Grunt plugins (which cover almost everything) and use them in your project to automate a wide variety of repetitive tasks.
So, let’s begin our article: first, we will see how to install Grunt JavaScript Task Runner on Linux and macOS, then cover the basic usage of automating tasks using Grunt JavaScript Task Runner, and finally, I’ll show you how I use it to automate Sass to CSS compilation, autoprefixing, and minification in my web application.
Tutorial Details
| Description | Grunt JavaScript Task Runner |
| Difficulty Level | Moderate |
| Root or Sudo Privileges | Yes (for installation) |
| OS Compatibility | Ubuntu, Manjaro, Fedora, macOS, etc. |
| Prerequisites | – |
| Internet Required | Yes |
How to Install Grunt JavaScript Task Runner
The Grunt JavaScript Runner is an NPM package that you can globally install with root or sudo privileges, so before installing it, install Node.js and NPM on your system.
# On Debian, Ubuntu, Mint, Pop!_OS, etc.
$ sudo apt install nodejs npm -y

# On RHEL, CentOS, Fedora, Rocky Linux, AlmaLinux, etc.
$ sudo dnf install nodejs -y

# On Arch, Manjaro, EndeavourOS, Garuda, etc.
$ sudo pacman -Sy nodejs npm

# On Linux and macOS
$ brew install node
Once done, use the following command to install the “grunt-cli” package:
$ sudo npm install -g grunt-cliAfter the installation finishes, you’ll be able to access the “grunt” command from the terminal.
$ grunt --versionOutput:

Now that you’ve successfully installed it, we can look into its basic usage first.
Basic Usage of Grunt JavaScript Task Runner
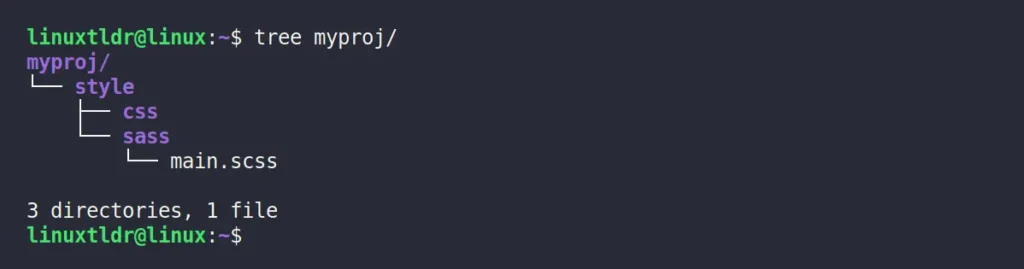
To demonstrate the usage of the Grunt JavaScript Task Runner in automating repetitive tasks, I’ll use the “myproj/” directory created in my home directory by me, which houses a “style” directory that was comprising an empty “css” directory and a “sass” directory containing a single “main.scss” file.
The following is a “myproj/” directory hierarchy.
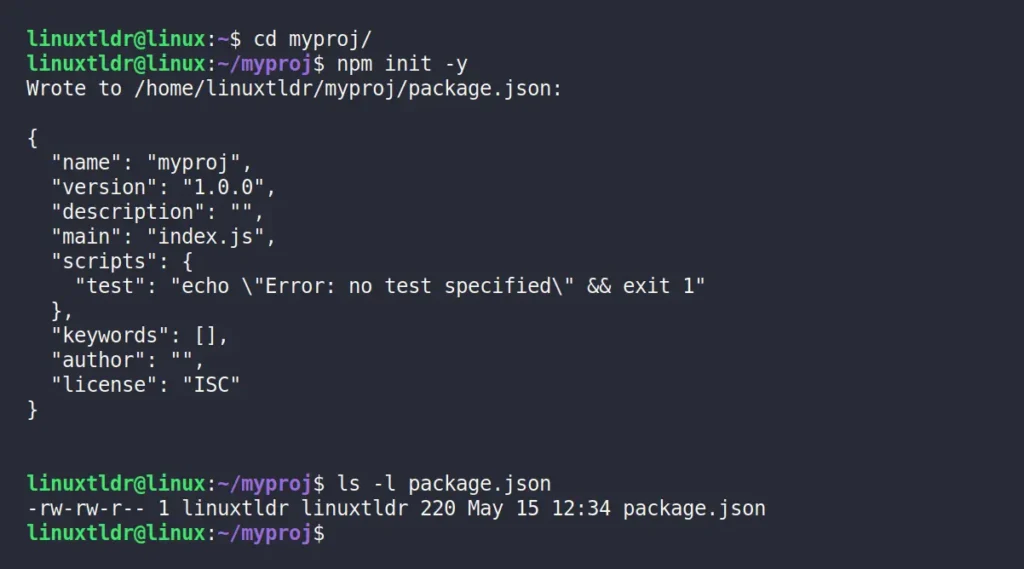
I have already entered the project directory, and our first move would be to initialize the “package.json” file with the following command:
$ npm init -yOutput:
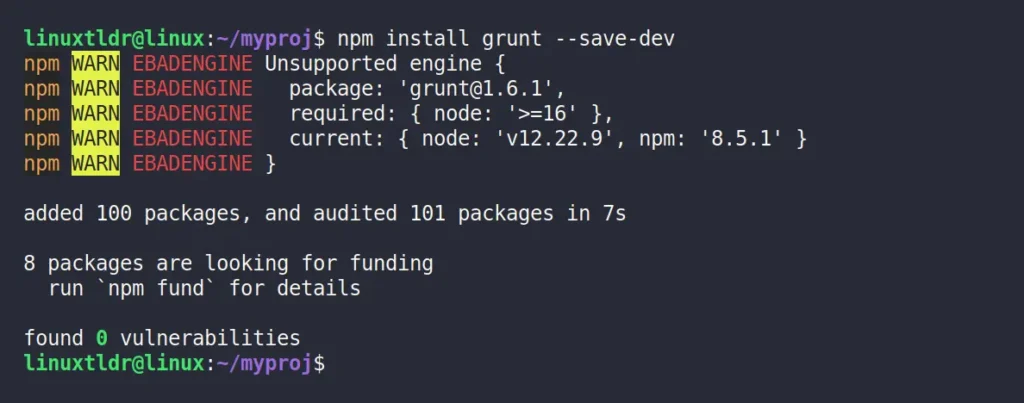
We will now install a Grunt NPM package in the local development environment, which will be required later when working with the Grunt config file.
$ npm install grunt --save-devOutput:
Once done, you can now create the Grunt config file named “Gruntfile.js” using your preferred text editor, like Nano or Vim; I personally prefer Vim.
$ vim Gruntfile.jsNow, you can copy and paste the following basic Grunt config settings (an explanation will be given in a few seconds).
module.exports = function(grunt) {

    // Configuration
    grunt.initConfig({

    })

    // Load plugins
    // grunt.loadNpmTask('<plugin-name>')

    // Register task
    grunt.registerTask('compile-sass', function() {
        console.log('I am compiling the sass files.');
    });

    grunt.registerTask('concat', function() {
        console.log('I am concatenating the files.');
    });

    grunt.registerTask('autoprefix', function() {
        console.log('I am autoprefixing the files..');
    });

    grunt.registerTask('all', ['compile-sass', 'concat', 'autoprefix']);

};Save and close the file, and now to run the “compile-sass“, “concat“, “autoprefix“, or all tasks at once, you can use the following commands:
$ grunt compile-sass
$ grunt concat
$ grunt autoprefix
$ grunt all
Output:
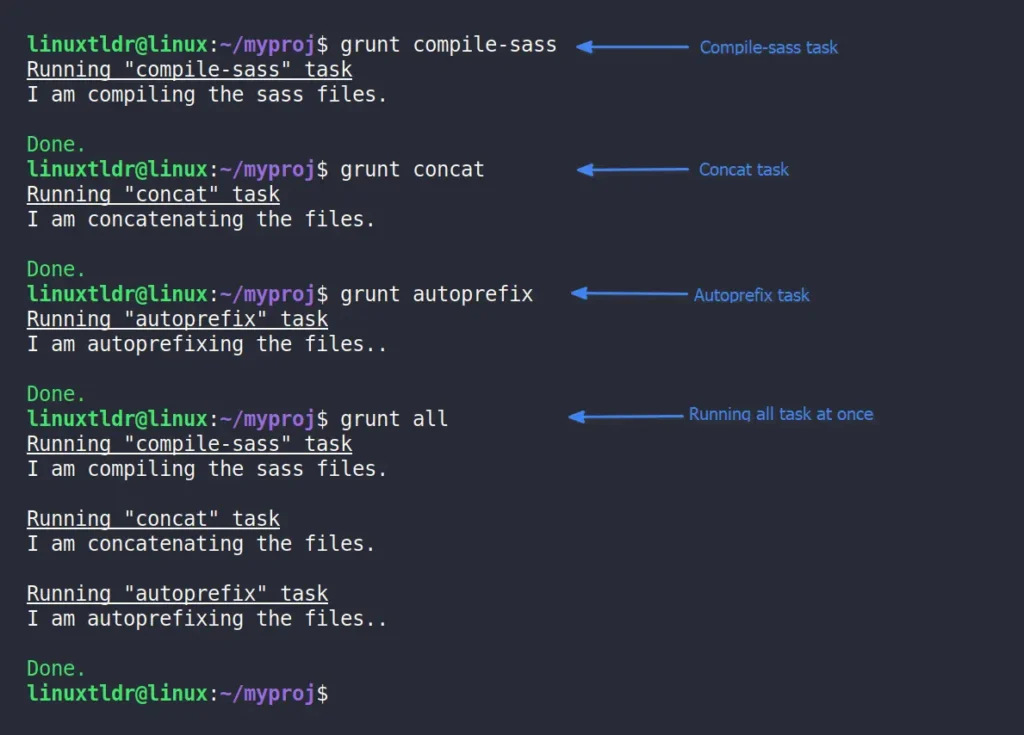
This way, you can execute single, multiple, or all tasks at once, as defined in the Grunt config file. Now, let’s understand the “Gruntfile.js” config file. So, to properly understand this file, you need to keep in mind that the Grunt config file consists of three things: configuration of the plugin, loading plugin, and task registration (each section is color-highlighted).
We will declare each of these three Grunt configurations under the following function:
module.exports = function(grunt) {

    // Write your Grunt configuration.

};
The first step within the above function typically involves specifying the plugin’s configuration, such as the compiler, source, and destination paths for compiling a Sass file. Each plugin’s configuration varies, and you can refer to their documentation page for guidance.
    // Configuration
    grunt.initConfig({

    })
The second step is to load your desired plugin; now there are quite a lot of Grunt plugins available, such as “grunt-contrib-watch“, “grunt-contrib-cssmin“, “grunt-contrib-connect“, “grunt-contrib-sass“, “grunt-contrib-compress“, “grunt-contrib-csslint“, and many others, which you can explore on the Grunt plugin page.
    // Load plugins
    grunt.loadNpmTask('<plugin-name>')
The third and final step is to register the task. In our basic Grunt config template, we created four tasks, naming each task as “compile-sass“, “concat“, “autoprefix“, and “all“. When each task is called using the “grunt” command, it will perform the specified task within it (in our case, displaying a console message). The fourth task, named “all“, is used to invoke the above three tasks. So when you call it, it will execute all the specified tasks.
    grunt.registerTask('<task-one>', function() {
        console.log('I am the task one.');
    });

    grunt.registerTask('<task-two>', function() {
        console.log('I am the task two.');
    });

    grunt.registerTask('run-all-task', ['task-one', 'task-two']);
I hope you understand how the Grunt JavaScript Task Runner works, as well as the structure of its configuration file. If you have worked with JavaScript before, it would be a breeze for you. Now, let’s see a practical demonstration of using Grunt to automate the process of compiling Sass files and minifying the generated CSS output file.
Automate the Sass Compiling and Minifying Task with Grunt JavaScript Task Runner
I hope you remember our current directory is “myproj/“, where we have a “style” directory containing two more directories, “css” and “sass” (with a single SCSS file), as shown.
myproj/
└── style
	├── css
	└── sass
	    └── main.scss
What I want to do is create a Grunt task that automatically compiles the “style/sass/main.scss” file, saves it to the “style/css/” path as “main.css“, and then another Grunt task will minify the generated “main.css” file, saving it as “main.min.css“.
To achieve that, I’ll use the “grunt-sass” plugin to compile the Sass into a CSS file, and then use the “grunt-contrib-cssmin” plugin to minify the generated CSS file.
So, let’s install both of these plugins, along with their dependencies, in the development environment using the following command:
$ npm install node-sass grunt-sass --save-dev
$ npm install grunt-contrib-cssmin --save-dev
Once the installation is complete, open the “Gruntfile.js” config file, clear out all the existing content, and copy-paste the following premade template.
const sass = require('node-sass');
module.exports = function(grunt) {

    // Configuration
    grunt.initConfig({
        sass: {
            options: {
                implementation: sass,
            },
            build: {
                files: [{
                    src: 'style/sass/main.scss',
                    dest: 'style/css/main.css'
                }]
            }
        },
        cssmin: {
            options: {
                mergeIntoShorthands: false,
                roundingPrecision: -1
            },
            target: {
                files: {
                    'style/css/main.min.css': ['style/css/main.css']
                }
            }
        }
    })

    // Load plugins
    grunt.loadNpmTasks('grunt-sass');
    grunt.loadNpmTasks('grunt-contrib-cssmin');

    // Register task
    grunt.registerTask('dev', ['sass', 'cssmin']);

};
Once done, save and close the file, then compile the Scss file, minify the generated file, list the generated files, and read the minified file content all in one go using the following command:
$ grunt dev
$ ls style/*
$ cat style/css/main.min.css
Output:
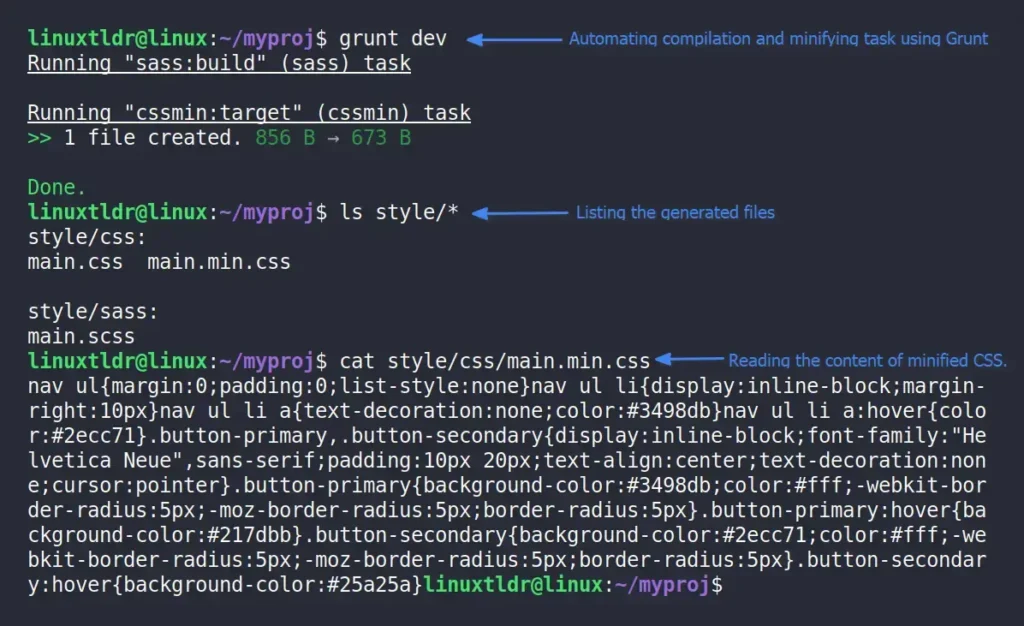
Voila, we’ve successfully automated the compiling and minifying tasks in a single step. Honestly, it’s a pretty simple example, but there’s plenty more you can achieve with it.
Let’s now see what we did in the Grunt config file, as most of the things we already discussed in the basic usage of the Grunt section, so the new thing we did in this config file is that we first imported the “node-sass” package (required for some plugins).
const sass = require('node-sass');Then, using the instructions provided on the official plugin page, we set up the Sass settings within the plugin configuration, such as specifying the compiler, the location of the source file, and the destination of the output file.
        sass: {
            options: {
                implementation: sass,
            },
            build: {
                files: [{
                    src: 'style/sass/main.scss',
                    dest: 'style/css/main.css'
                }]
            }
        }
Next, continuing with the Sass configuration, we have also set up the minifying settings, such as its options, target source file, and destination of the output minified file.
        cssmin: {
            options: {
                mergeIntoShorthands: false,
                roundingPrecision: -1
            },
            target: {
                files: {
                    'style/css/main.min.css': ['style/css/main.css']
                }
            }
        }
Then we loaded both plugins.
    // Load plugins
    grunt.loadNpmTasks('grunt-sass');
    grunt.loadNpmTasks('grunt-contrib-cssmin');
Finally, register a task named “dev” that will invoke the “sass” and “cssmin” plugins using their configuration, and later, the “dev” task can be executed using the “grunt” command, as previously seen.
That’s it. Now the plugin settings may vary depending on the plugin you’re using, but usually the officially maintained plugins are well-documented, so you shouldn’t encounter any difficulty in applying their configuration.
Final Word
This article has come to an end. In this article, you learn how to install Grunt JavaScript Task Runner on Linux (which will work for Debian, Ubuntu, RedHat, Fedora, Arch, Manjaro, and almost everyone else) and macOS, then learn its basic usage and how to use it in practical projects.
Now, if you have any questions or queries related to the topic, do let us know in the comment section.
Till then, peace!


Hello, This is good.
Can you wait a day or 3 and then do another article, this time same grunt but instead with bun.js ?
Thanks !