
LosslessCut is a free and open-source GUI front-end for the FFmpeg CLI tool, providing a seamless experience for converting, trimming, merging, extracting, and more with media files.
If you feel uncomfortable with FFmpeg, you can utilize this tool for multimedia processing. While it may not be as advanced as production-grade editors like Adobe Premiere Pro or Final Cut Pro, it is quite resourceful for performing basic editing tasks.
I’ve been using it for a while now for my basic editing needs, such as trimming certain portions from the video, splitting YouTube videos by their chapters, or converting the media to another format.
So, if your daily life revolves around basic video editing tasks, then read the entire article to explore its features, installation on different systems, and a few practical examples.
Tutorial Details
| Description | LosslessCut |
| Difficulty Level | Low |
| Root or Sudo Privileges | No |
| OS Compatibility | Windows, macOS, and Linux |
| Prerequisites | – |
| Internet Required | Yes (for installation) |
Features of the LosslessCut
The following is a list of features (or tasks) that this tool can perform with ease.
- Trim the video into multiple segments and export them either separately, merged, or both.
- Rotate the video, remove audio from the video, only remove video (silent), or both.
- Set a custom thumbnail for the video, zoom in on a specific scene, and adjust the FPS.
- Capture a snapshot of a specific scene and save it in JPG, PNG, or WEBP formats.
- The supported formats for video include MP4, MATROSKA, MOV, MPEGTS, OGV, and WEBM; for audio, FLAC, IPOD, MP3, OGA, OGG, OPUS, and WAV; and for subtitles, AS, SRT, and SUP.
- Any media file can be converted effortlessly to any of the aforementioned supported formats at a super-fast pace.
- Replace audio in video, video in audio, and add or remove subtitles from the media files.
- Extract YouTube chapters into segments or merge multiple videos into a single one.
- The option to detect black scenes, silent scenes, and scene changes is available.
It’s a fact that it doesn’t cover all FFmpeg CLI features, but it includes many more that I haven’t even touched. The ones mentioned above are the ones I’ve mostly used or used in the past, but feel free to explore more.
How to Install LosslessCut for Windows, macOS, and Linux
LosslessCut is a cross-platform tool available for Windows, macOS, and Linux. However, if you download it from the Windows or macOS app stores, a payment is required due to platform charges and supporting the project.
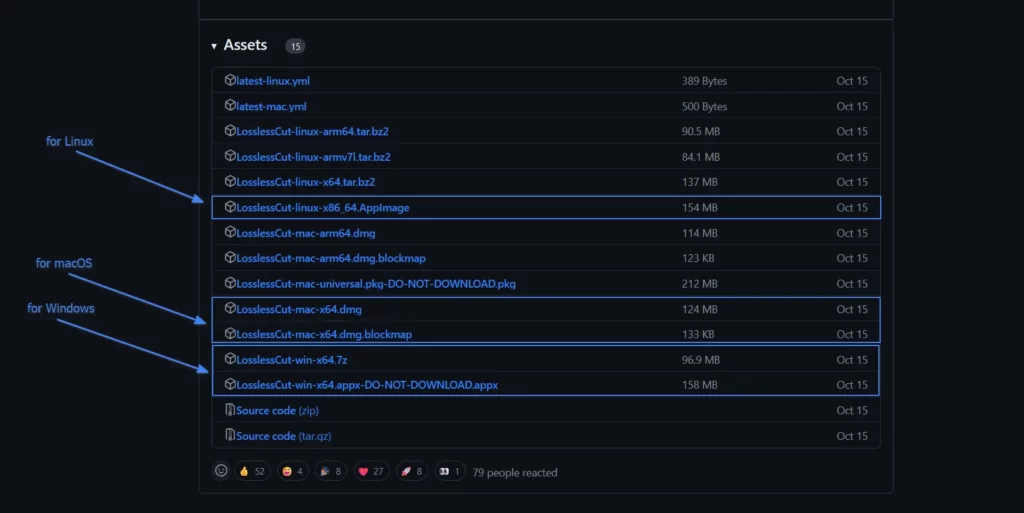
For that reason, I suggest you visit the project page, navigate to the “Assets” section, click on “Show all assets“, and download the 7z for Windows, DMG for macOS, and AppImage for Linux.
If you are using a Linux x64 system, you have a few more options to install it via Sandbox technology, namely Snap and Flatpak, by running the following commands:
$ sudo snap install losslesscut                                                                                           #for Snap
$ flatpak install flathub no.mifi.losslesscut                                                                      #for Flatpak
How to Launch and Use LosslessCut
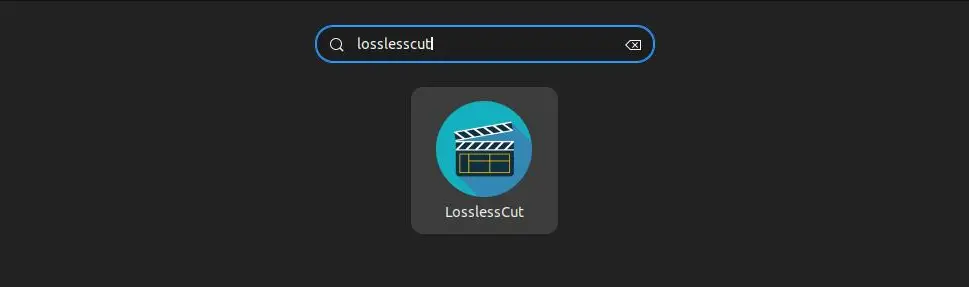
Once the installation process is complete, you can locate and launch the application from the app section if you are using the Windows or macOS system; for Linux, find it in the application menu.
When you launch it for the first time, you will interact with the following home window:
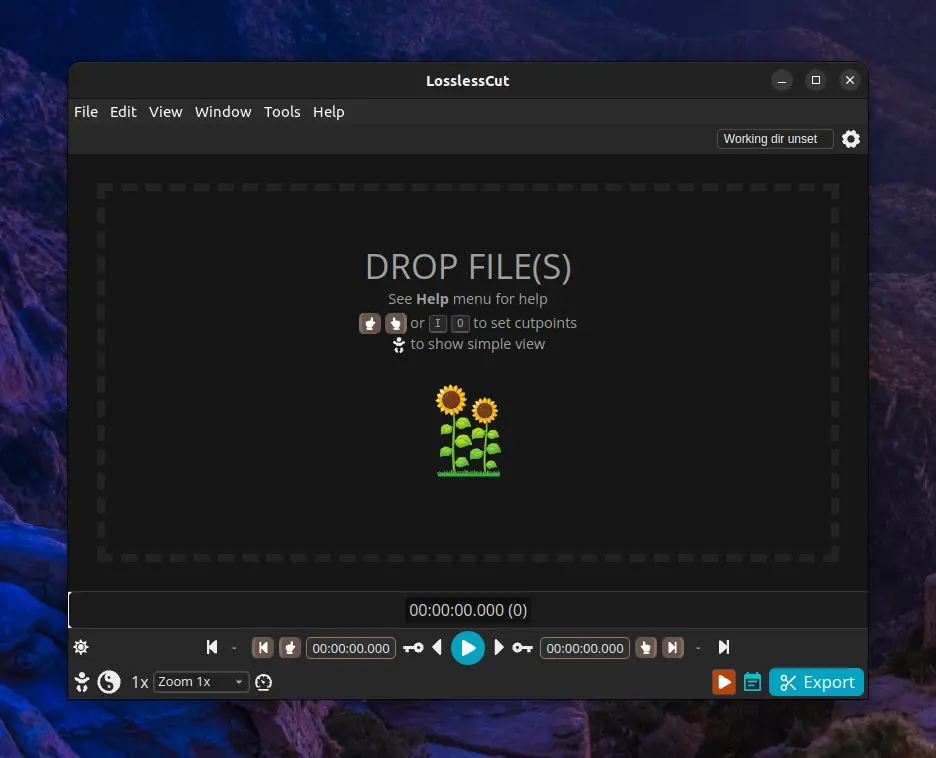
Here, you can take some time to explore, as it is easy to figure out each option. To make things a little more comfortable, here’s an example of performing a certain task using this tool.
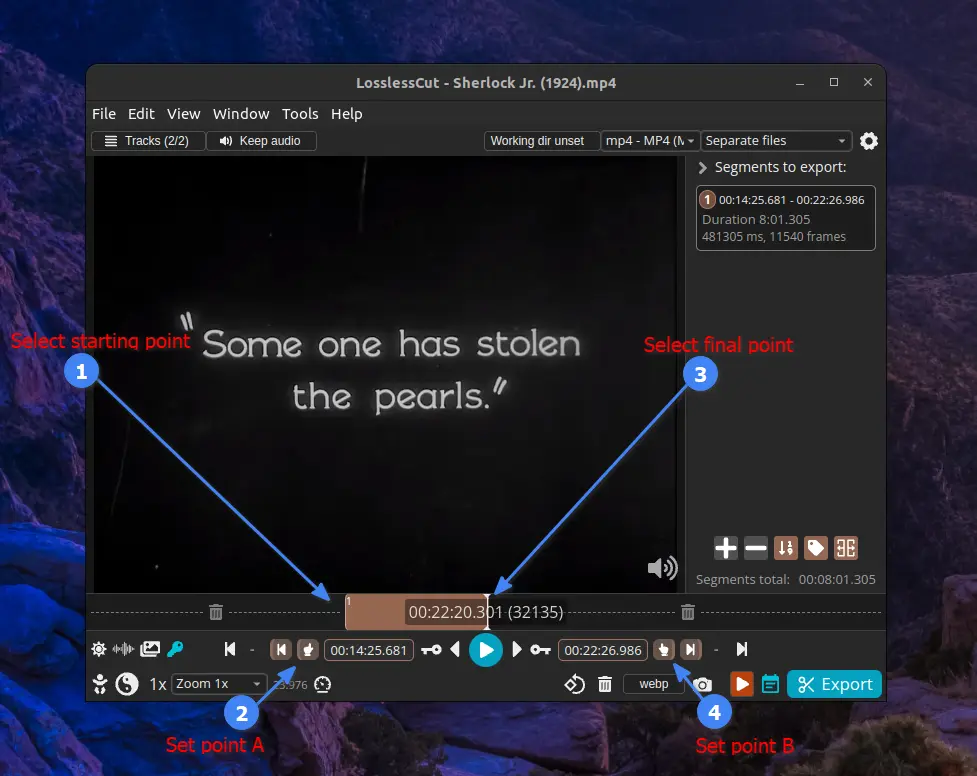
So, opening a media file can be done via “File” -> “Open (Ctrl+O)” or simply by dragging and dropping it onto the application, and once you’re done, you can click on a specific time frame and then click on the highlighted options to trim a specific portion from the media file.
After trimming the media file, you can click on the “Export” button in the bottom right corner, and it will open the following window.
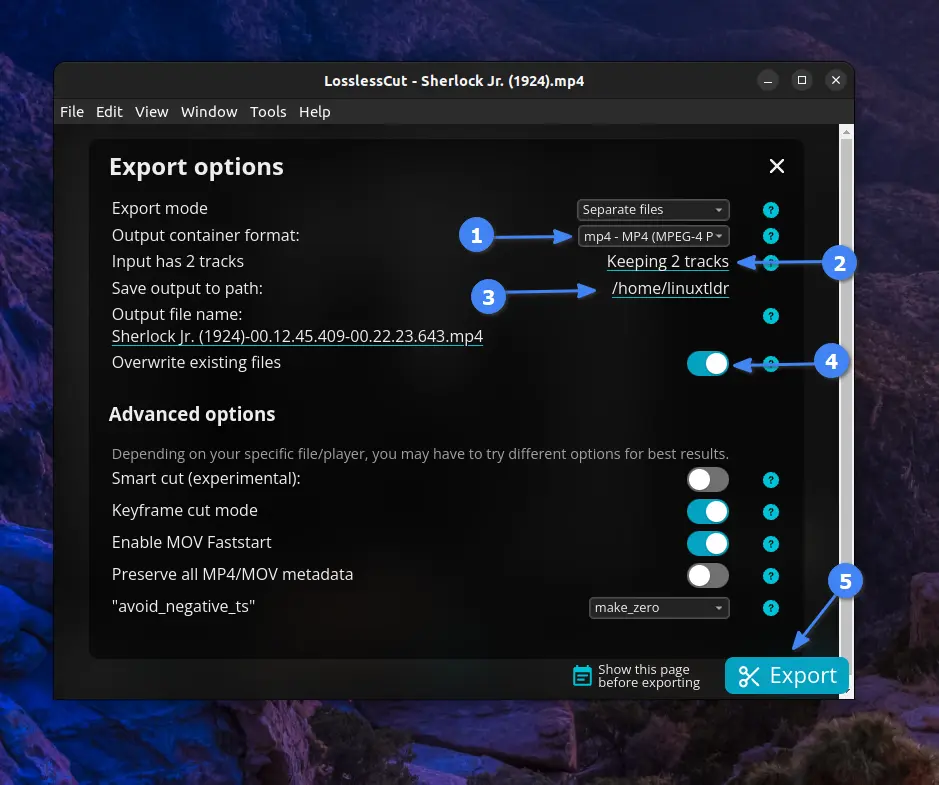
Here, each option highlighted above is explained in detail below.
- It allows you to export the selected video to the supported audio or video formats, and extracting subtitles is also possible through this option.
- It allows you to extract audio or video from the input file or keep it unchanged.
- The specified location will be used for saving the output files.
- If any file with a similar name exists, overwrite it without asking.
- When you are done with everything, click here to start the export process.
Now, here are a few more options that you can use while editing the media file when the advanced option is enabled.
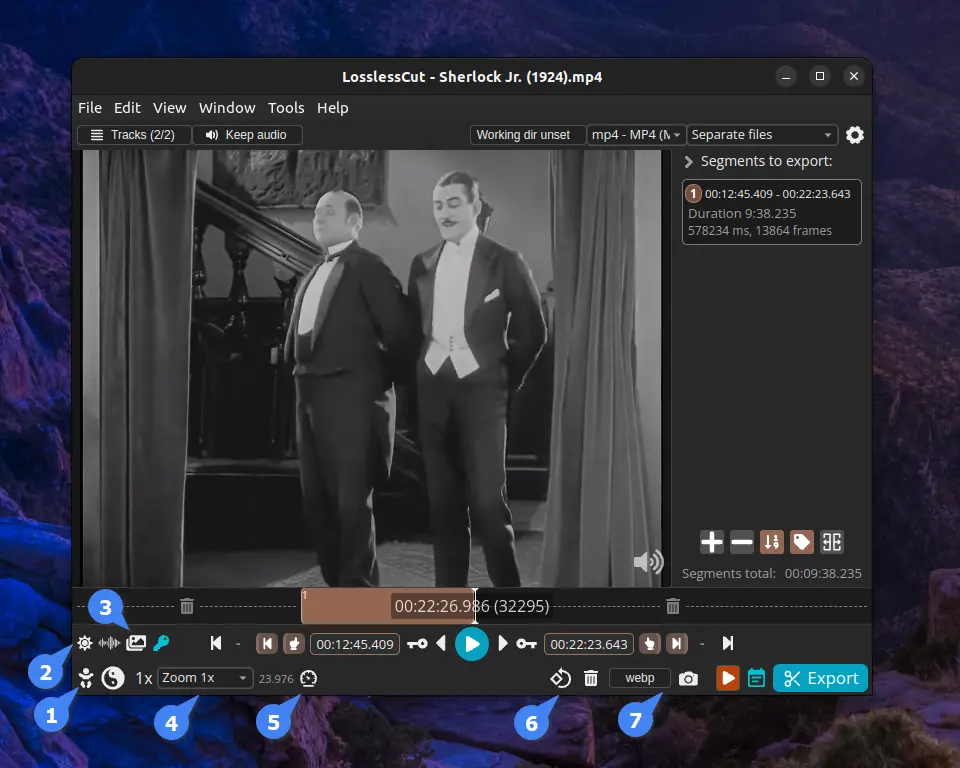
Here, each option highlighted above is explained in detail below.
- Toggle to show or hide the advanced toolbar.
- Toggle for a light or dark theme.
- Show a list of all possible thumbnails.
- Zoom from 1x to 4096x for the chosen scene.
- Change the playback speed of the media file (higher speeds require higher CPU usage).
- Rotate the selected media file to 360 degrees.
- Capture snapshorts of the selected scene in JPG, PNG, and WEBP formats.
I’ll end this article here and encourage you to dig further, as it’s quite an amazing tool for performing basic video editing tasks on your laptop/desktop with fewer system resources.
If you have any questions or queries related to the topic, feel free to ask them in the comment section.
Till then, peace!


Warning: When installing the appimage on the latest version of Ubuntu LTS (Noble Numbat) it will not run unless you add the –no-sandbox option to the command line. This is a bug in electron that needs to be addressed by those developers. The LosslessCut guys can’t do anything about it.