
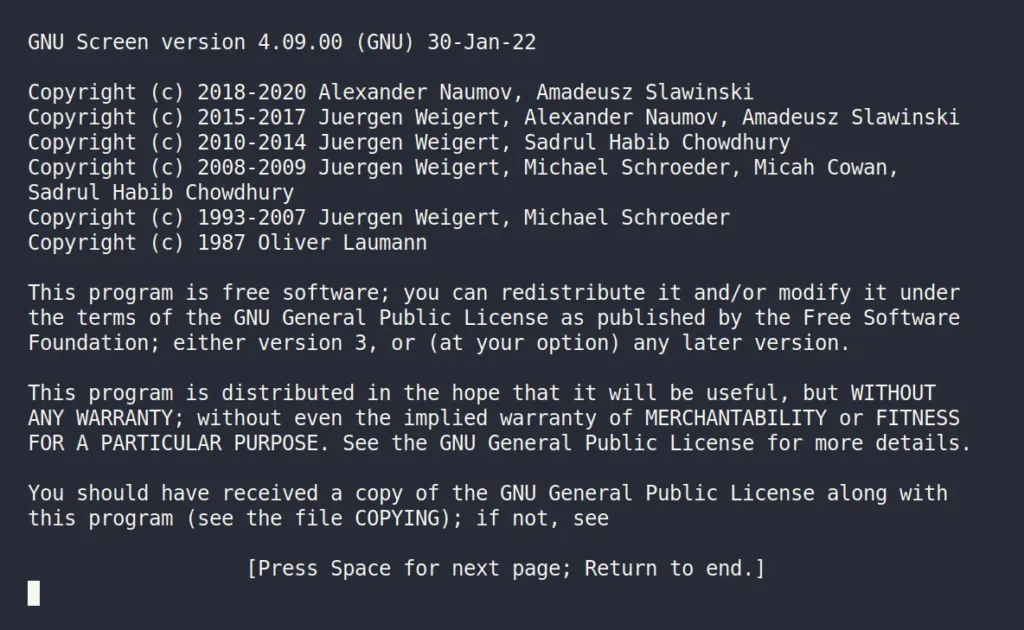
Screen was a popular Linux command-line tool back in the day for launching and managing multiple shell sessions or splitting the screen vertically or horizontally across multiple terminal instances within a single terminal window manager.
This way, you are allowed to manage multiple shell sessions within a single SSH session, run a program in the background, maximize workspace efficiency, monitor various command statuses on one screen, and more.
However, later it was replaced with better tools such as Tmux or Zellij, and now there are many advanced terminal emulators available that provide built-in multiplexers that require zero learning curves, such as Tilix, Wave, Wrap, etc.
If you seek my advice and you’re a beginner stumbling upon this article without knowledge of Screen or Tmux, I recommend learning to use Tmux instead of Screen. And if you’re already familiar with Tmux and other tools, you can learn to use Screen for fun.
In this tutorial, I’ll show you how to install a screen on Linux and then how to use it with different examples.
Tutorial Details
| Description | Screen |
| Difficulty Level | Low |
| Root or Sudo Privileges | No |
| OS Compatibility | Ubuntu, Manjaro, Fedora, etc. |
| Prerequisites | – |
| Internet Required | Yes (for installation) |
How to Install Screen on Linux
On certain Linux distributions, screen comes preinstalled, and to verify, you can run the “screen” command. However, if you encounter the “screen: command not found” error, use one of the following commands, depending on your Linux distribution, to install screen.
# On Debian, Ubuntu, Mint, Pop!_OS, etc.
$ sudo apt install screen

# On RHEL, CentOS, Fedora, Rocky Linux, AlmaLinux, etc.
$ sudo yum install screen

# On Gentoo Linux
$ sudo emerge -a sys-apps/screen

# On Alpine Linux
$ sudo apk add screen

# On Arch Linux
$ sudo pacman -S screen

# On OpenSUSE
$ sudo zypper install screen
Once the installation is complete, the “screen” command becomes accessible.
Usage of Screen
The screen command takes three arguments: the first is the option, the second is the command, and the third is the arguments (all of which are optional).
$ screen [options] [command [arguments]]Now, let’s see some practical examples on the usage of the “screen” command.
1. To start a screen session, simply enter the “screen” command without any options; it will present an interface identical to the command prompt.
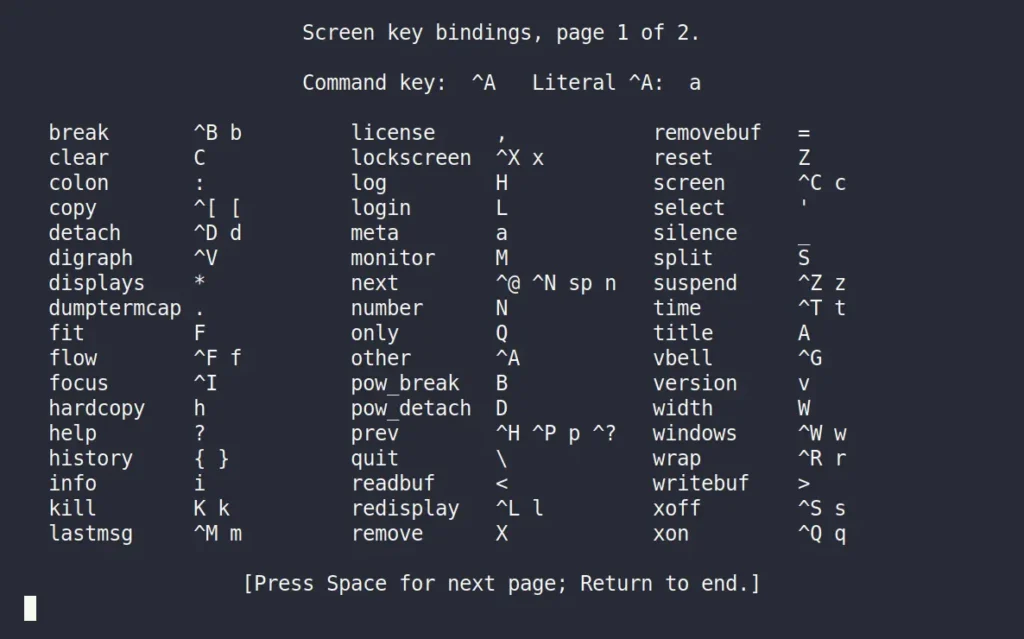
2. Once you’re on the screen, you can start creating multiple windows or splitting screens, but all of this requires knowing the correct key combinations. In this article, I’ll show you most of it, but if you ever forget them, you can press “Ctrl+a” and then “?” to open the screen key bindings page.
3. As of now, you’re operating within a single window, but you can open multiple windows within a single-screen session by using “Ctrl+a” and then “c“. This is particularly handy when you’ve initiated a single SSH session that’s already occupied and need to open a new window without reinitializing the SSH session.
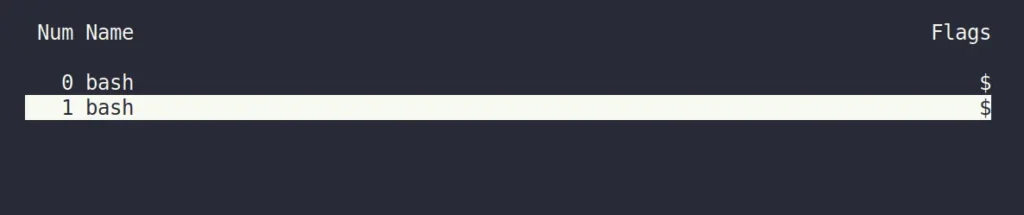
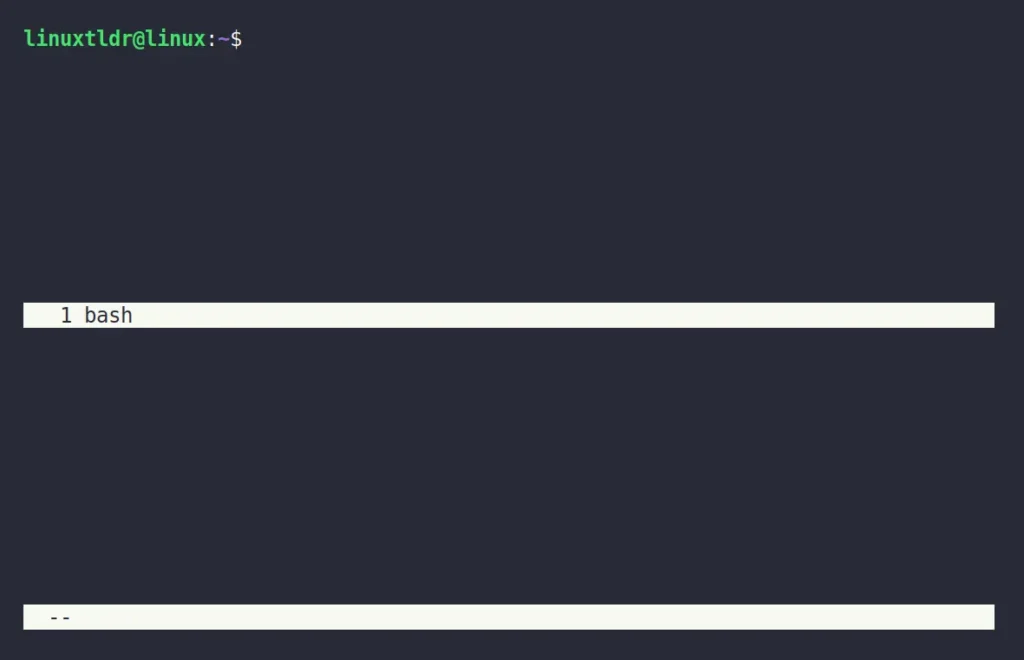
4. When you create a new window in an existing screen session, there’s no visual change, causing confusion in identifying the current working window. To address this, you can use “Ctrl+a” and then “"” (double quote) to list all created windows, with the active one highlighted.
5. To navigate between different windows, you can use either arrow keys or “j” and “k” while listing all windows using the previous method, or use “Ctrl+a” with “n” (to move forward) and “p” (to move backward) within the active window.
6. By default, the names of the window titles are set to the program that created them (often bash), but to distinguish each window, you can rename them. First, enter to desired window, then use “Ctrl+a” followed by “Shift+a“, it will open a prompt titled “Set Window's title to: <title>“. Provide your desired title and press enter to save.
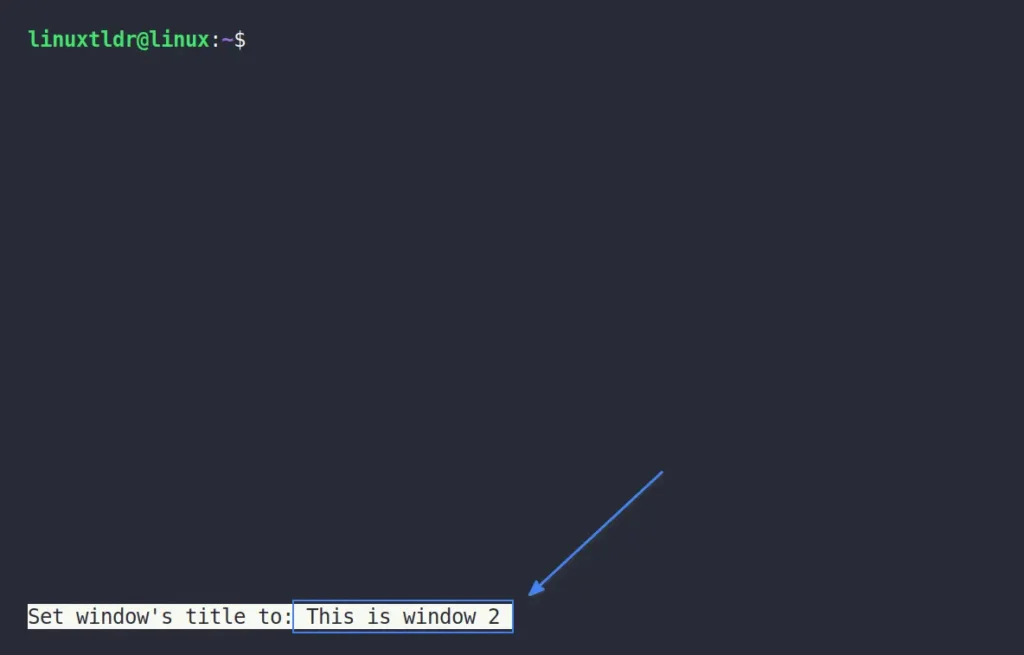
Once you rename the window title, you’ll find a new title that will make it more distinguishable when you list all the windows.

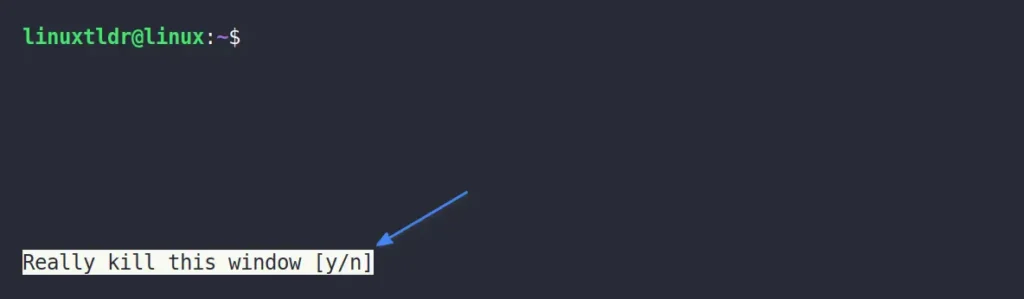
7. To terminate an active window session, use “Ctrl+a” followed by “k“; it will ask for confirmation, where you should press “Y” for yes.
8. You can split the screen horizontally by using “Ctrl+a” and then “Shift+s“; to jump between them, use “Ctrl+a” and then “Tab“; lastly, to close the active window, use “Ctrl+a” and then “Shift+x“.
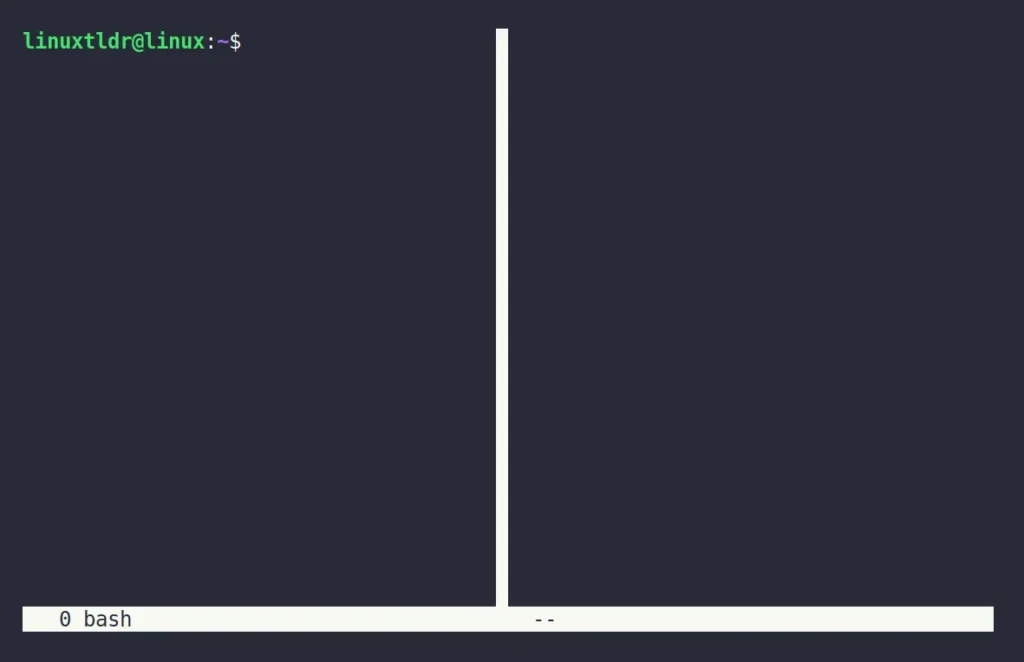
9. To split the screen vertically, use “Ctrl+a” and then “Shift+|“; to jump between them, use “Ctrl+a” and then “Tab“; lastly, to close the active window, use “Ctrl+a” and then “Shift+x“.
10. To detach the screen session, you can use “Ctrl+a” and then “d“; this way, you can avoid terminating all the running programs inside the screen.

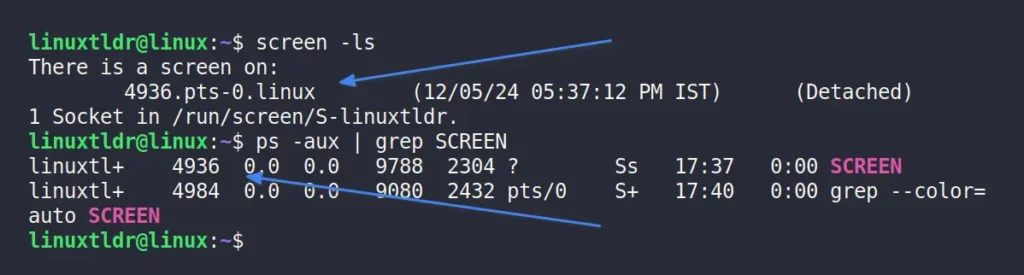
11. To list all detached screen sessions, use the “screen -ls” command; furthermore, you can list all the running processes on your system and filter the output to display only those with the “SCREEN” command.
12. To reattach the screen session either you can use the “screen -r <process-id>” command or just execute the “screen -r” command to reattach the most recently detached screen session.
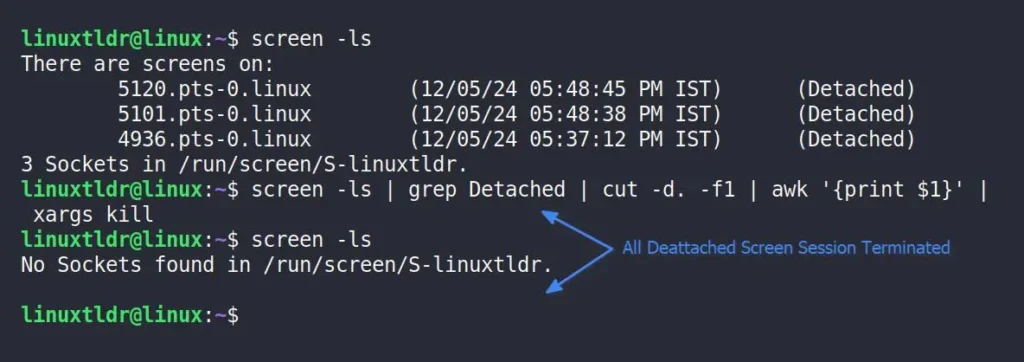
13. If you’ve accidentally detached multiple screen sessions and now want to terminate them, the first method is to reattach them and use the “exit” command to quit, or alternatively, you can use the following command to terminate all detached screen sessions at once.
$ screen -ls | grep Detached | cut -d. -f1 | awk '{print $1}' | xargs killOutput:
14. The screen allows locking the current session with the user login password, so to lock it, use “Ctrl+a” and then “x“; this will show the following prompt for the user login password to unlock.

15. The screen has a built-in mechanism to log every action during the session recording, eliminating the need to log each executed command individually and making it useful in debugging. To start screen logging, simply use “Ctrl+a” and then “Shift+h“, which will also display the log file location at the bottom.
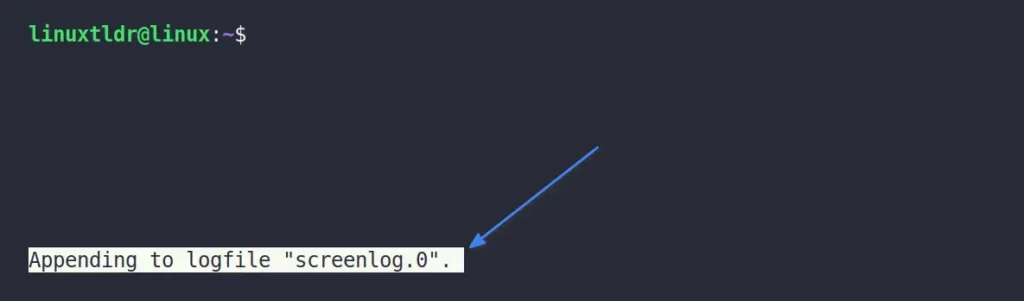
When you quit the screen session or stop the screen logging by using the same “Ctrl+a” and then “Shift+n” key combination, it will stop recording and append all the changes to the file displayed during the start of recording. To view the log, you can simply use the “cat” or “bat” commands.
Final Word
Today, most users might not use the screen, but it was once a great tool. Now, if you have any questions or queries related to the article, you can ask them in the comment section.
Till then, peace!


