
Wave is a free, open-source, cross-platform (currently not available on Windows) fancy terminal emulator designed for the modern generation to become comfortable with the command-line.
It offers some interesting features lacking in traditional terminal emulators such as GNOME or Konsole, and I’ve been searching for them for a while, including a focus on managing different SSH connections.
Apart from that, it has a lot of built-in tools and customization options that can enhance the workflow of a SysAdmin or DevOps engineer, including a built-in JSON and Markdown editor, an image viewer, ChatGPT integration, etc.
There is a lot to discuss, so stick with this article until the end to discover its interesting features, learn how to install it on your system, and explore a few practical examples.
Tutorial Details
| Description | Wave: A Modern Terminal Emulator |
| Difficulty Level | Low |
| Root or Sudo Privileges | No |
| OS Compatibility | macOS and Linux |
| Prerequisites | – |
| Internet Required | Yes (for installation) |
Features of Wave
The following is a list of features (or options) it provides to enhance your daily workflow.
- All terminal tabs can have their own custom title, color, icon, and connections customized.
- Organize terminal tabs to relevant workspaces; for instance, group four tabs connected to the production server under the “Production” workspace and three tabs linked to the deployment server under the “Deployment” workspace, reducing the chance of wandering.
- Option to delete or archive a specific tab or workspace for future access.
- Built-in history mechanism to immediately check the list of commands executed on other instances of the Wave terminal, whether on the same network or remotely.
- Add or remove different local or remote systems on the connection tab.
- Automatically connect to a remote system via SSH, even if the system times out or is restarted.
- Built-in features for image viewing, markdown editing (with preview), and ChatGPT support.
Here, the list of features ends. However, there are certain things that I dislike about this terminal that can be improved in future releases.
- The absence of various installation methods in Linux, such as Snap, Flatpak, DPKG, or RPM packages.
- The term “cross-platform” is used, but there is no option for the Windows system.
- The “Help” option in the menu is not working in both Xorg and Waveland.
- Deleting the terminal tab or workspace is a little annoying, as it always prompts you with a window asking whether to archive it or delete it.
- Reconnecting to a disconnected SSH system is not a seamless experience, as it prompts you that it’s trying to connect, or sometimes you have to click on the “Connect Now” button.
These are not significant issues that can’t be dealt with; future versions might address most of them. If any changes occur, the article will be updated accordingly.
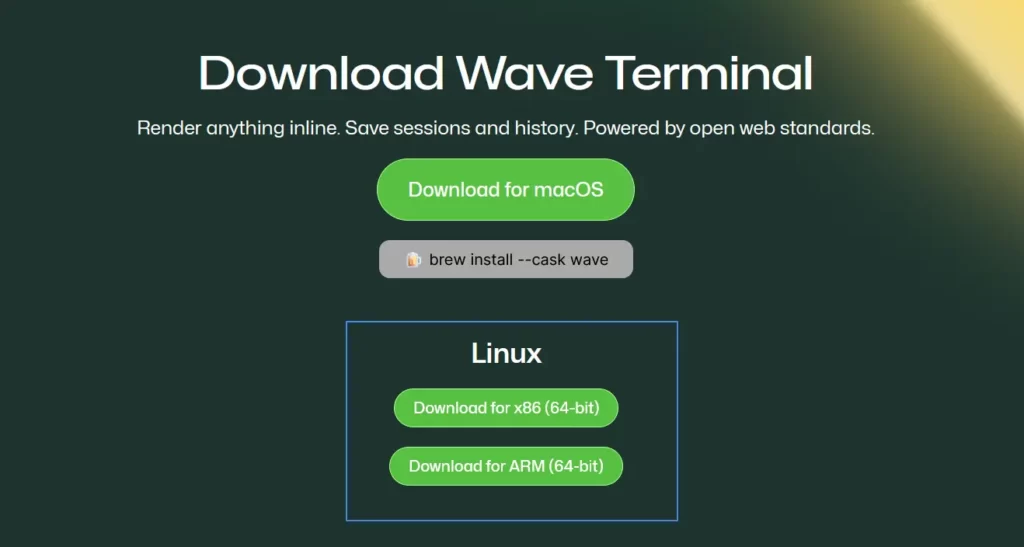
How to Install Wave
There are a limited number of ways to install Wave on your system, making it more straightforward. For example, if you are running a Mac system, run the following command to install it:
$ brew install --cask waveFor Linux operating on ARM64 or x64, simply visit the official download page and download the latest package file compressed in zip format.
Once downloaded, navigate to the download location and unzip the compressed content by executing the following command:
$ unzip waveterm-linux-*.zipFinally, move into the extracted directory and run the Wave binary file by executing:
$ ./WaveIn the future, when there is an update, you will be notified within the app, but you’ll need to perform all these steps again. Don’t worry, as your data is saved locally (“~/.waveterm/“) and will be accessible across different Wave versions.
Usage of Wave
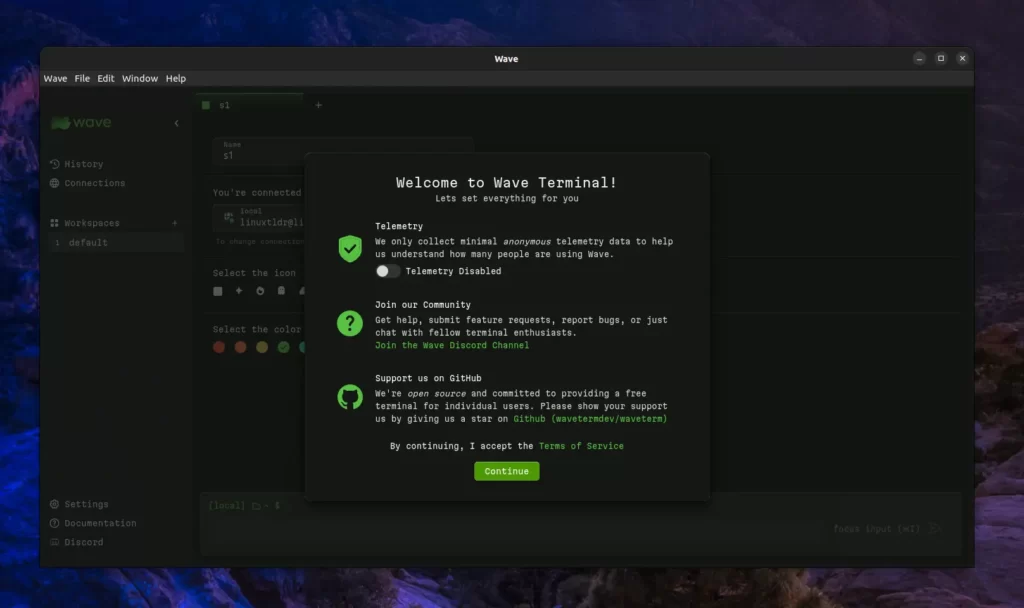
When you launch the Wave for the first time, you will be presented with the following welcome window, where it will give you the option to enable or disable a telemetry collection and ask you to agree to the license agreement.
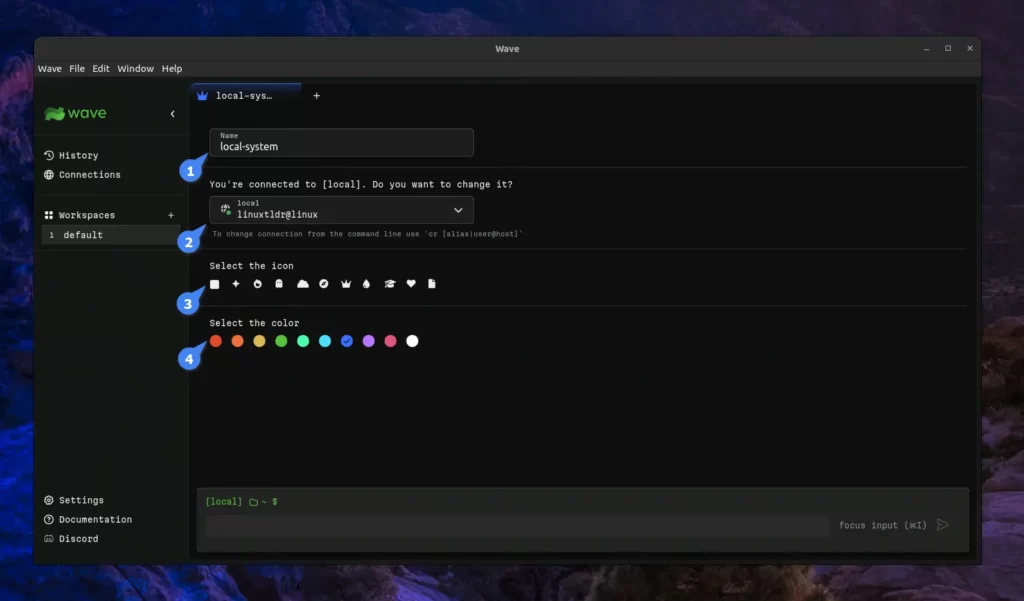
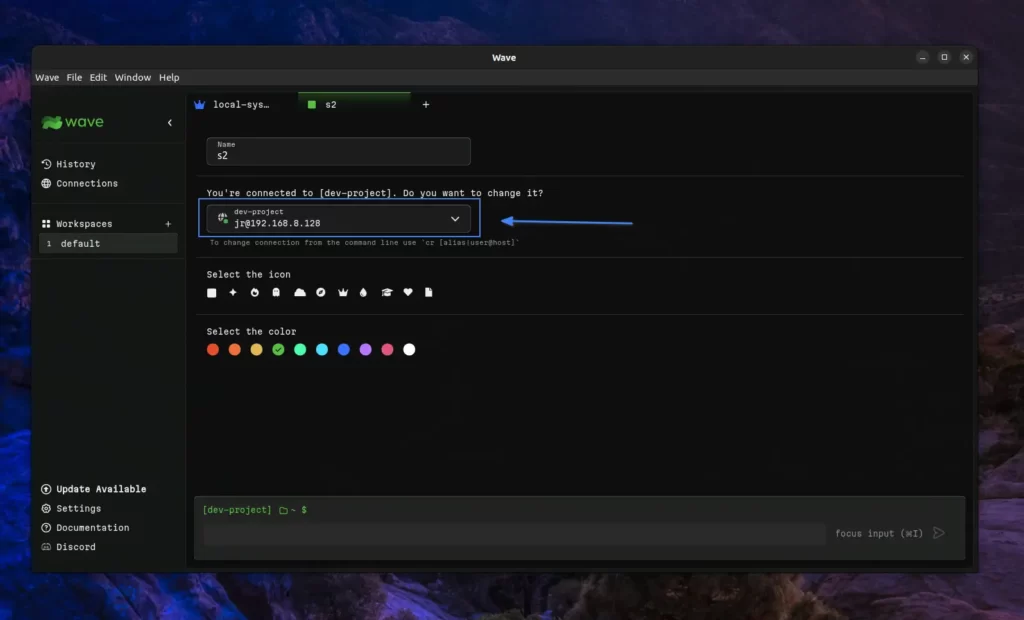
Next, you will interact with the Wave main window, where you will have customization options to select the name, icon, and color for the tab, as well as the connection profile to be used for the local or remote system.
Once you’re done, you can start executing your command in the input box at the bottom.

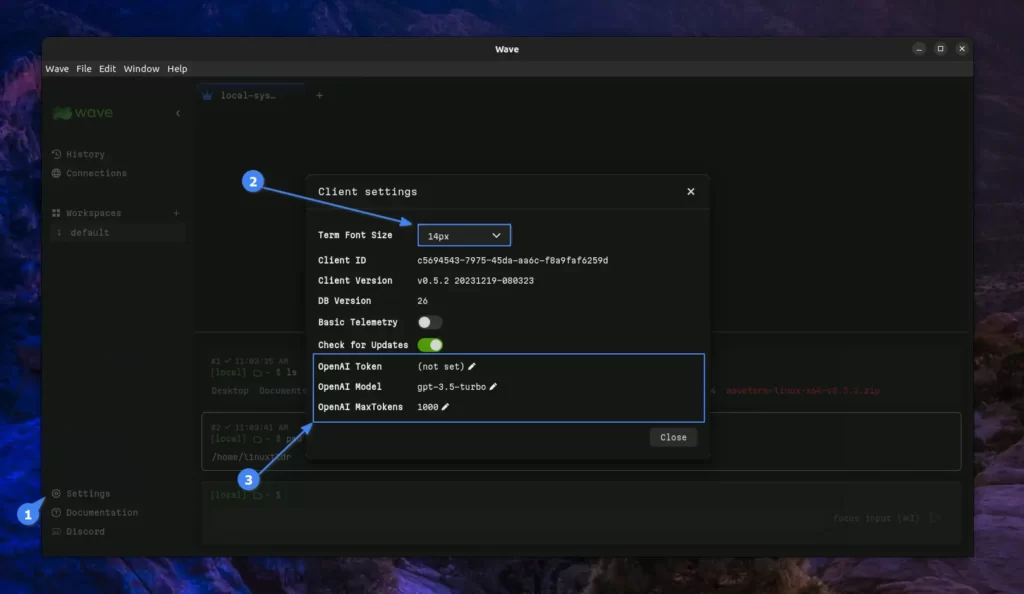
The default command output text is too small due to the default font size being set to 12px; I recommend changing it to 14px for an improved experience, which you can do in the settings where you’ll also find options for OpenAI Token key, model selection, and MaxTokens.
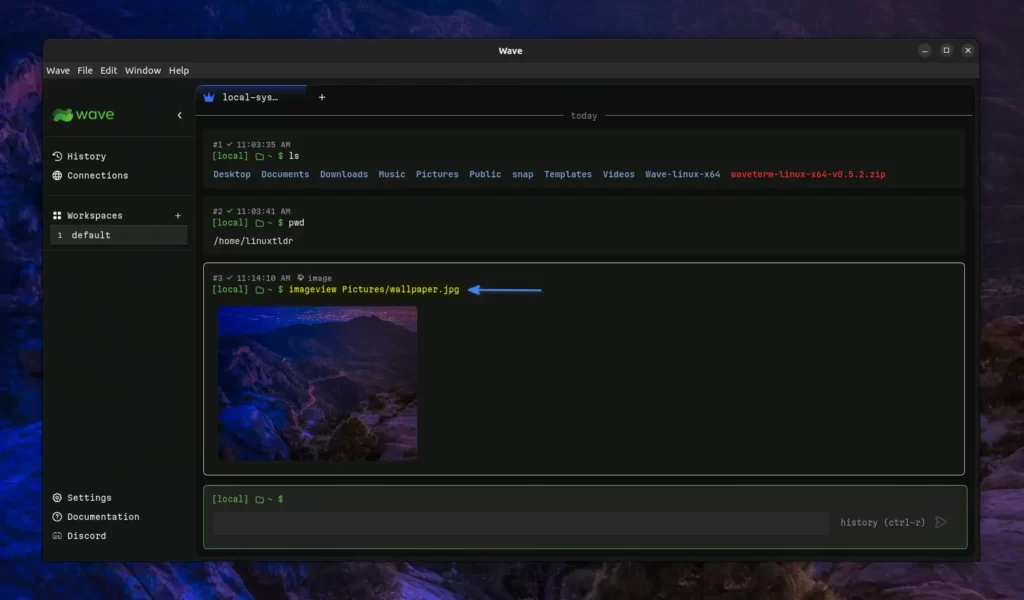
To view an image within the terminal, use the “imageview” command and specify the image’s path.
To edit markdown files and preview the output without leaving the terminal, use the “codeedit” command and specify the markdown filename as an argument.
- Basic to Extended Markdown Cheat Sheet With Examples
- Marker: A Free and Open-Source Markdown Editor for Linux
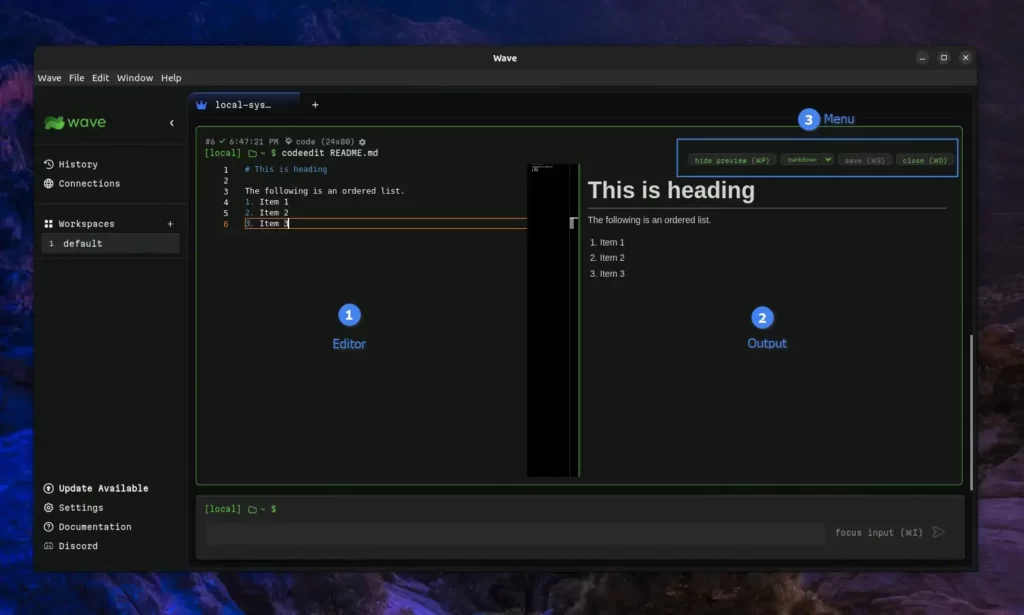
The following are shortcut keys that you can use while editing your markdown file.
| Shortcut Key | Description |
|---|---|
| Ctrl+P | Toggle preview |
| Ctrl+S | Save changes |
| Ctrl+D | Quit |
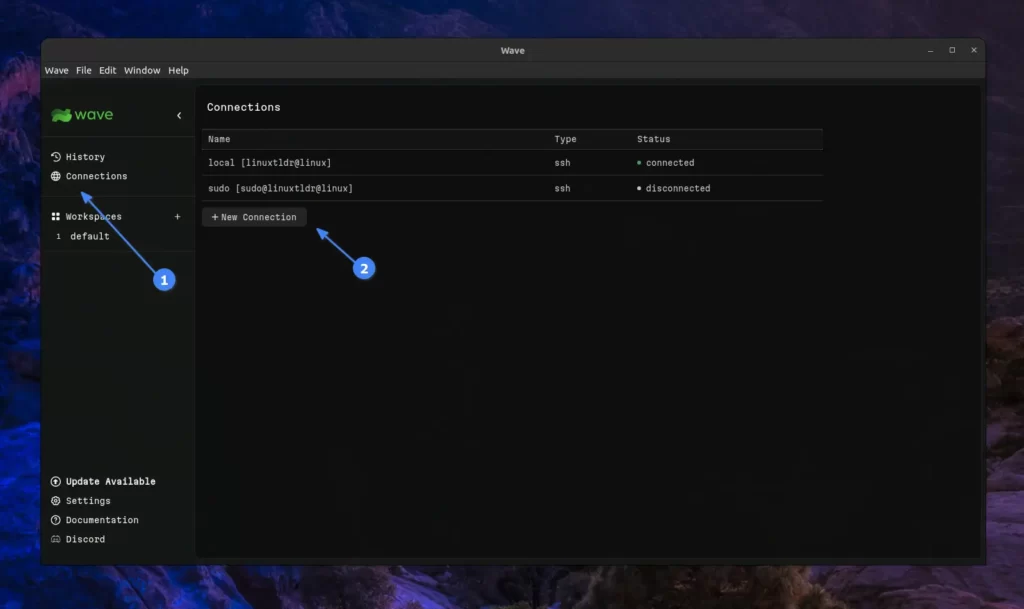
To access your remote system through an SSH connection, navigate to the “Connections” window and click the “New Connection” button.
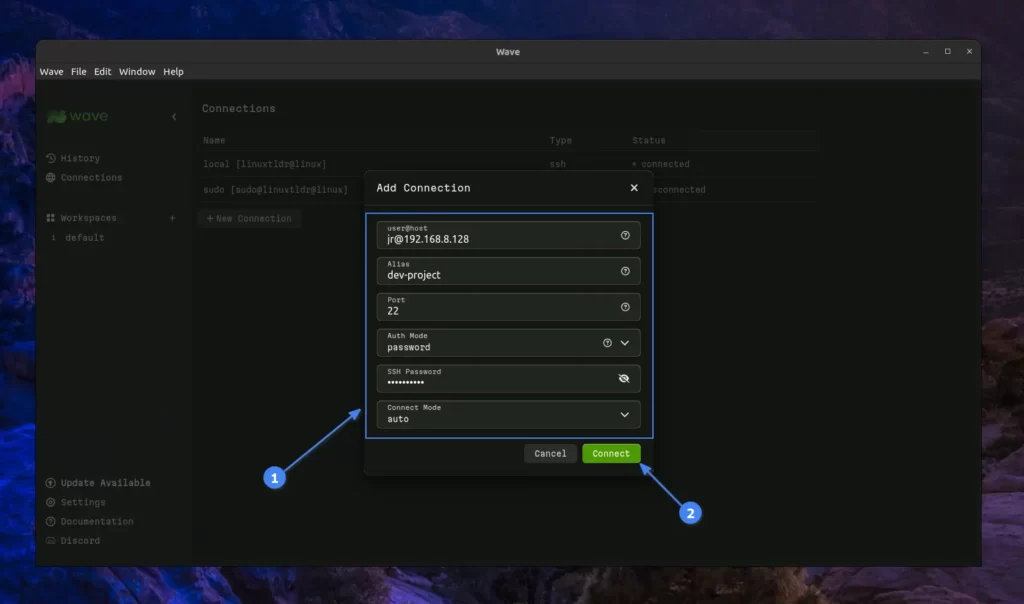
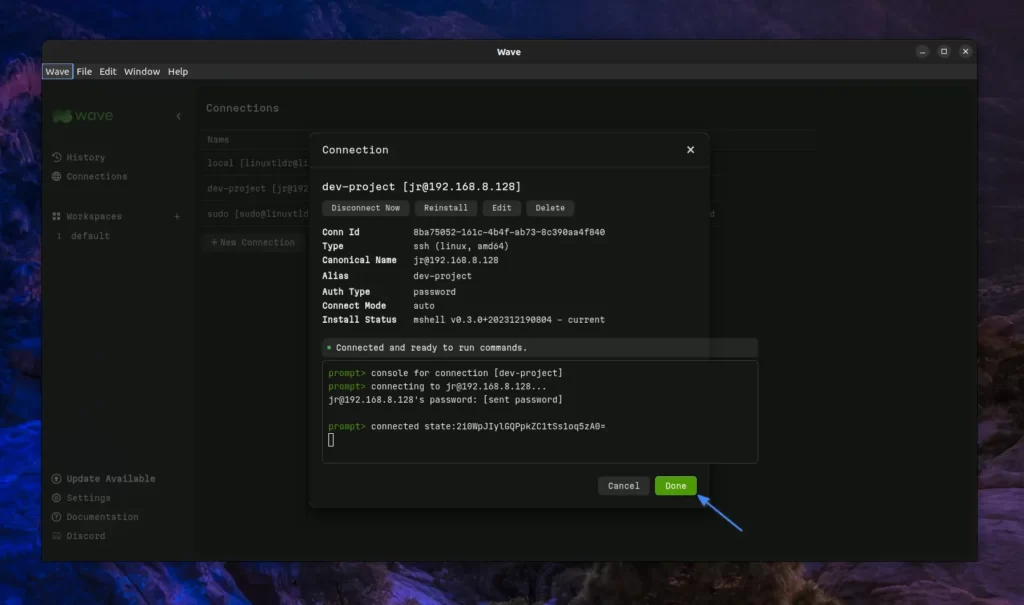
The following “Add Connection” window will prompt you to provide all required information for the remote system, including USER@HOST/IPADDRESS, Alias (which can be anything), port (if it’s not 22), and options for key and password for authentication. Lastly, keep the connect mode to auto and click on the “Connect” button.
If all the provided information for the remote system is correct, you will be automatically connected to that system in the “Connection” window.
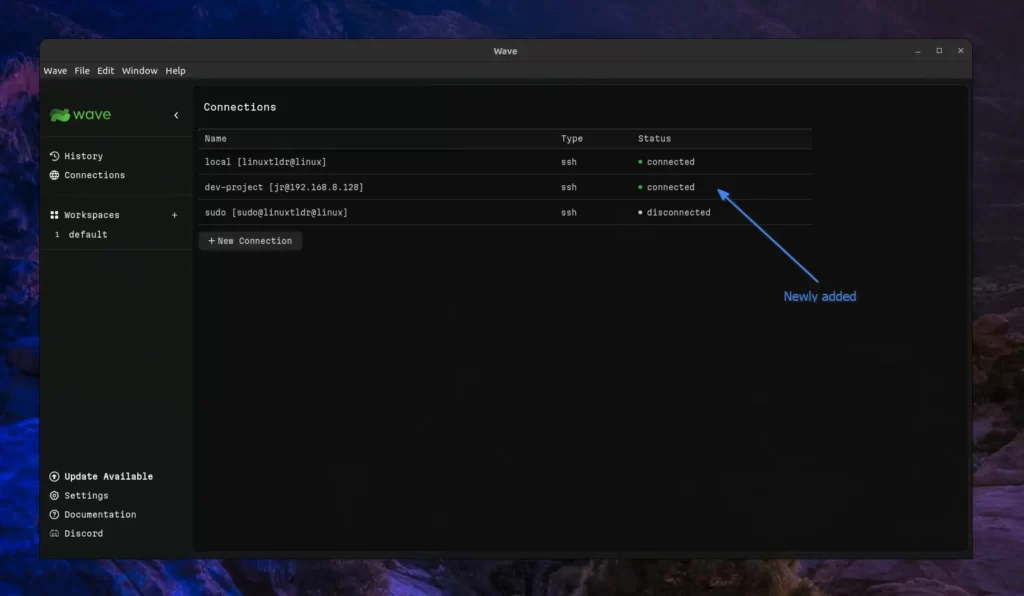
This way, you can provide information for all your remote systems, and after adding them, you can conveniently locate them in the “Connections” window.
To connect with your newly added remote system, simply open a new tab and select the added remote system (also known as a connection) from the list of connections.
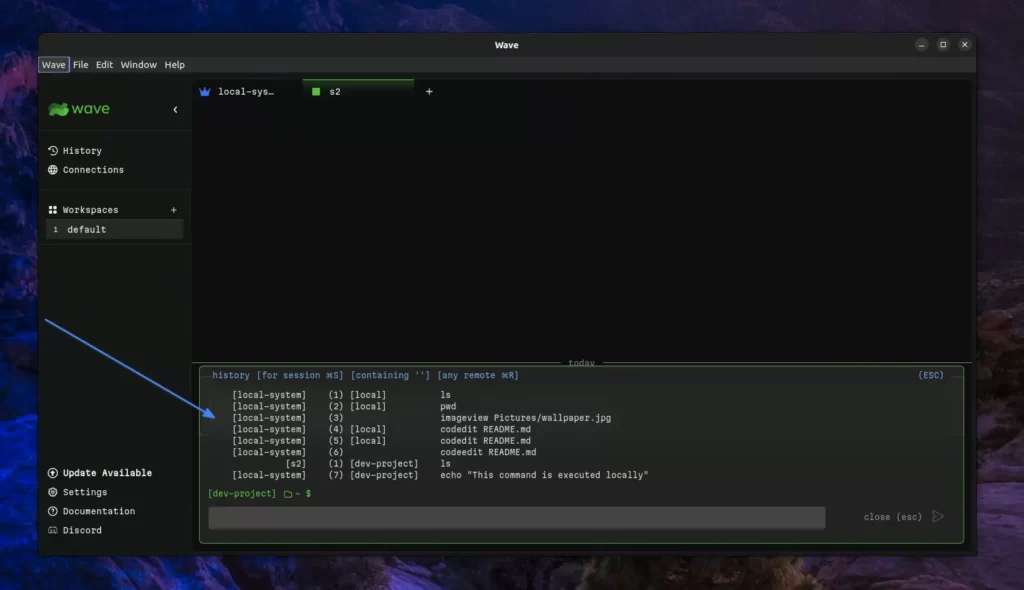
The best thing about Wave Terminal comes here. Let me explain with an example. If you’ve executed a command in your local system under Wave Terminal and then, in a new tab connected to a remote system, you can check the history of commands executed in your local system and utilize them without manual selection and copying.
To accomplish this, simply use the “Ctrl+R” shortcut key to view the history on your remote system, followed by the “Ctrl+S” shortcut key to display the list of locally executed commands.
Here comes the end of this article; almost all the necessary details about the current version of Wave Terminal are covered, except for Workspace, which I’ll leave to you.
If I share my opinion on this terminal, it could be my favorite from the early days of my Linux journey; today, it still proves helpful to me through its connections and workspace options.
But I’m too stuck with tmux as it currently does not provide any seamless method for installation, and fetching its package file from the project release page, unzipping it, and using it from there is kind of time-consuming.
So for now, I would rather use my standard terminal with tmux, but I’m definitely excited for the upcoming release.
Now, if you have any questions or queries related to the article, please let me know in the comments.
Till then, peace!


