
Don’t stick with VSCode or PyCharm for your Python journey if you’re a scientist, engineer, or data analyst. You already have a finely-tuned, tailored IDE specifically designed for you by people like you named Spyder.
Spyder is an open-source, specially designed IDE for scientists, engineers, and data analysts who work with scientific computing libraries such as NumPy, SciPy, Pandas, and Matplotlib in Python.
It offers an interactive IPython console, Variable Explorer, integrated Matplotlib plotting, code profiling, synchronization between explorer and editor, support for Jupyter Notebooks, a data viewer, and many more features for seamless scientific analysis and experimentation within the IDE.
Quite amusing, isn’t it? Now, let’s learn about its features in more detail and then see how to install Spyder IDE on your favorite Linux distributions.
Tutorial Details
| Description | Spyder IDE |
| Difficulty Level | Low |
| Root or Sudo Privileges | Yes |
| OS Compatibility | Ubuntu, Manjaro, Fedora, etc. |
| Prerequisites | – |
| Internet Required | Yes (only for installation) |
A Quick Overview of Spyder IDE Features
The following is a list of features offered by this IDE that might convince you to install it.
- Freely available and open-source.
- Compatible across multiple platforms, including Windows, macOS, and Linux.
- Offers an advanced editor featuring multi-language support, a function/class browser, code analysis tools, automatic code completion, and more.
- Includes an IPython console for running code line by line, cell, or file.
- Interactive tracking of each step in code execution.
- Allows interactive work with debugging, plots, and magic commands.
- It enables modification of variables through the variable explorer, plotting histograms or time series, editing dataframes or NumPy arrays, and more.
- Supports free external plugins to enhance the IDE’s extensibility.
And the list keeps going, so if you want to give it a try, follow the next section for installation steps.
How to Install Spyder IDE on Linux
The Spyder IDE can be easily installed in multiple ways, but in this guide, we will go through the default package manager and the official installer method.
If you were unaware of this IDE and discovered it through this article, I suggest checking out the fully functional copy of the Spyder online service via Binder by following the guide below.
Try out the Spyder IDE Online Service via Binder
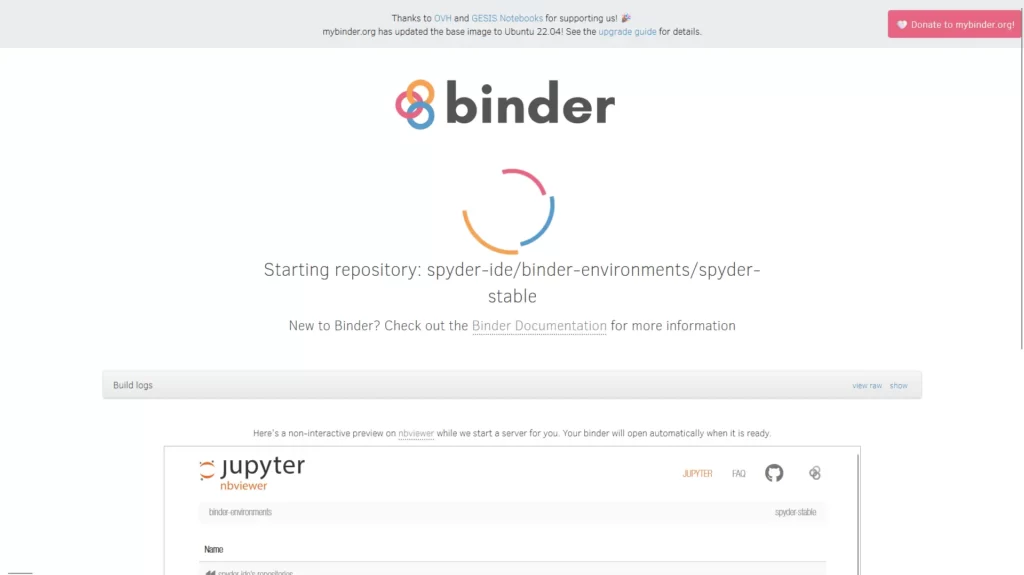
1. To start, visit the Spyder Binder page first and wait while the repository is being fetched and configured to set up the online environment.
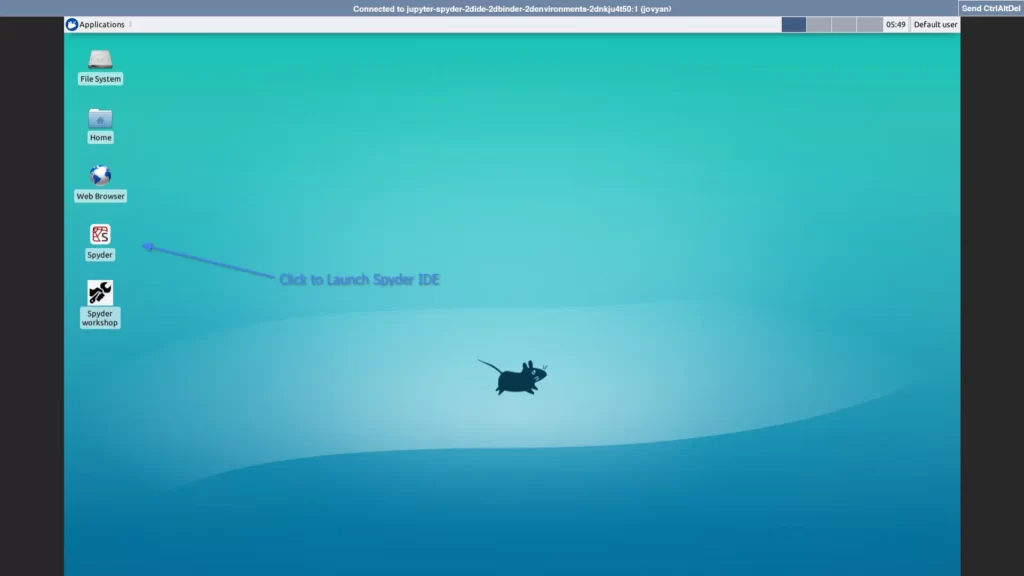
2. After waiting for a few seconds, you will be connected to the Spyder IDE binder environment, where you simply need to click the Spyder icon on the desktop.
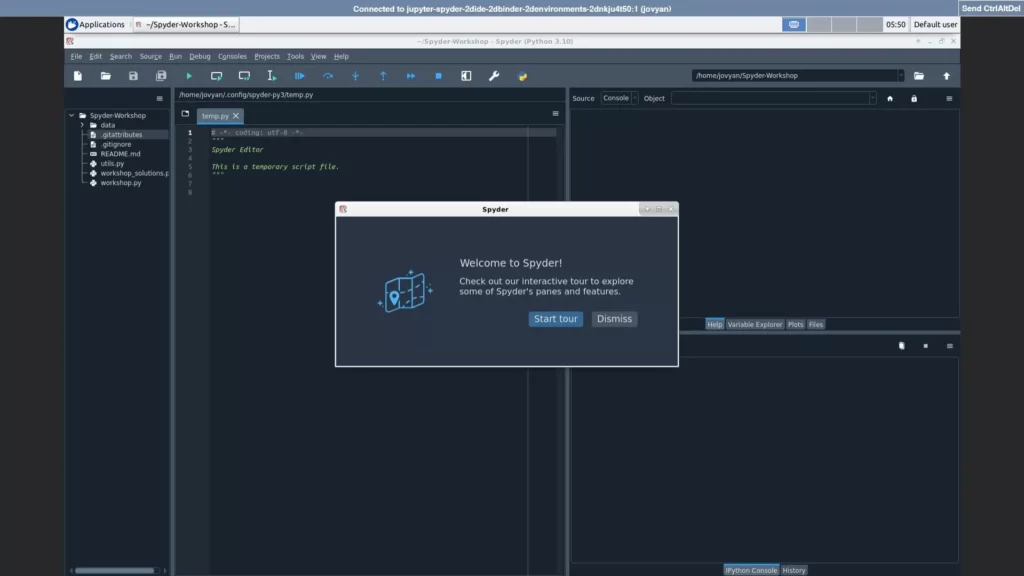
3. Lastly, you have a fully functional copy of Spyder IDE via Binder.
From here, you can look around, check the quick start guide, and, when you’re ready, follow the next section to install it on your Linux system.
Installing Spyder IDE via Package Manager
The installation of Spyder IDE from the package manager is only applicable for Debian-based distributions such as Ubuntu, Pop!_OS, Linux Mint, and Arch-based distros like Manjaro.
While the official installation page suggests that Spyder is available for other GNU/Linux distributions such as Fedora, Gentoo, and openSUSE, the command was not found during testing. So, to install it on this system, follow the next section.
For supported systems, execute the provided command based on your Linux distribution.
$ sudo apt install spyder                                                                       #For Debian, Ubuntu, Pop!_OS, etc.
$ sudo pacman -S spyder-git                                                              #For Arch, Manjaro, etc.
Once the installation is complete, the Spyder IDE icon will start to appear in the application menu.
Installing Spyder IDE via the Official Installer
This method will work with most Linux distributions; all you have to do is follow the steps below one by one.
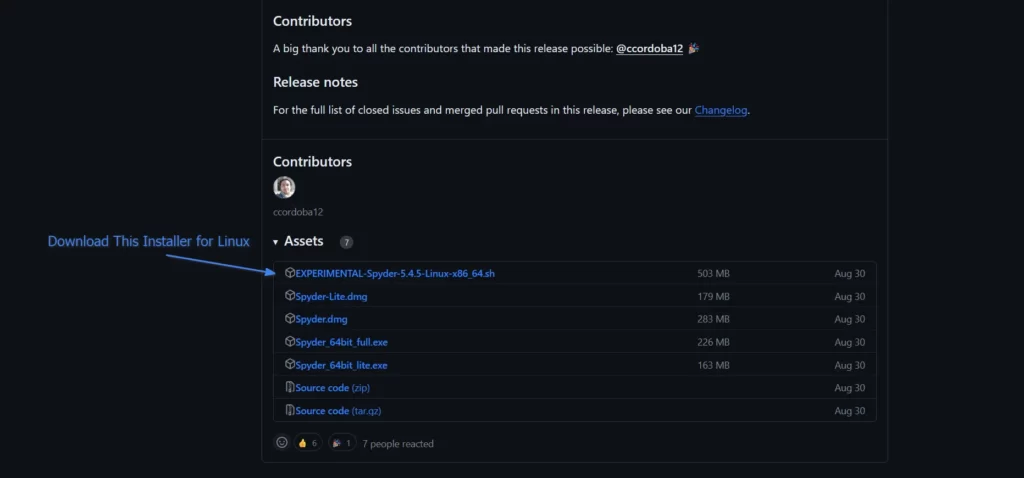
1. Visit the official Spyder IDE GitHub release page and download the latest version of the Spyder installer for Linux (currently experimental).
2. Next, you need to launch your terminal, navigate to the directory where you downloaded the installer, and give it executable permission using the chmod command.
$ cd ~/Downloads/
$ chmod +x *Linux-x86_64.sh
Output:

3. Finally, run the installer to initiate the Spyder IDE installation on your Linux system.
$ ./*Linux-x86_64.shOutput:
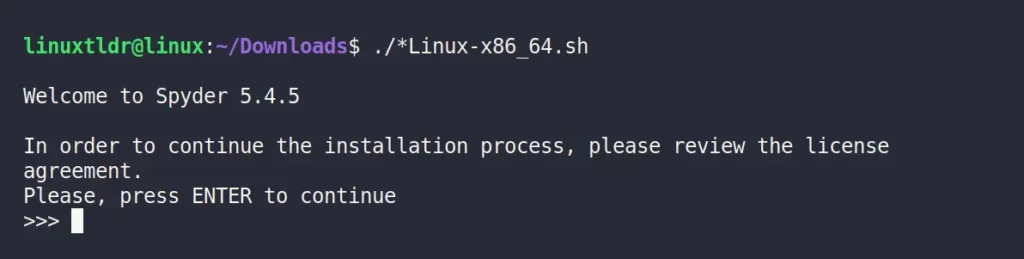
Here, the installer will ask you for certain options before installation; simply follow the steps below to complete the installation.
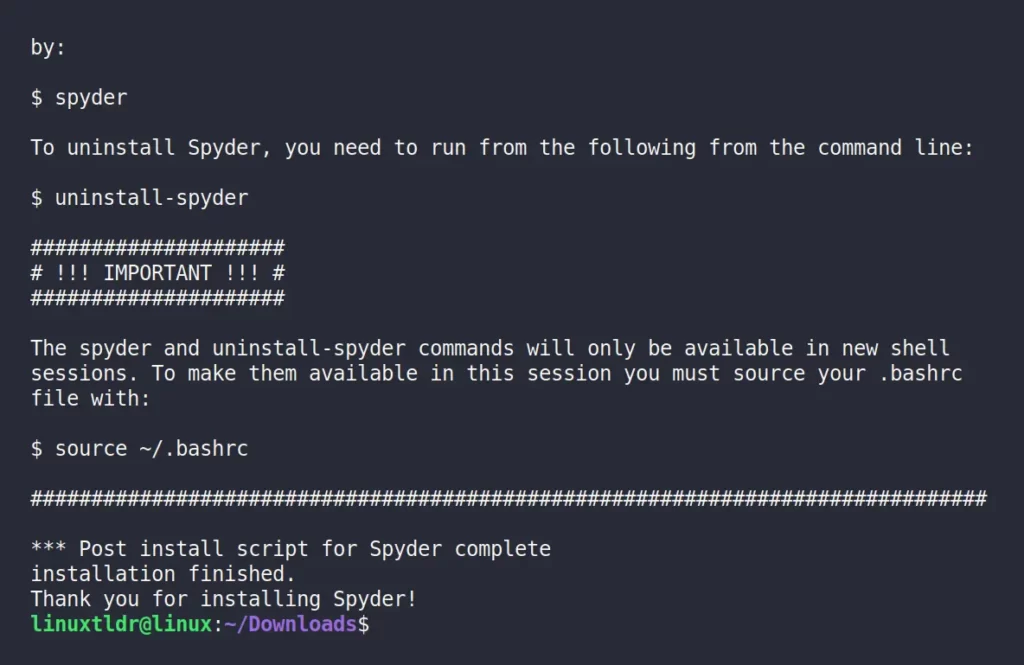
- Press “Enter” to read the license agreement.
- Press “q” to finish reading.
- Type “yes” to agree.
- Press “Enter” to begin the installation at the default location (typically “
~/.local/Spyder-X.X.X“)
After the installation is complete, you will receive the following message:
Now, the Spyder IDE icon will start to appear in the application menu.
How to Launch Spyder IDE on Linux
Once the Spyder IDE is installed on your Linux system, you can proceed to execute the following command:
$ spyderOr, search for Spyder IDE in your application menu.

When you launch Spyder IDE for the first time, you will interact with the following window:
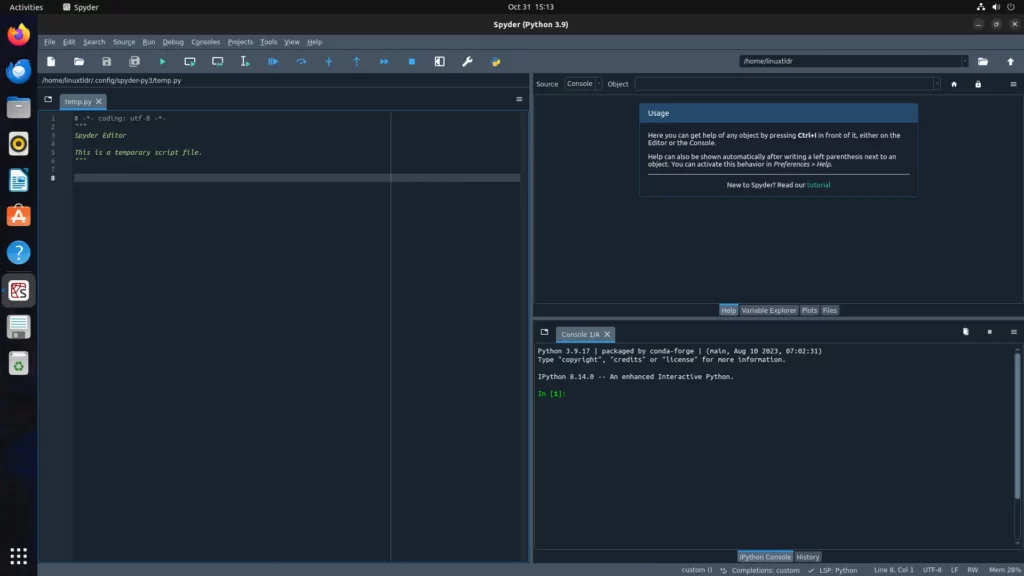
Now, the rest of the things require a decent knowledge of IDE usage, so if you’ve used an IDE like PyCharm, you can easily become familiar with it in a couple of minutes.
If you find it uninteresting and unuseful, proceed to the next section to remove it from your Linux system.
How to Remove Spyder IDE from Linux
If you have installed it on your Debian or Arch-based distro using the default package manager, then proceed with:
$ sudo apt remove spyder                                                                       #For Debian, Ubuntu, Pop!_OS, etc.
$ sudo pacman -R spyder-git                                                                 #For Arch, Manjaro, etc.
Or, if you’ve installed it using the official installer, then execute the following command:
$ uninstall-spyder And type “yes” to continue removing the Spyder IDE directory with the desktop shortcut from the user “~/.local” directory.
Final Word
I hope you find this article helpful, even though it’s a powerful and advanced IDE. I’ve used it less because most features aren’t necessary for me, as it’s primarily useful for programmers requiring Python libraries such as NumPy and Pandas.
So, if you have any questions or another amazing tool in your hand, please let us know in the comment section.
Till then, peace!


