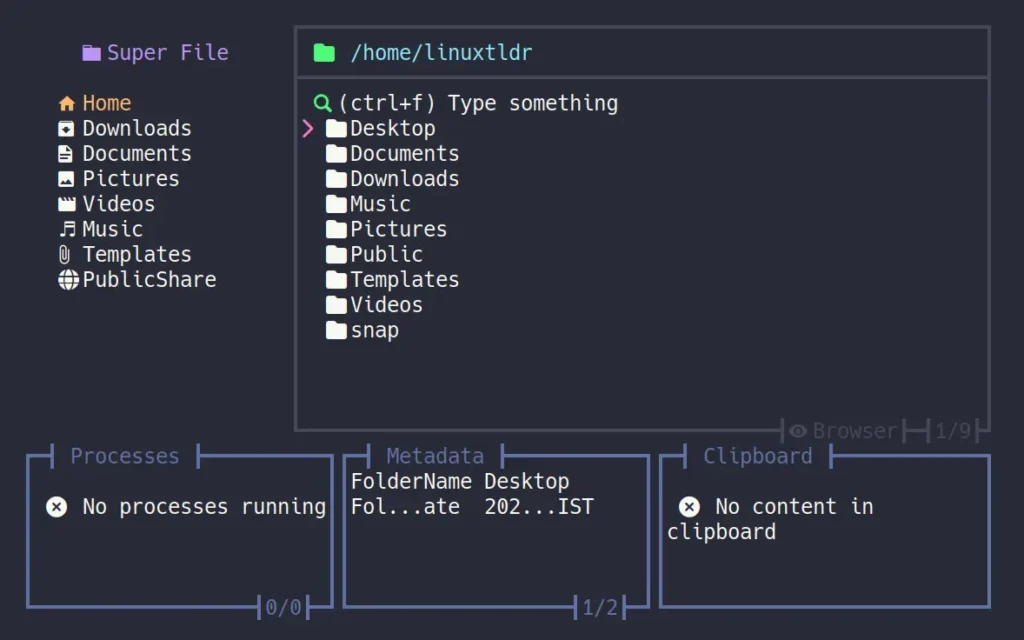
Superfile is a modern terminal file manager that recently caught my attention; it’s not only easy to use but is very user-friendly compared to its alternatives, such as Ranger, MC, or nnn.
It allows you to create files and directories, view (process, metadata, clipboard), provide a navigation pane, create multiple panels to work in two separate directories, support plugins, offer a variety of themes, and much more.
The project is new, so there have been active updates every week, allowing you to see new features quickly. I’ve also been using it for a few days, and honestly, one key factor in using DE in Linux for me was its easy-to-use file manager, but with Superfile, there’s no need for that now.
Today, in this article, I’ll guide you on installing Superfile on Linux, using it, installing plugins, and changing the default theme.
Tutorial Details
| Description | Superfile: A Modern CLI File Manager |
| Difficulty Level | Low |
| Root or Sudo Privileges | No |
| OS Compatibility | Linux, macOS, and Windows (Kindof). |
| Prerequisites | – |
| Internet Required | Yes (for installation) |
How to Install Superfile on Linux
Prior to installation, Superfile relies on Nerd Font for displaying file and directory icons in the terminal, so make sure you install and enable it by reading our article on Nerd Font installation.
To install Superfile, you have multiple options, but the easiest and most trusted method is using the brew command. If you have HomeBrew installed on your Linux system or are using macOS, then run:
$ brew install superfileApart from HomeBrew, you can also install it using the shell script with curl or wget commands, or manually compile it from source, though we do not recommend these methods; if you insist, you can follow them to install Superfile.
So, to install Superfile using the shell script, simply execute your preferred command.
# Via Curl
$ bash -c "$(curl -sLo- https://raw.githubusercontent.com/MHNightCat/superfile/main/install.sh)"

# OR

# Via Wget
$ bash -c "$(wget -qO- https://raw.githubusercontent.com/MHNightCat/superfile/main/install.sh)"
To compile and build it yourself, run the following series of commands:
# Clone the project repository.
$ git clone https://github.com/MHNightCat/superfile.git

# Enter the downloaded directory and run the "build.sh" file.
$ cd superfile && ./build.sh

# Add the compiled binary to your "/bin" directory.
$ mv ./bin/spf /usr/local/bin
That’s it. You have now successfully installed Superfile on your system.
How to Use Superfile on Linux
Once the installation is complete, you can access the Superfile by using the “spf” command.
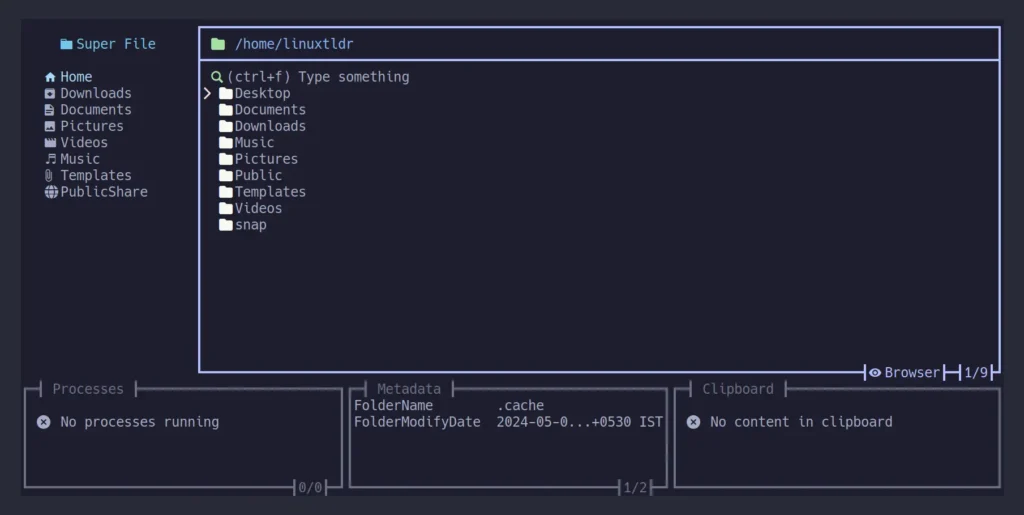
To effectively work with Superfile, it’s essential to be familiar with the correct key bindings. For instance, use the “b” key to focus on the navigation pane, the “p” key for the process bar, “m” for metadata, and “q” or “Esc” to quit the Superfile.
In the file panel, you can use the arrow key for navigation, the “Enter” key to open the active file (in the default application) or directory, the “Backspace” key to return, and “Ctrl+f” to search.
To maximize the workspace, you can quickly create multiple file panels (like tabs in File Manager) to work on multiple directory structures using the “Ctrl+n” key, press “Tab” to cycle between the file panels, and “Ctrl+w” to close the active file panel.
You can press “Ctrl+h” to see dotfiles (hidden files), the “c” key to create a file, the “f” key to create a directory, the “r” key to rename the selected file or directory, “Ctrl+c” to copy, “Ctrl+x” to move the selected file or directory, “Ctrl+v” to paste, and “Ctrl+d” to delete them.
To edit the selected file using the default text editor, you can press “e“. Additionally, press “Ctrl+r” to compress a file or directory (in Zip format), “Ctrl+e” to decompress, and the “v” key to enable bulk selection mode, where the “Enter” key can be used to select individual files. Once done, you can perform bulk file operations.
EDITOR” environment variable.There are quite a few more hotkeys you can use to enhance your productivity while using Superfile. To check out the complete list, visit this page. If you want to edit any existing key binding, you can do so by editing “hotkeys.toml” with your preferred text editor, either Nano or Vim.
# Via Nano
$ nano ~/.config/superfile/hotkeys.toml

# OR

# Via Vim
$ vim ~/.config/superfile/hotkeys.toml
Output:
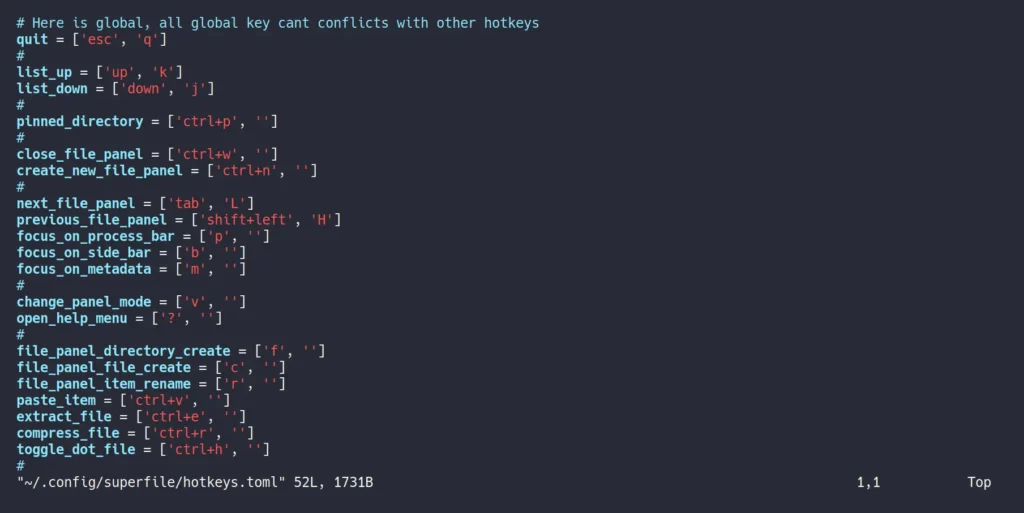
As you can see, you have the option to add two different keys to a specific task, feel free to edit this file (but for safety, keep a backup before editing). Once done, save and close the file.
How to Install Plugins in Superfile
Superfile provides a plugin option to increase the built-in capabilities. At present, Superfile has only one plugin in its catalog, named Metadata, but due to its ongoing development, we anticipate more in the future.
Now, if you want to enable the Metadata plugin that allows you to see more information about the file or directory, such as modification date, access date, errors, file permissions, and more, you first need to install the required “exiftool” package for this plugin.
# On Debian, Ubuntu, Mint, Pop!_OS, etc.
$ sudo apt install exiftool

# On RHEL, CentOS, Fedora, Rocky Linux, AlmaLinux, etc.
$ sudo dnf install exiftool

# On Arch, Manjaro, EndeavourOS, Garuda, etc.
$ sudo pacman -S perl-image-exiftool
Once installed, edit the “config.toml” file and change “metadata = false” to “metadata = true“.
# Via Nano
$ nano ~/.config/superfile/config.toml

# OR

# Via Vim
$ vim ~/.config/superfile/config.toml
Output:
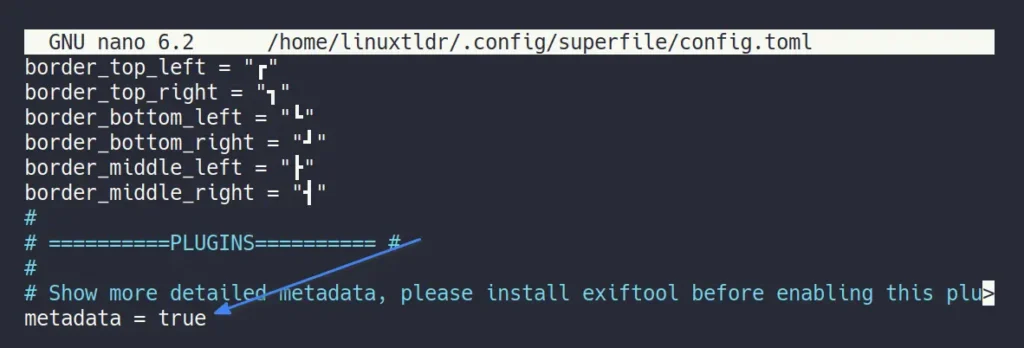
After editing the file, save and close it. Once you’ve done this, you can view more metadata information of any file.

This way, when new plugins arrive in the future, you can easily install and activate them.
How to Install Themes in Superfile
The Superfile comes with multiple themes, such as Catpuccino (default), Dracula (my favorite), Kaolin, Nord (Wow), Rosé Pine, Tokyonight, and Gruvbox. You can check out the appearance of each theme on the theme list page.
The default theme is “Catpuccino“, which is decent, but I prefer the “Dracula“; thus, to install it or any other theme, open the “config.toml” file and specify the name of your chosen theme to “theme = 'theme-name'” derivative.
# Via Nano
$ nano ~/.config/superfile/config.toml

# OR

# Via Vim
$ vim ~/.config/superfile/config.toml
Output:
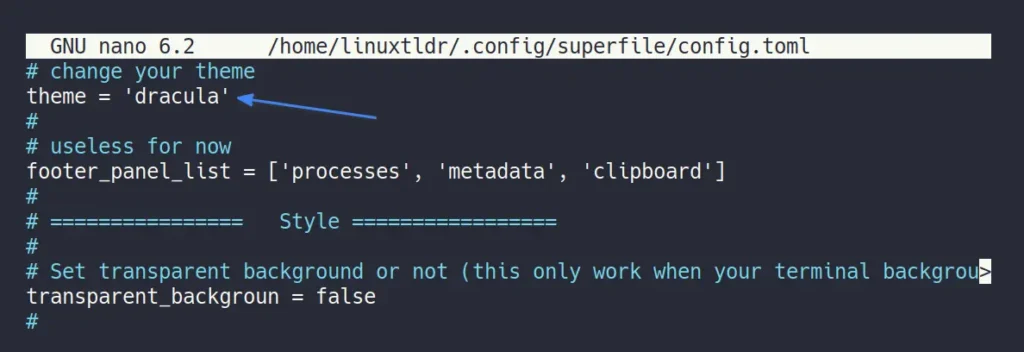
Once done, save and close the file, and check your theme’s look by opening Superfile.
Final Word
That’s it for this article. Today, you learned how to install and use the amazing modern Superfile CLI file manager, as well as how to install plugins and themes. I’ve been using it for a while, and it’s the closest thing to replacing any GUI file manager.
If you find it interesting or know of any other such tool, please leave a comment.
Till then, peace!


Are there any plans for a snap or flatpak or appimage versions to be made?
Not everyone wants to bloat their PC with golang sources for a one-time compilation of superfile.
Currently, these are the only available methods; if there are any updates, the article will be revised accordingly.
Use this url to install, insted of the raw github one :
https://superfile.netlify.app/install.sh