Warp is a modern terminal with AI features (built fully in Rust) to greatly enhance your workflow, productivity, and team collaboration on Linux, Windows (coming soon), and macOS.
It offers quite rich full features such as bookmarks, support for multiple cursors, support for (Bash, Zsh, and Fish), auto suggestions, syntax highlighting, Warp AI, Warp Drive, and many more.
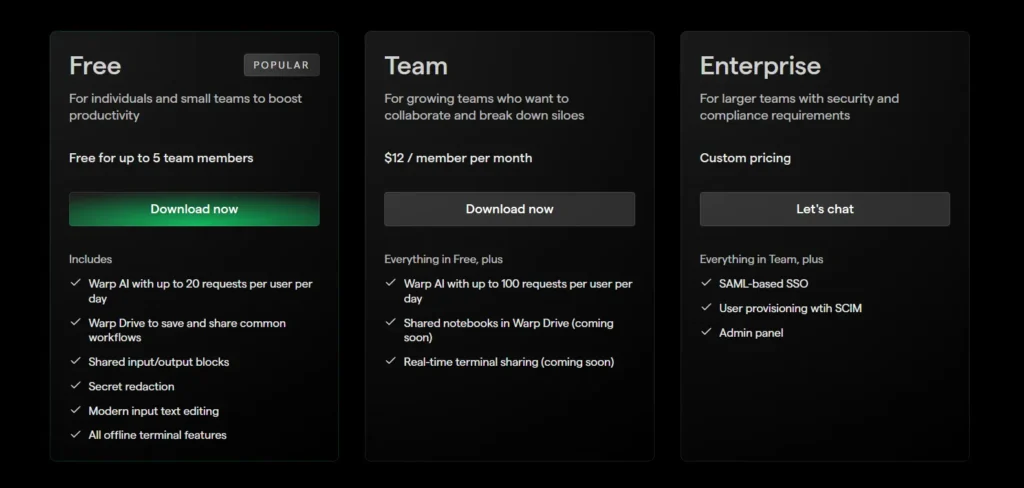
However, there is a caveat that Warp Terminal is mostly oriented towards businesses and professionals because, to use it, you need to have a Warp account logged into your terminal, and it comes with different plans where the free tier only offers support for 5 team members and 20 requests to the Warp AI.
To be honest, when I first used it, it totally reminded me of the Wave terminal, which is almost identical in terms of UI and offers a few of the features of the Warp terminal, but they’re still different as Warp has more things to offer.
So, whether you’re a beginner or a professional looking to enhance your command-line experiences with a touch of AI, read the entire article to grasp its features, installation steps on various Linux distributions, and usage.
Tutorial Details
| Description | Warp: A Modern Terminal With AI Features |
| Difficulty Level | Low |
| Root or Sudo Privileges | Yes (for installation) |
| OS Compatibility | Ubuntu, Manjaro, Fedora, etc. |
| Prerequisites | – |
| Internet Required | Yes (for installation and once at the initial launch) |
Features of the Warp Terminal
The following is a list of features offered by Warp Terminal:
- Graphics rendering is done directly on the GPU.
- It allows you to insert, copy, or select like an IDE.
- Out-of-the-box support for Bash, Zsh, and Fish.
- Smart autocompletion and syntax highlighting.
- Command input and output are grouped together into atomic blocks.
- Customize keybindings and launch configs.
- Warp AI integration allows you to look for forgotten commands, debug errors, etc.
- Save and securely share commands as a workflow using Warp Drive.
To get into the details of each listed feature, check out their official feature documentation.
How to Install Warp Terminal on Linux
To install Warp terminal on your Linux system, you can download the distribution-specific package such as “.deb” for Debian or Ubuntu, “.rpm” for RedHat or Fedora, and “.pkg.tar.zst” for Arch or Manjaro. If you prefer not to install it, you can try out its AppImage (a portable app).
Once you’re ready for installation, visit its download page, and download the Warp terminal package for your Linux distribution.
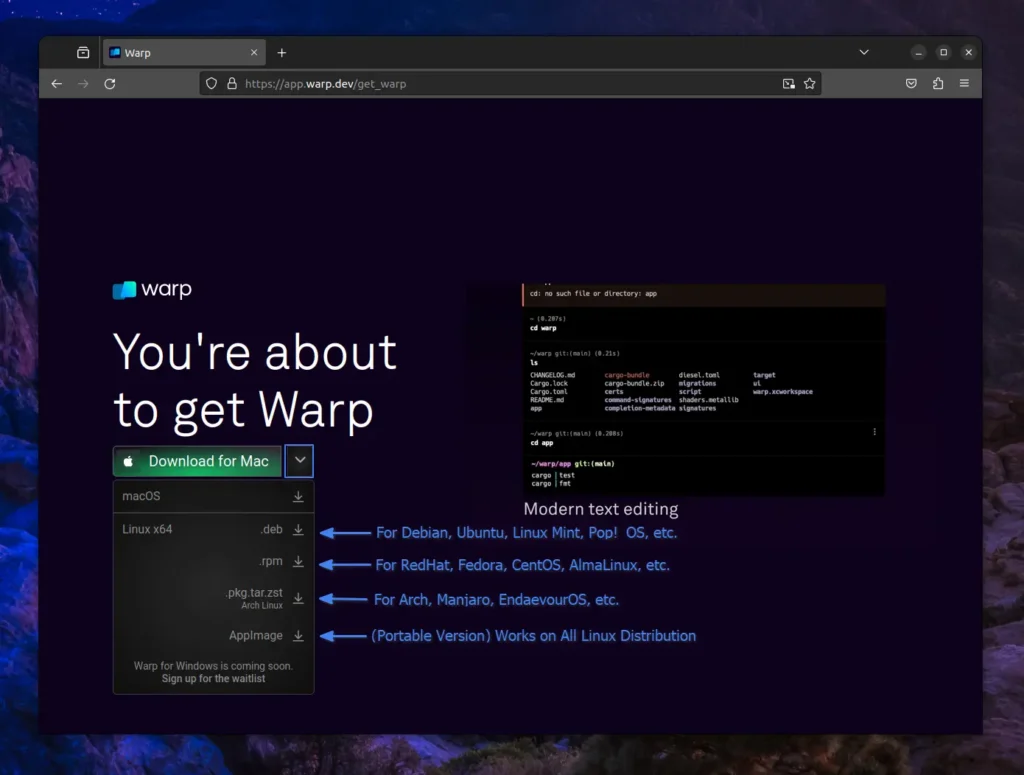
Once the download process is finished, navigate to the location (assuming “~/Downloads/“) and follow one of the methods mentioned based on your Linux distribution.
Installing Warp Terminal on Debian and Ubuntu
Be present in the directory where the “.deb” file is downloaded, assign executable permissions to the file, and then install it using the “dpkg” command:
$ chmod +x warp-terminal_*_amd64.deb
$ sudo dpkg -i ./warp-terminal_*_amd64.deb
Installing Warp Terminal on RedHat and Fedora
RedHat, Fedora, OpenSUSE, etc., users can install Warp terminal in their system using the “.rpm” file, just ensure to assign necessary permissions, and then install it via the “rpm” command.
$ chmod +x warp-terminal-*.x86_64.rpm
$ sudo rpm -i ./warp-terminal-*.x86_64.rpm
Installing Warp Terminal on Arch and Manjaro
Arch and Manjaro users don’t need any help; you can easily install it on your system. However, for the sake of this article, here is the command you can use for installation.
$ chmod +x warp-terminal-*.pkg.tar.zst
$ sudo pacman -U --noconfirm ./warp-terminal-*.pkg.tar.zst
Warp Terminal AppImage
The Warp terminal AppImage is the portable version of the application that can be easily launched and used once executable permission is granted.
$ chmod +x Warp-x86_64.AppImage
$ ./Warp-x86_64.AppImage
How to Use the Warp Terminal on Linux
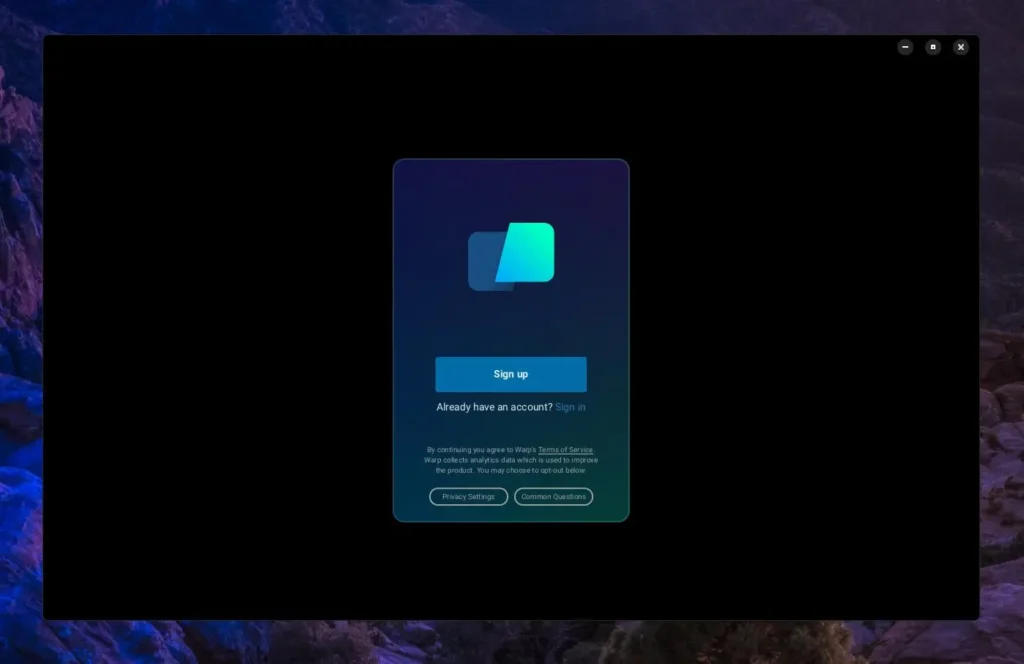
Once the installation is complete, you can search and launch it from the application menu, and when you launch it for the first time, it asks you to sign in with your Warp account.
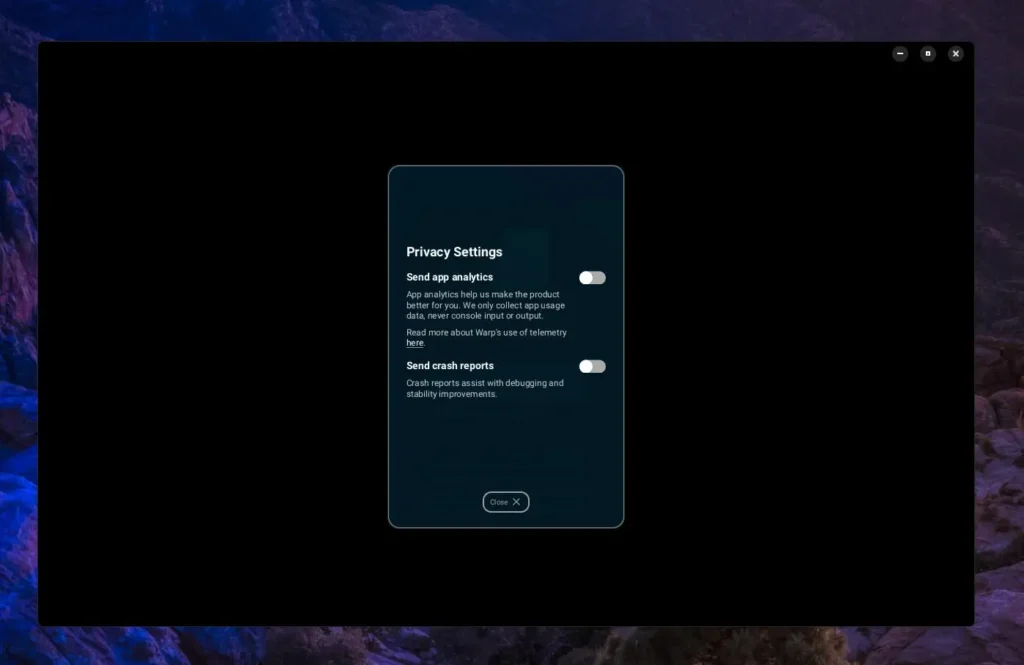
Before creating and logging into a Warp account, there will be analytics and a crash report option enabled, which you can disable by clicking the “Privacy Settings” button. Here, uncheck both checkboxes and click the “Close” button .
You can now create a Warp account; the creation process is pretty simple. Just click on the “Sign up” button, provide an email address, and an email verification will be sent to your email. Open it, and it will automatically redirect and log you into your Warp terminal.
Once you log in, you have to go through a short survey that basically asks you the following three questions:
- What best describes your role?
- How did you hear about us?
- What were the sources?
However, it’s not necessary, so you can skip it by clicking the “Remind me later” button.
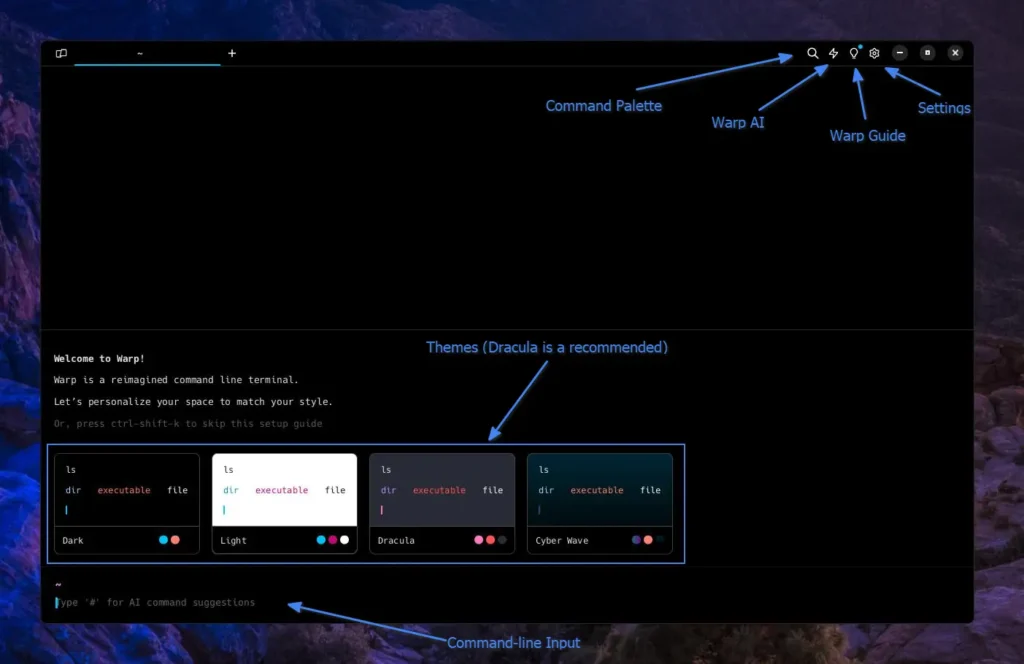
Finally, you will be presented with the following Warp dashboard, where most of the important stuff is marked with an explanation. However, for a quick overview, the “Command Palette” allows you to search for your command, create workflows, and open the theme picker.
Meanwhile, the “Warp AI” option is like a Microsoft Copilot in terms of feel, while the “Warp Guide” provides tips and tricks for using the Warp terminal.
Lastly, you have “Settings” (from where you can manage your account, appearances, features, shared blocks, keyboard shortcuts, teams, and subshells), the “Theme” option (I recommend using the “Dracula“), and your shell prompt.
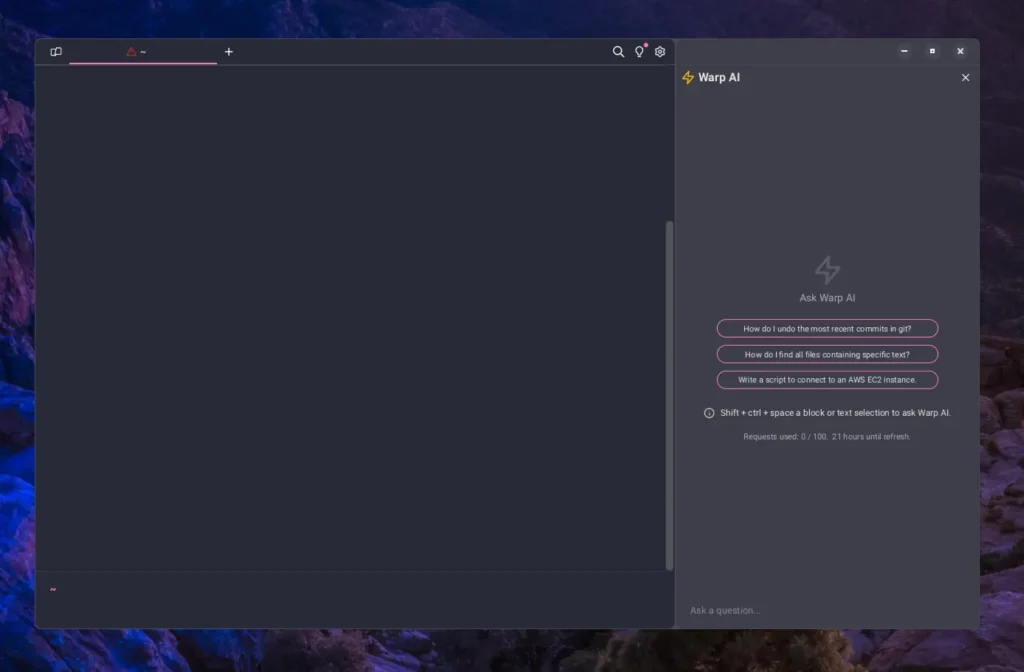
In the shell prompt, typing “#” will prompt you to choose “Ask Warp AI“.

If you directly type your query, such as asking for a command explanation, then it will give you a short, generated explanation.

However, if you choose to click on the “Ask Warp AI” option, it will open the Microsoft Copilot-type sidebar window from where you can chat with Warp AI.
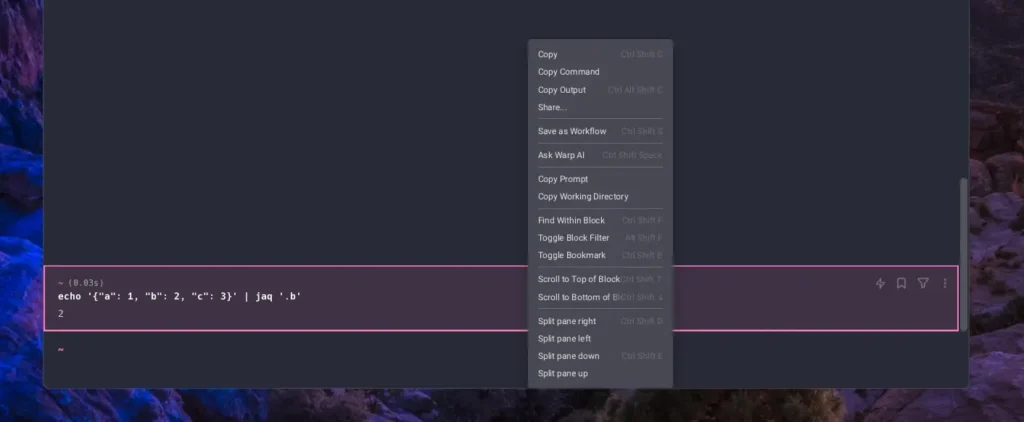
At the shell prompt, when you execute your commands and hover your mouse over the output, you will have multiple options, such as Warp AI (clicking it redirects the executed command to Warp AI), Bookmark (highlighting the command while scrolling), Filter, and Menu.

When you right-click on the command output, you will get the following context menu from which you can copy the command, output, share the selected block, copy the working directory, toggle block filter, toggle bookmark, and even move the selected block to the right, left, down, or up panel.
When you move on to the settings, you will interact with the following windows, which have multiple tabs, most of which are self-explanatory, but the most highlighted one is the “Team” tab.
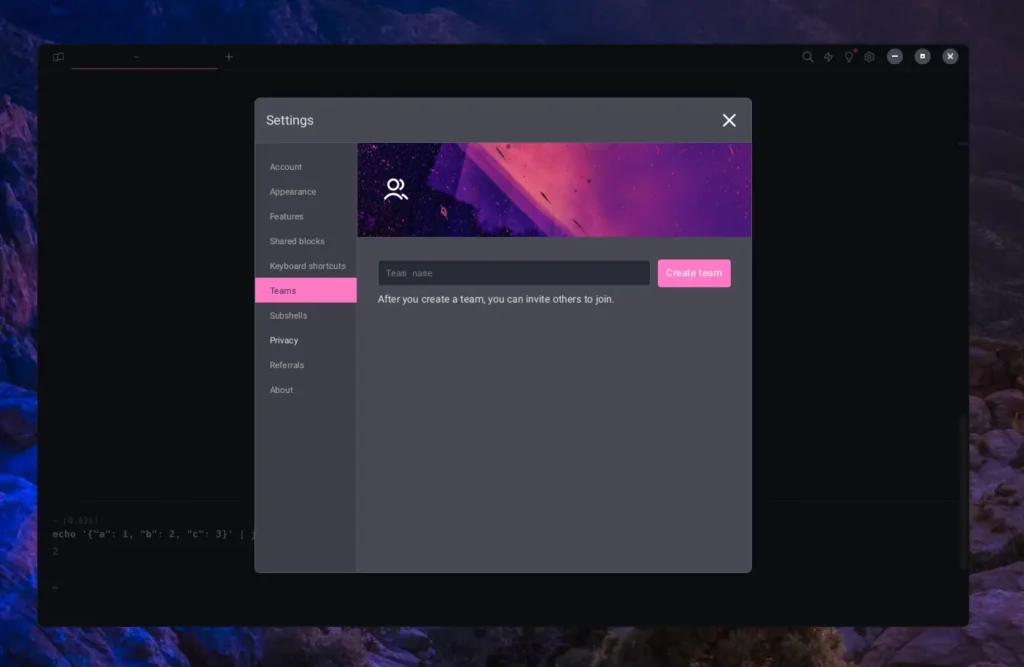
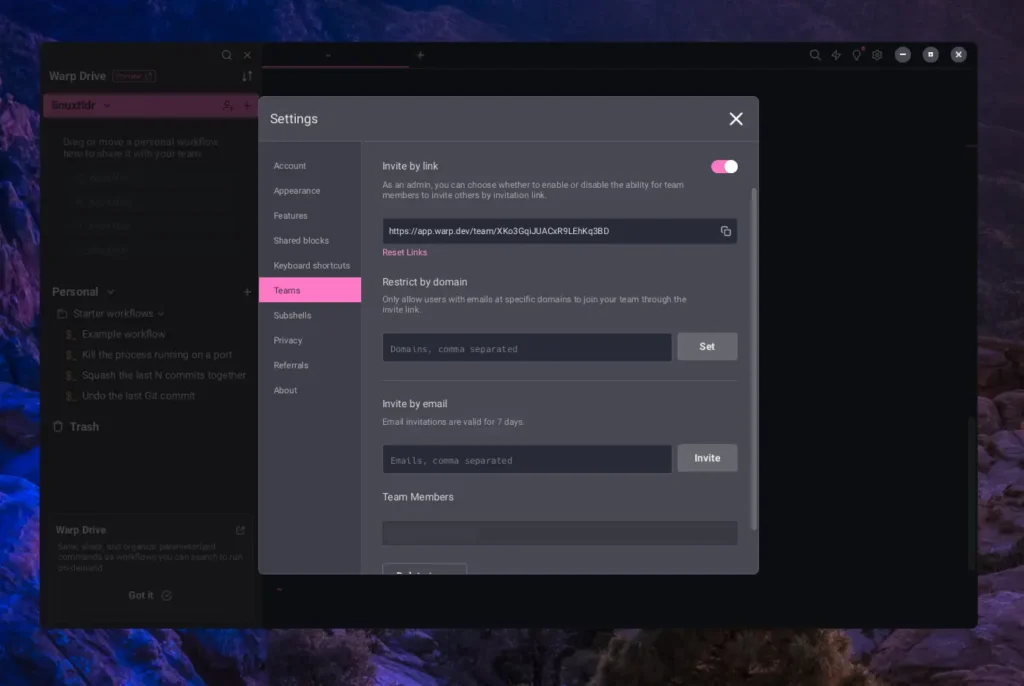
Here, you can give a name to your “Team“, and when you click on the “Create Team” button, you will be navigated to the following window. From there, you will get an invite link that you can share with your team to let them join or invite them via email.
Now, I’ll end the exploration here, as the most highlighted features have already been discussed; I’ll leave the rest of the adventure up to you.
How to Remove Warp Terminal from Linux
To remove the Warp terminal, execute one of the following commands based on your Linux distribution:
#On Debian, Ubuntu, Linux Mint, Pop!_OS, etc.
$ sudo dpkg -r warp-terminal

#On RedHat, Fedora, CentOS, AlmaLinux, OpenSUSE, etc.
$ sudo rpm -e warp-terminal

#On Arch, Manjaro, EndeavourOS, etc.
$ sudo pacman -R warp-terminal
The AppImage can be easily removed with a simple deletion.
Final Word
Warp is a great tool for professionals, but for me, it feels a little overwhelming, and most of its included features can be separately added to the traditional terminal, except for a few such as bookmarks, block splitting, and of course, the Warp AI and Warp Drive.
For now, those features don’t affect me, and I’m kind of happy with the traditional minimalist terminal, but who knows the future.
Lastly, if you have any questions or queries related to the topic, feel free to ask them in the comment section.
Till then, peace!


“The development of full artificial intelligence could spell the end of the human race.”
Stephen Hawking (1942-2018) – English theoretical physicist, cosmologist and author
I installed warp, and when I started it, it asked me to login to their site…… WTF.
Immediately uninstalled. You’d have to be a complete spaz to use a terminal which requires you to login to something on the internet!
Not to mention the name is god-damn terrible. There are so many other tools already in place with that name. If they couldn’t even come up with an original name for their product, it should be enough warning to you that it’s terrible!
I tried to install on a Arch base distro and when i write the code lines and try to install i get the following results:
error: missing package metadata in warp-terminal-v0.2024.05.07.08.02.stable_02-1.x86_64.rpm
error: ‘warp-terminal-v0.2024.05.07.08.02.stable_02-1.x86_64.rpm’: invalid or corrupted package
do you know why?
It appears you’re running the incorrect command (the error indicates usage of an RPM package meant for RedHat and Fedora).
The correct command for installation on Arch-based distros is:
$ chmod +x warp-terminal-*.pkg.tar.zst$ sudo pacman -U --noconfirm ./warp-terminal-*.pkg.tar.zstWhat the heck do I need to have a terminal for, that needs an online account to get it working! Not even considering that terminal useful. To be honest, most if not all of those features already come out of the box in KDE’s konsole terminal, except any AI nonsense. Not sure what I would need AI in a terminal emulator for, telling me that “rm -rf /*” is not a good idea or what.